Cell Analogy
The goal of this project is to make an analogy of a cell to some real-world object or location, and then construct a model of the real-world object. Students should first imagine and plan out an analogy, describing the parts of the cell, their functions, and why their analogies are appropriate. Next, they should make creative use of materials and construction methods such as clay modeling, 3D printing, and laser-cutting to build their model.
Example:
The cell as a car:
- Engine - Mitochondria - burns food/fuel in order to power the cell
- Tail pipe + Catalytic converter - Lysosome - breaks down and removes harmful cell byproducts
- GPS - Nucleus - has information for what the car should do
- etc.
Other potential anologies could be a house, a country, a circus, a company, etc.
Authors: Rose Solow and Orian Sneor
Final Project
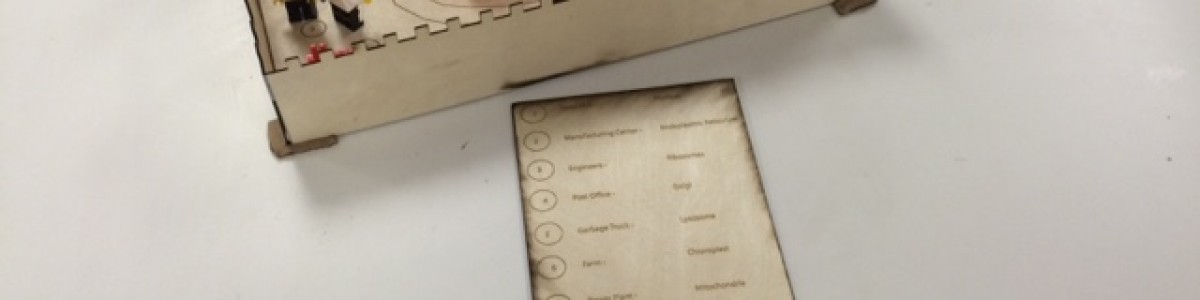
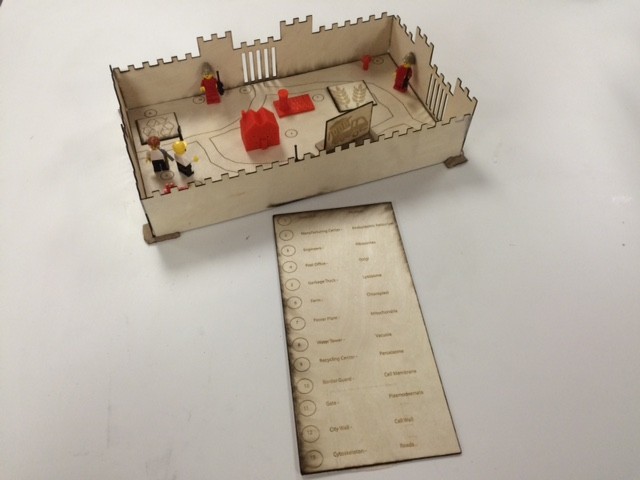
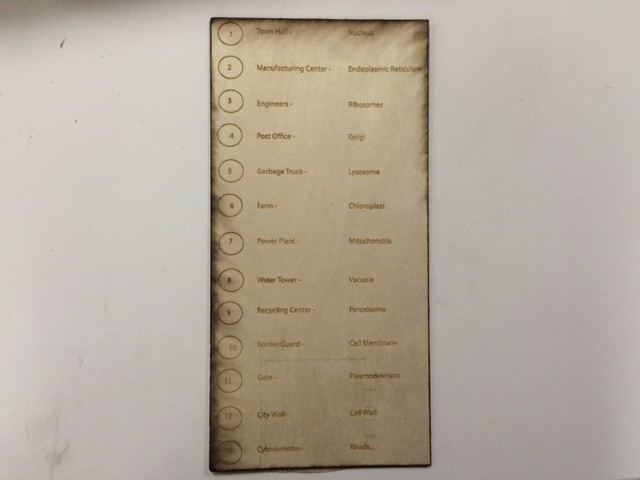
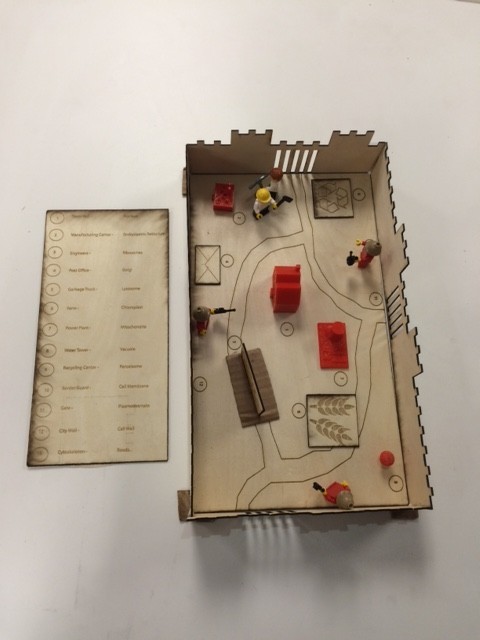
We analogized a cell to a town using town locations to represent key organelles. We also created a legend to make it easier for people to note which locations represented which organelles. The majority of parts were laser cut, but we also incorporated 3D printing. Although we made use of complex manufacturing methods, all the parts made for the analogy could have been constructed using simpler materials such as clay, paper, cardboard, and tape.

Big Idea
In order to accomplish their final goal, students must use a variety of skills:
- Students must understand and explain the functions of various parts of the cell
- Students must use abstract thinking to create an analogy for the cell
- Students must creatively imagine, plan, and build a model for their analogy
- Students must be proficient with whatever building tools and materials are available to them
- Students will make use of the engineering design process (Ask, Brainstorm, Plan, Create, Improve)
Ask
To come up with the prompt idea we knew wanted to create a project where the students could build some thing that represented some concept of biology. We decided that it would be good if the students would have to build model cells and identify all of the organelles contained within. To add more creativity to the project we thought that the students should build a model cell as an analogy. This would challenge the students to think about the purpose of each organelle and how they are a part of the larger cell.
The key questions:
- Plant cell or animal cell?
- What should we analogize the cell to?
- Which organelles should we include in our final model?
- What should we use to build it?
Brainstorm
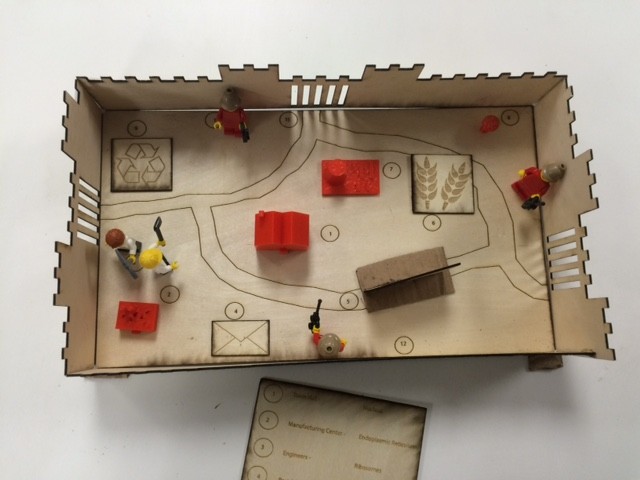
The first step in our process of making an analogy was coming up with an analogy. We decided that our cell analogy would be a plant cell as a town. Various parts of the town were to be compared to organelles, defined, and tabulated within a legend. The legend would accompany our diorama model of the town. We decided to use laser cutting and 3D printing to create all the parts of the diorama, but it could have been built using any materials available on hand.
Plan the Cell
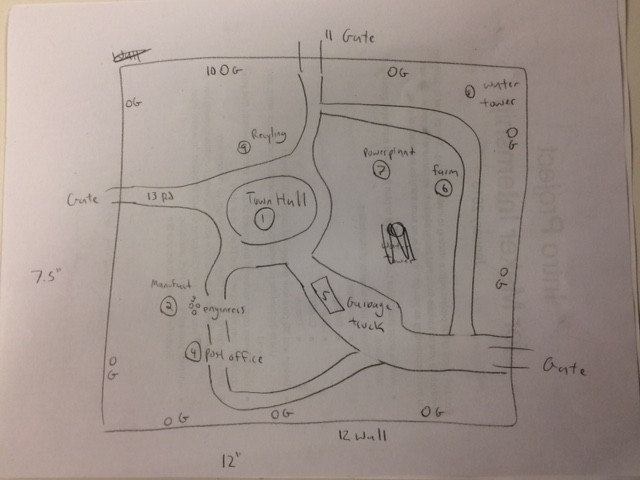
The first step was to select the organelles of the plant cell we wanted to include in the town. We brainstormed by listing all the organelles and parts of the cell. We then picked thirteen important parts of the plant cell and imagined their analogies, and hand-drew a simple map of the town to facilitate the organization of the diorama. We also started planning the instructions for the project, as can be seen on one of the planning pages pictured below. We starred the organelles we thought were imperative to include in every model, and decided that some portion of the 15 organelles would have to be used in each model. We did not decide on the number of organelles to be used until later.

Plan the Physical Diorama
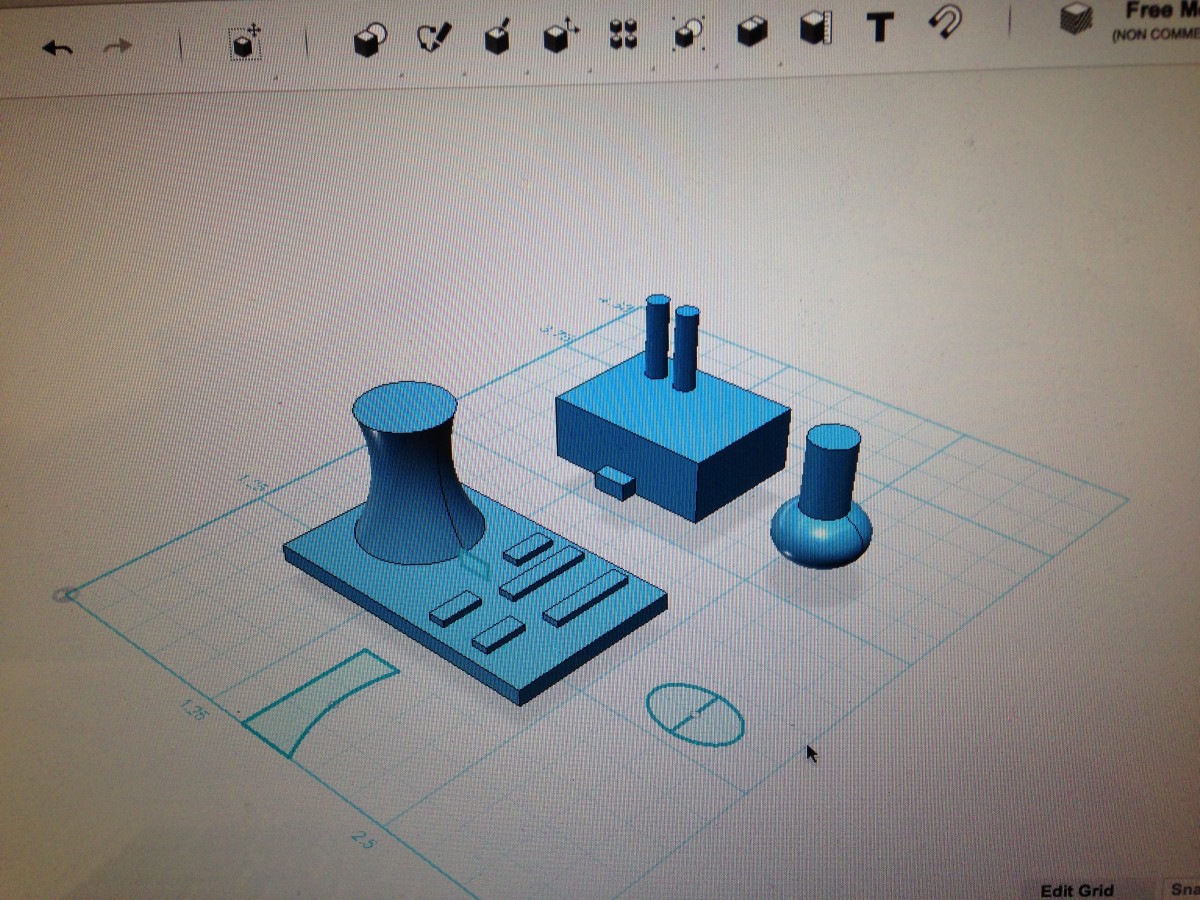
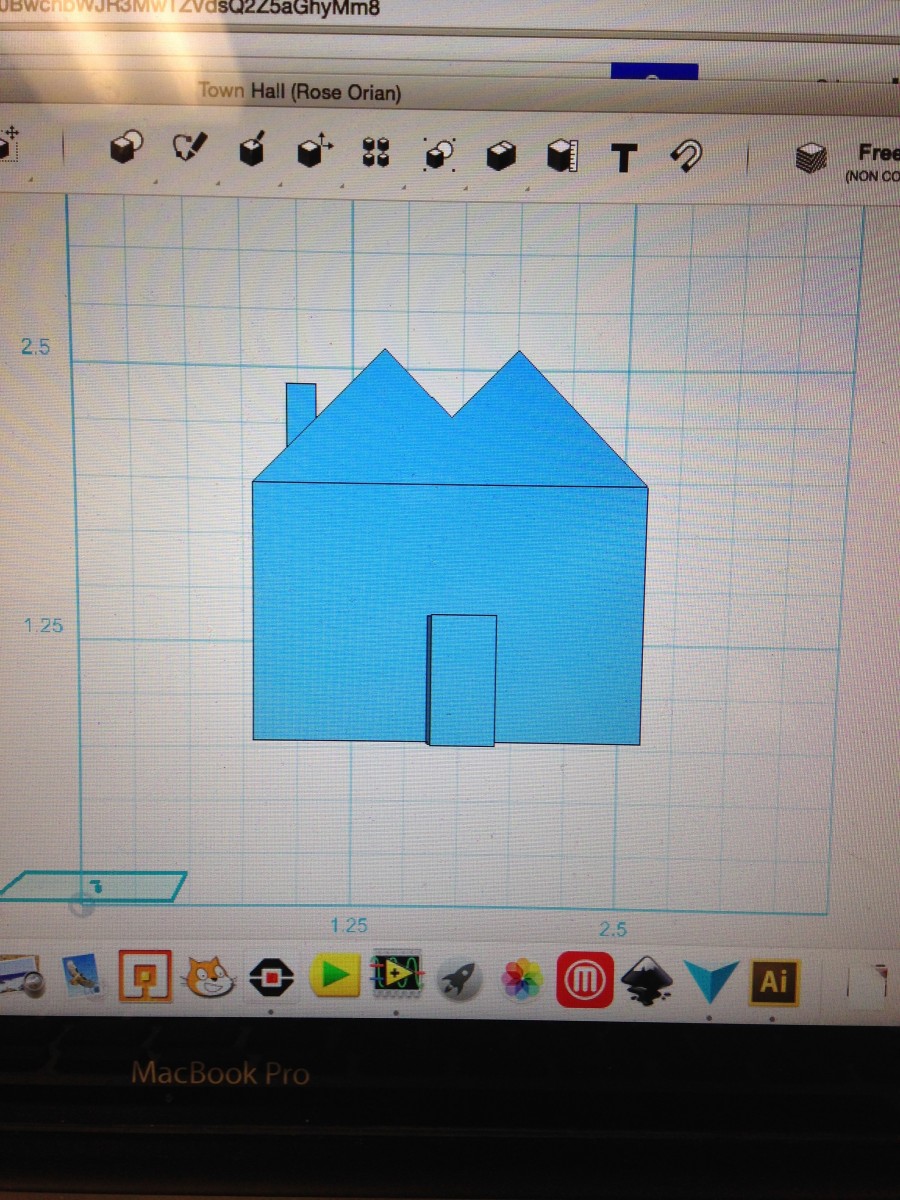
We tabulated the analogies on the computer, and decided how each part would be produced and depicted in the diorama. We designed the map of the town, its walls, various city icons, and the legend on Adobe Illustrator, and laser cut them. Other city locations were designed on 123D Design and 3D printed. Some of the analogies referred to people and we used lego figures to represent them.
celllasercuts.pdf
legend.ai
cell parts.pdf
Cell Parts planning.pdf
Create the Pieces
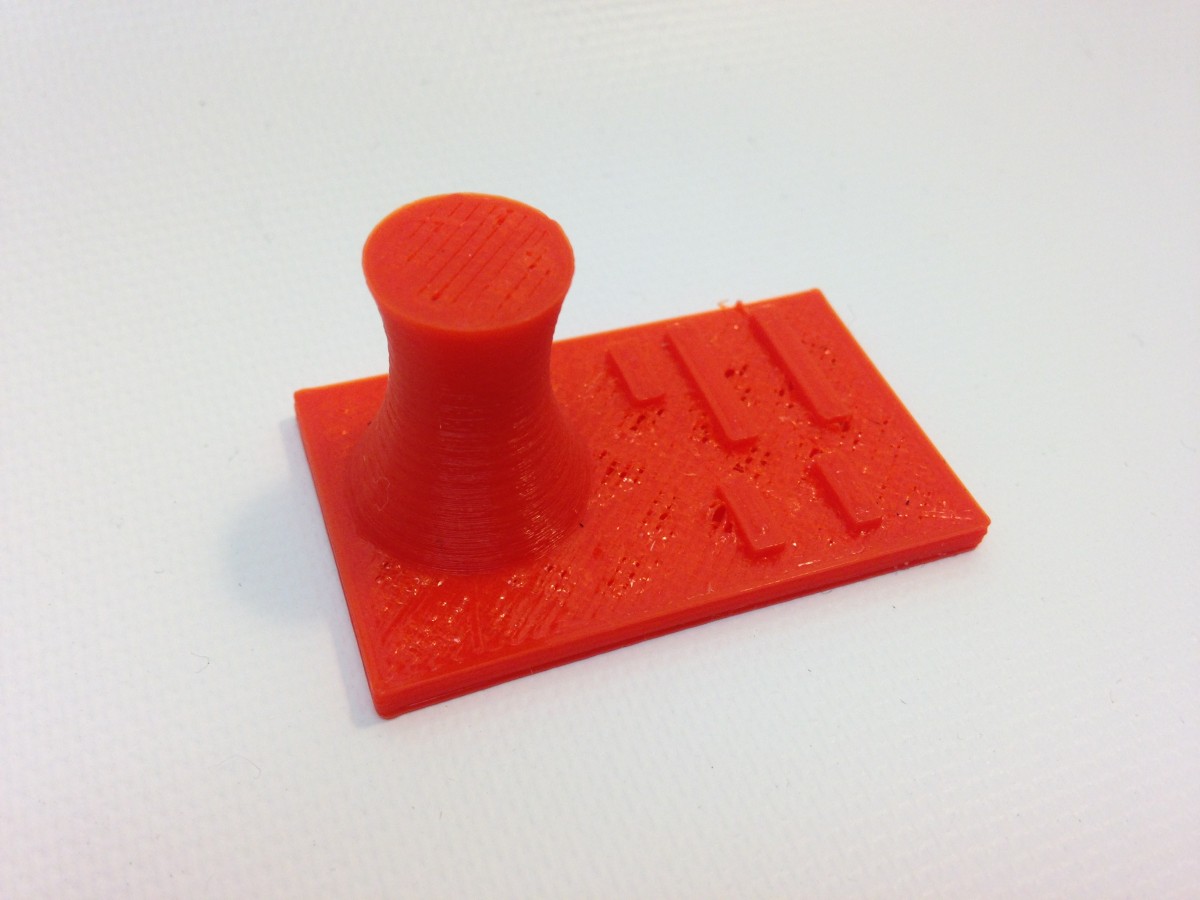
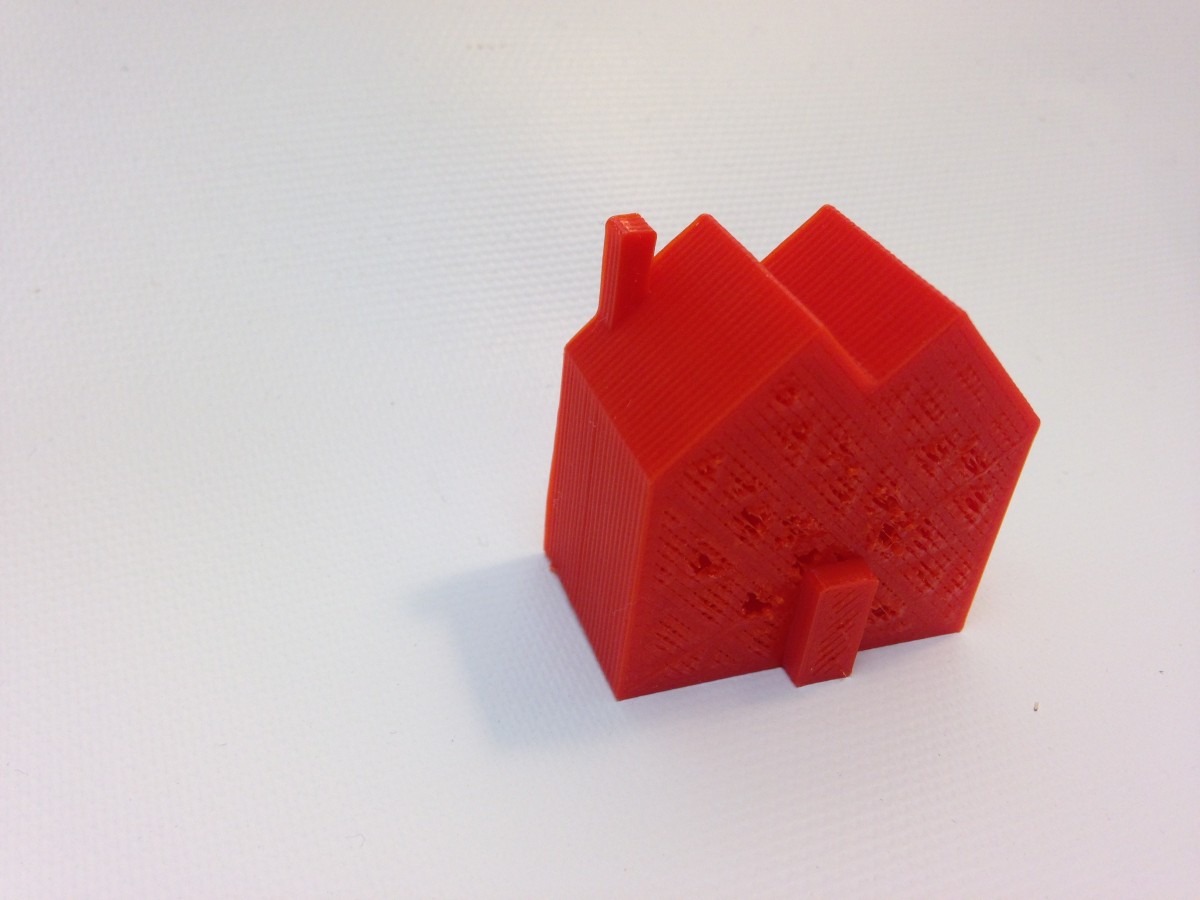
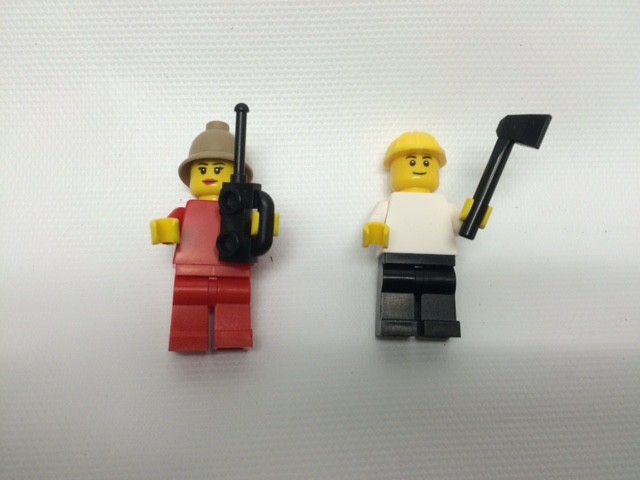
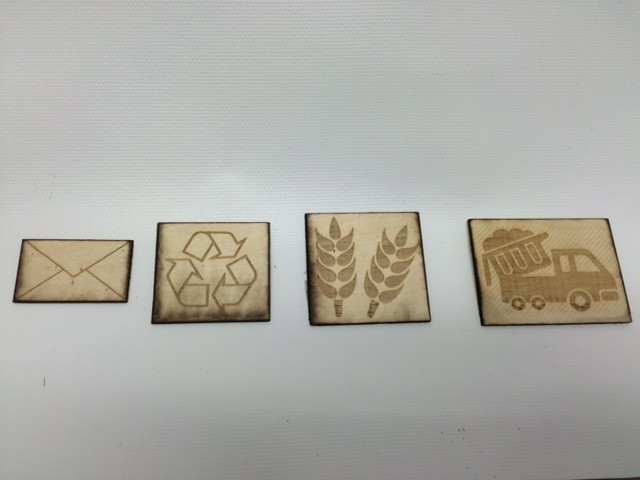
Each piece was either laser cut or 3D printed except for the lego figures. Each of the laser cut pieces had an icon representing their part of the town laser etched onto them (ie. envelop for post office). Each of the 3D printed parts were a building of the location (e.g. factory for manufacturing center). The lego people were given accessories to convey their purpose (engineers have an axes and hard-hats, border guards have radios and helmets).
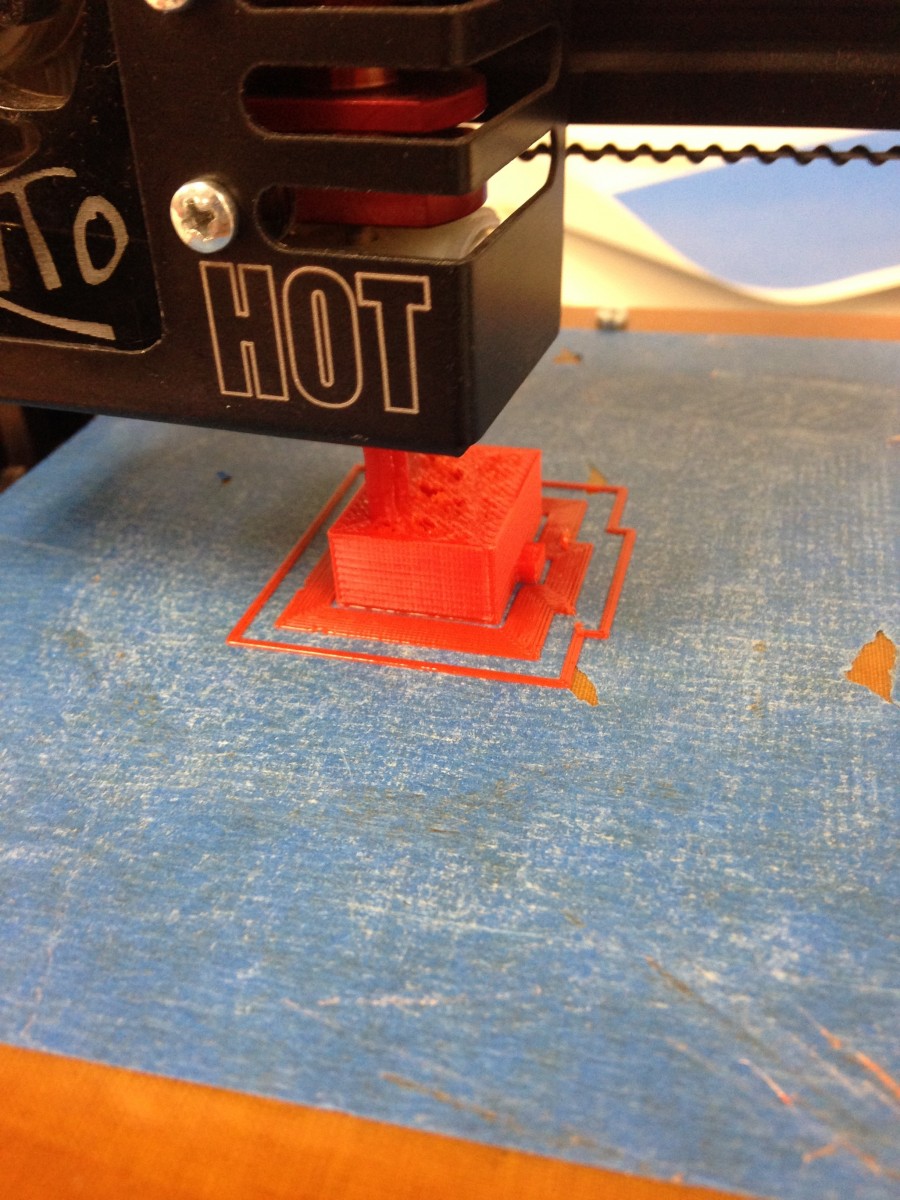
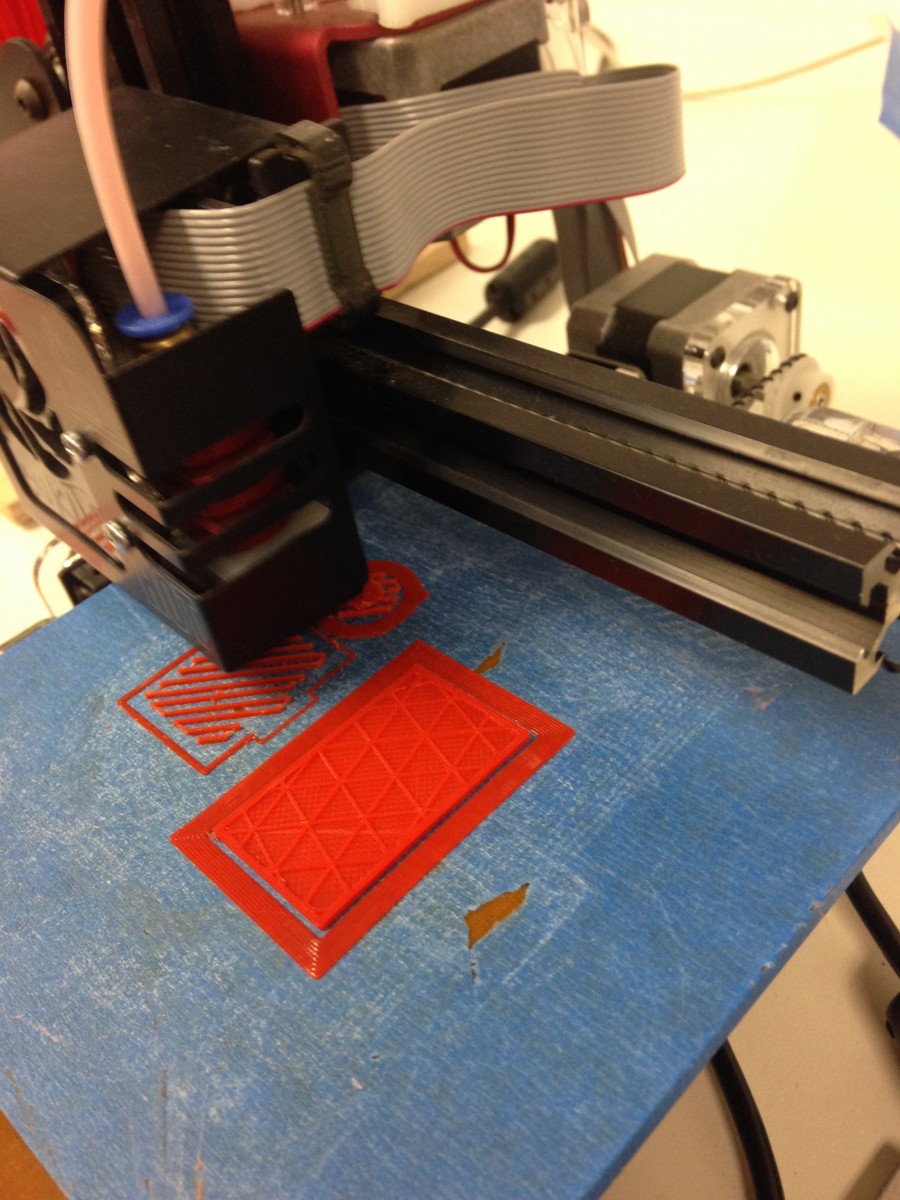
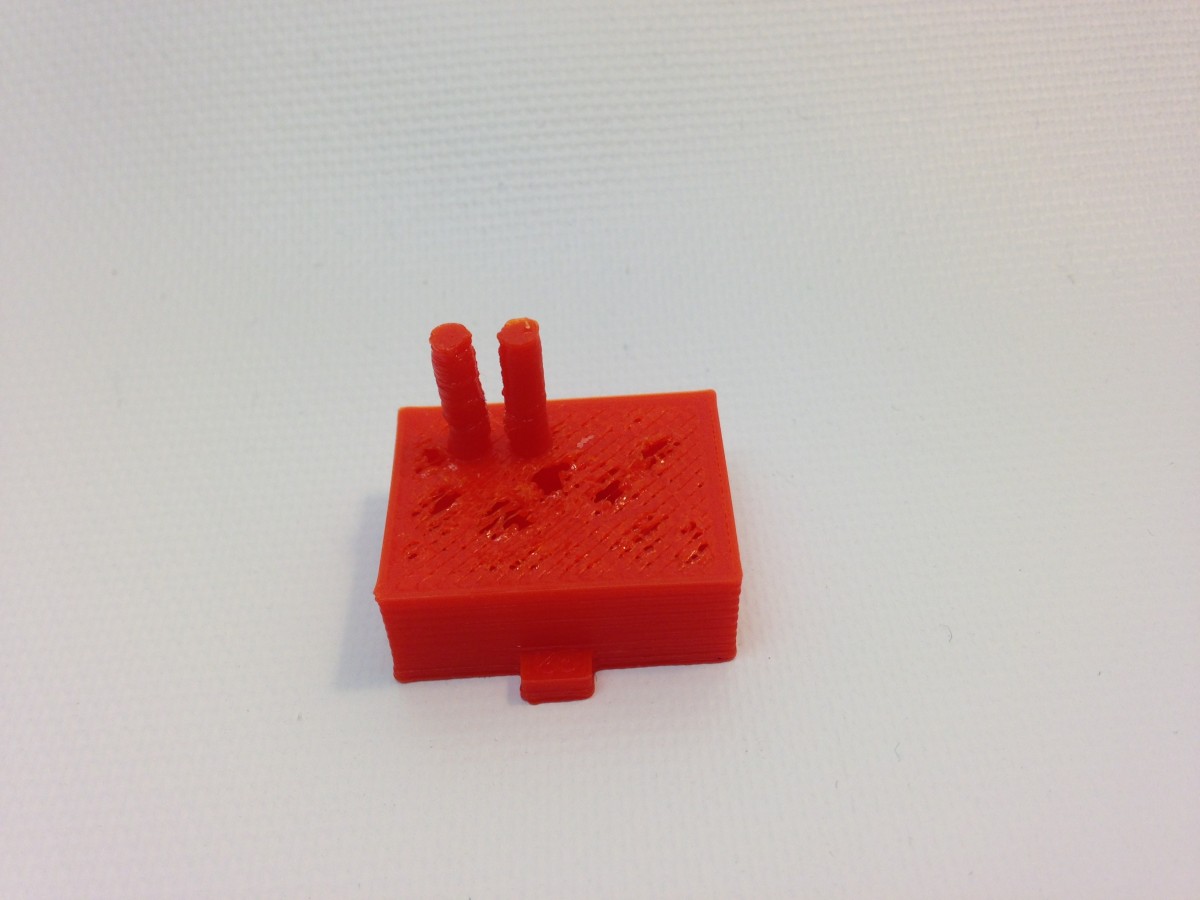
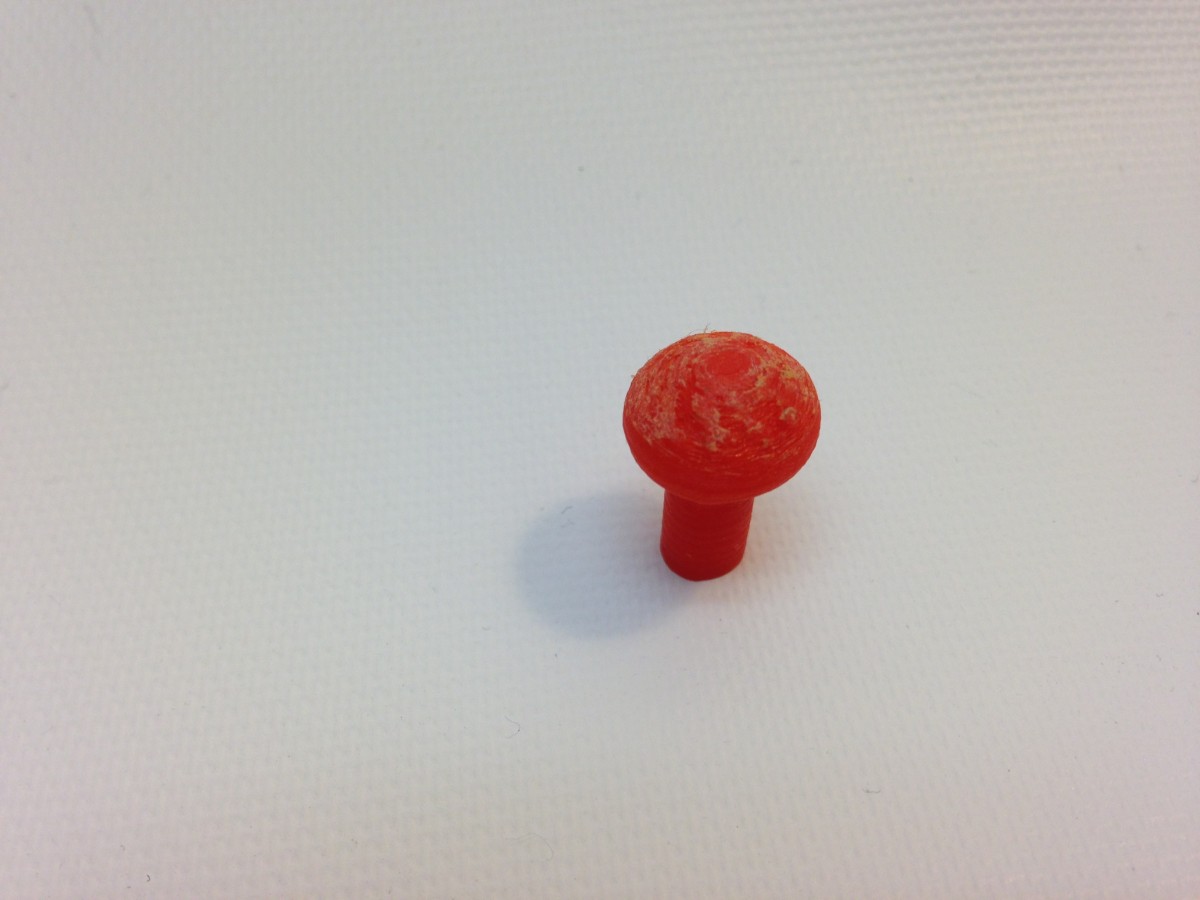
We ran into trouble 3D printing and laser cutting. The first 3D print was successful and printed the town hall. On the second 3D print, we attempted to print the other three buildings, but the factory/manufacturing center failed to print because its support material separated from the base. This was confusing, because the building had a flat base and we did not think it needed support material. It turns out that the problem originated in the .stl file. Because the factory was floating higher than the power plant in the 3D model, the computer dropped the lowest point in the print (the base of the power plant) to the ground, and tried to elevate the factory using support material. The factory was successfully printed by itself on the third 3D print.
When laser printing we ran into some issues fully cutting through the wood. We increased the power of the laser and decreased the speed. This improved the cutting, but we still did not fully cut through. To cut everything out we ran over the edges with a box cutter and this fully seperated the pieces from the wood.
Create the Diorama
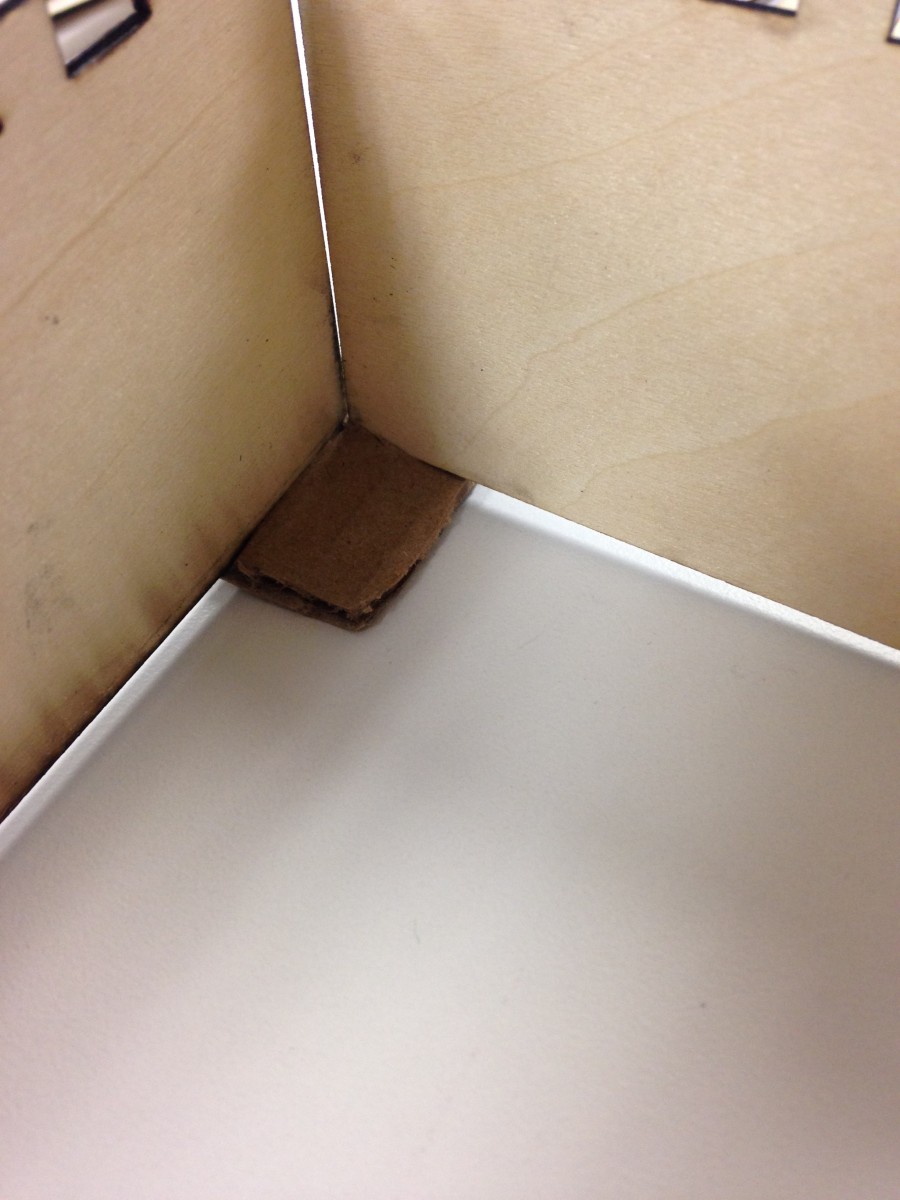
The cell walls were attached to the map base using L-shaped cardboard pieces, glue, and tape. The garbage truck was slotted into a cardboard base to make it stand up. All of the appropriate icons or pieces were placed near their respective number. The legend was displayed with the diorama to show each city part and their analogous organelle.


Final Assignment
A key part to the project is the table listing and properly defining each part of the cell. Each student or team of students should create a table that lists each organelle, the described function of each organelle, and the appropriate analogy in their diorama. See the below document for more details on this outline.
CellAnalogyModelInstructionSheet.pdf
CellAnalogyOurExample.pdf
Improve
Our town analogy successfully conveyed the important parts of cell. We would suggest that other iterations of this design use less complicated building procedures. 3D printing took a lot of time and it would have been just as easy to have made paper or clay models of those parts. Additionally, the laser cut pieces could have been replaced by pieces made with pen and paper, making the project simpler and faster.