Paper Circuits Exploration
Using paper, copper tape, batteries, LEDs, and more, students will explore basic circuits and switches. After understanding the basics, students will be able to use the concepts they have learned to create their own project ideas.
Authors
Luke Hanley, Vincent Bett, and Nico Lusardo.
Big idea
A paper circuit is a functioning electronic circuit built on a paper surface instead of a printed circuit board.
What makes them unique is the use of traditional fine art techniques to create a circuit that combines both aesthetics and functionality. By using paper circuits, students will be able to apply their physics knowledge of circuitry to design unique projects that range from simple greeting cards to complex vehicle counting systems.
The two main aims of this project are to help students apply the knowledge that they gain in class to pursue their own interests and to break the classroom monotony of having to build only what the teacher instructs.
We decided to do this project because we found out that simple circuits were all represented using black lines thus making it uninteresting to study. We therefore decided to use copper tape, LEDs, coin cell batteries and our imagination to come up with a project that would not only bring color to physics but would also spark the students creativity and eagerness to learn physics.
After learning the basics, students should be allowed to run with their creativity. This will make them have fun while learning physics.
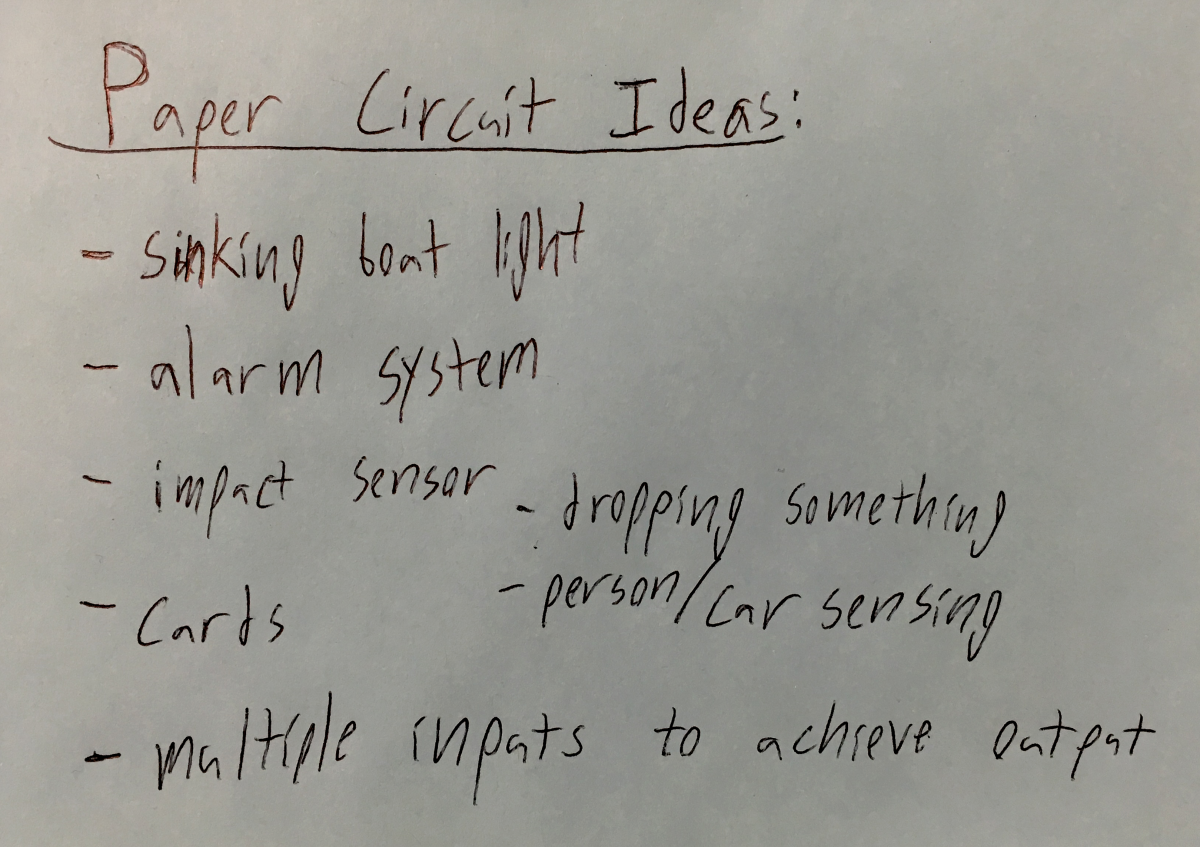
Planning
We sketched the ideas that we came up with as well as the different circuits that we would build.
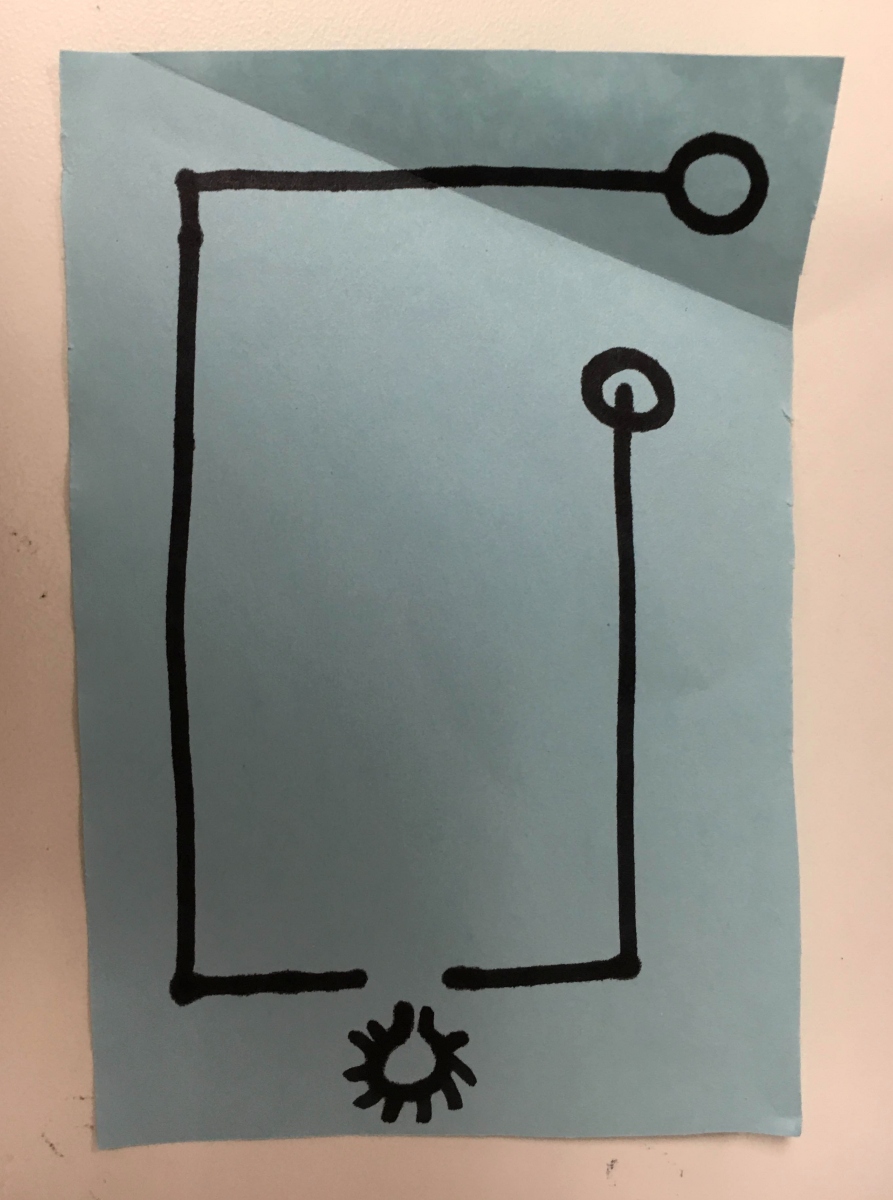
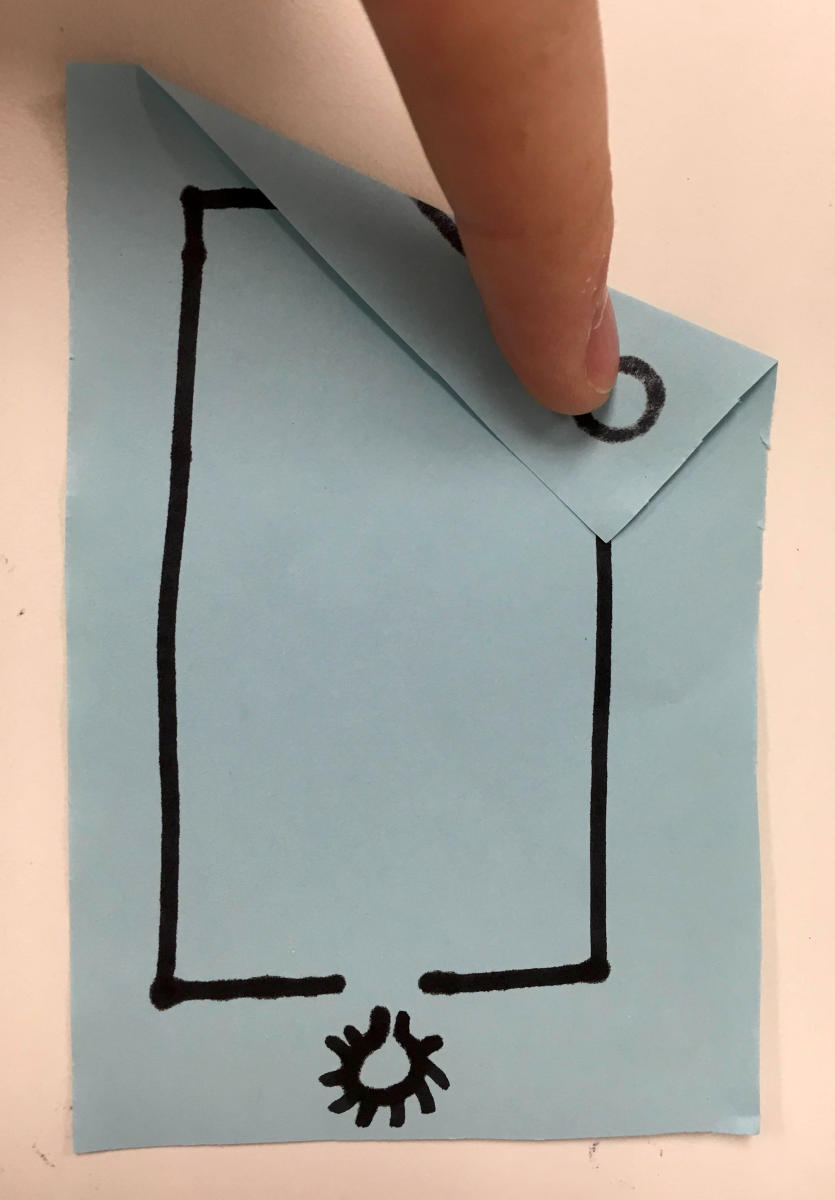
Drawing Out Circuits
Before laying out the tape, we first drew out the outline of the circuits on pieces of Manilla papers to make it easier to lay out the tapes.
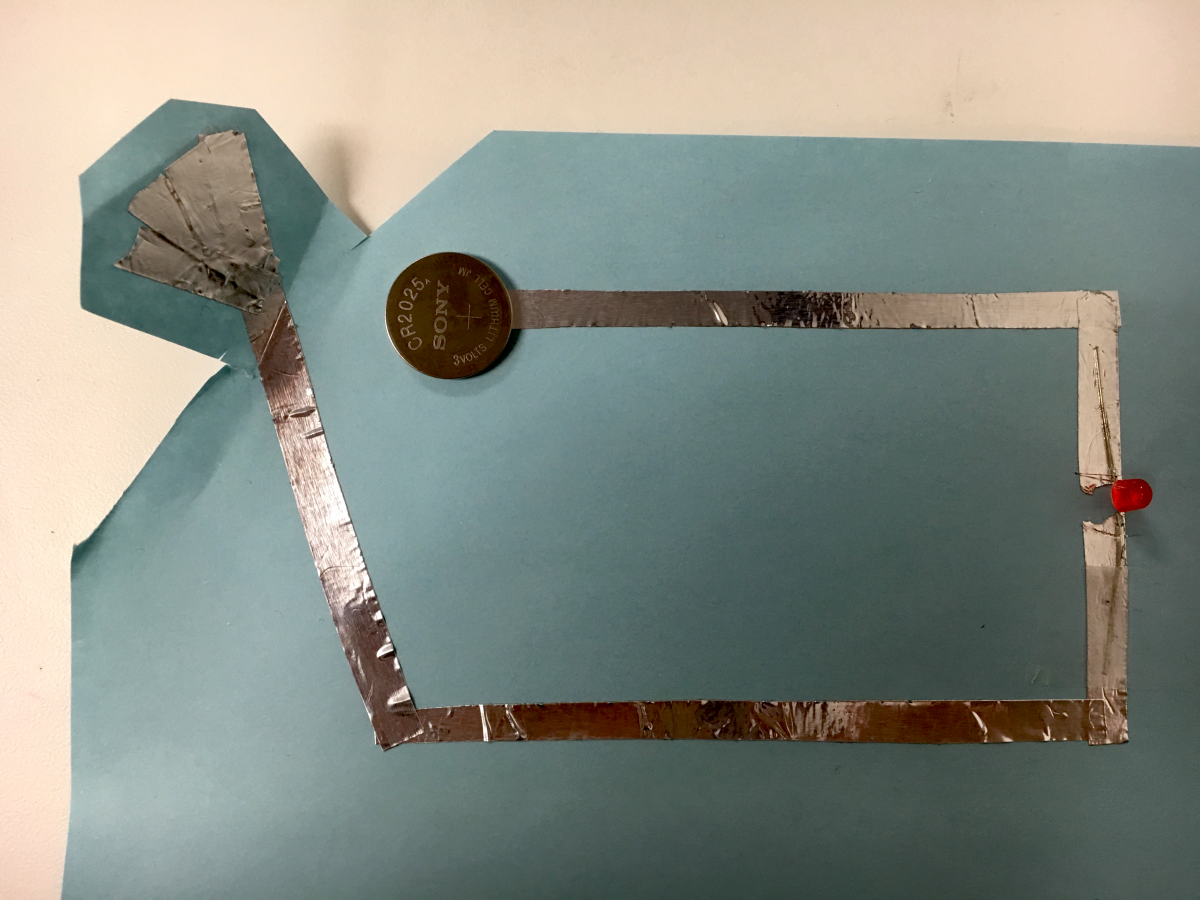
Problems with Aluminum Tape
At first we used aluminum tape but we could not get it to light up the LEDs. We found out that aluminum is not as conductive as copper. This means that not any metal can be used to make paper circuits. Only go for metals that are good conductors of electricity.

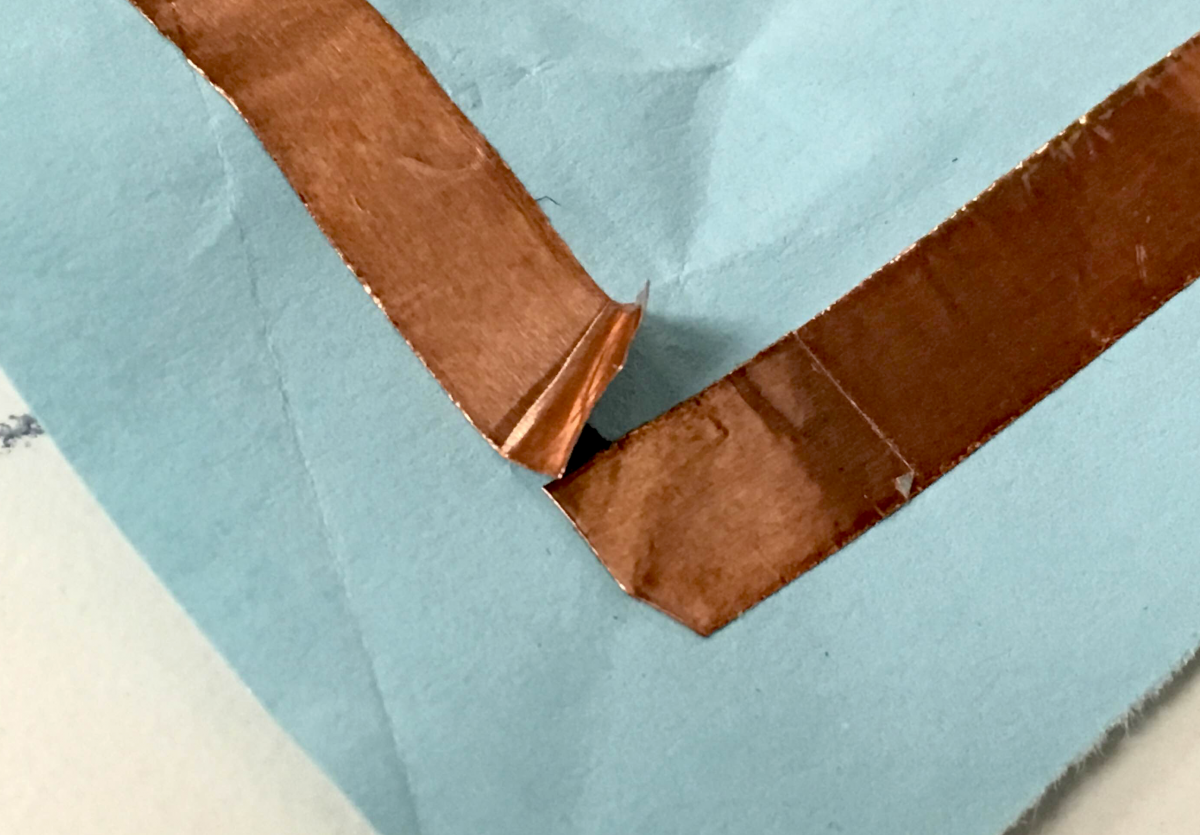
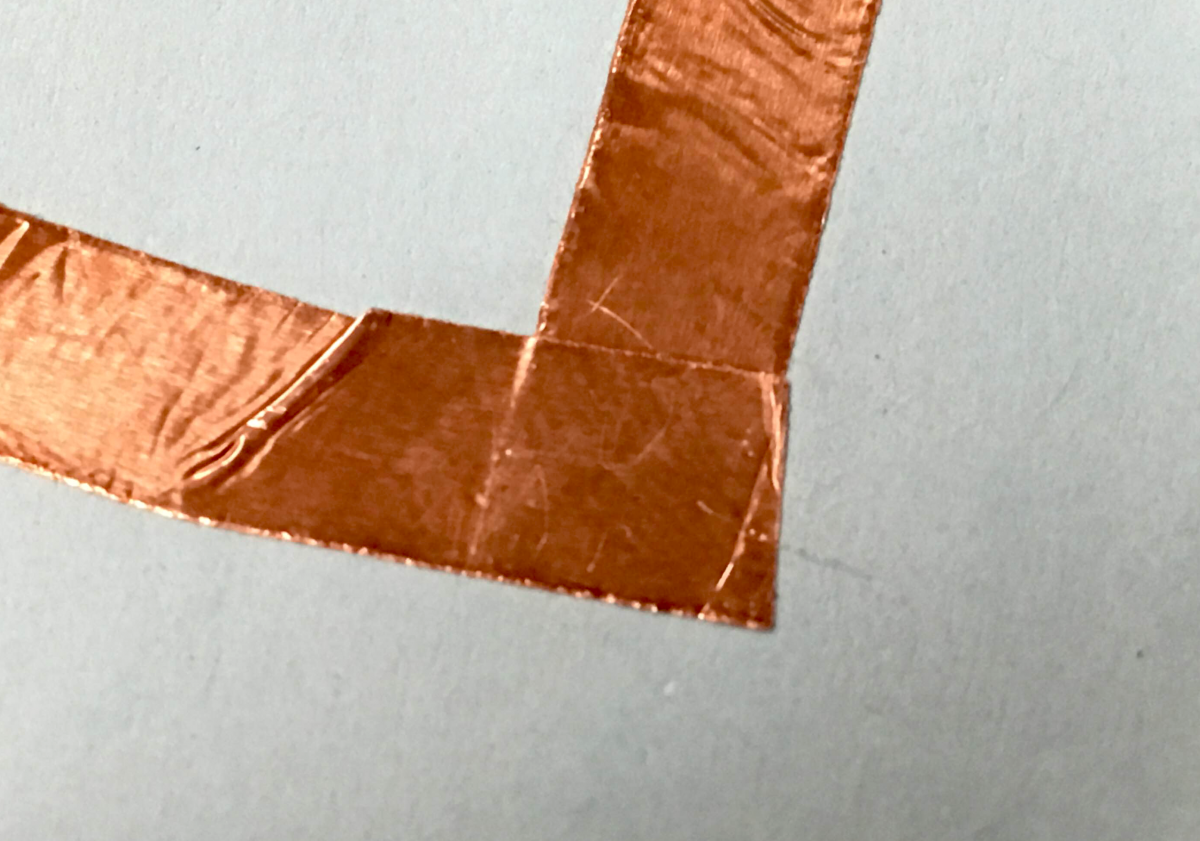
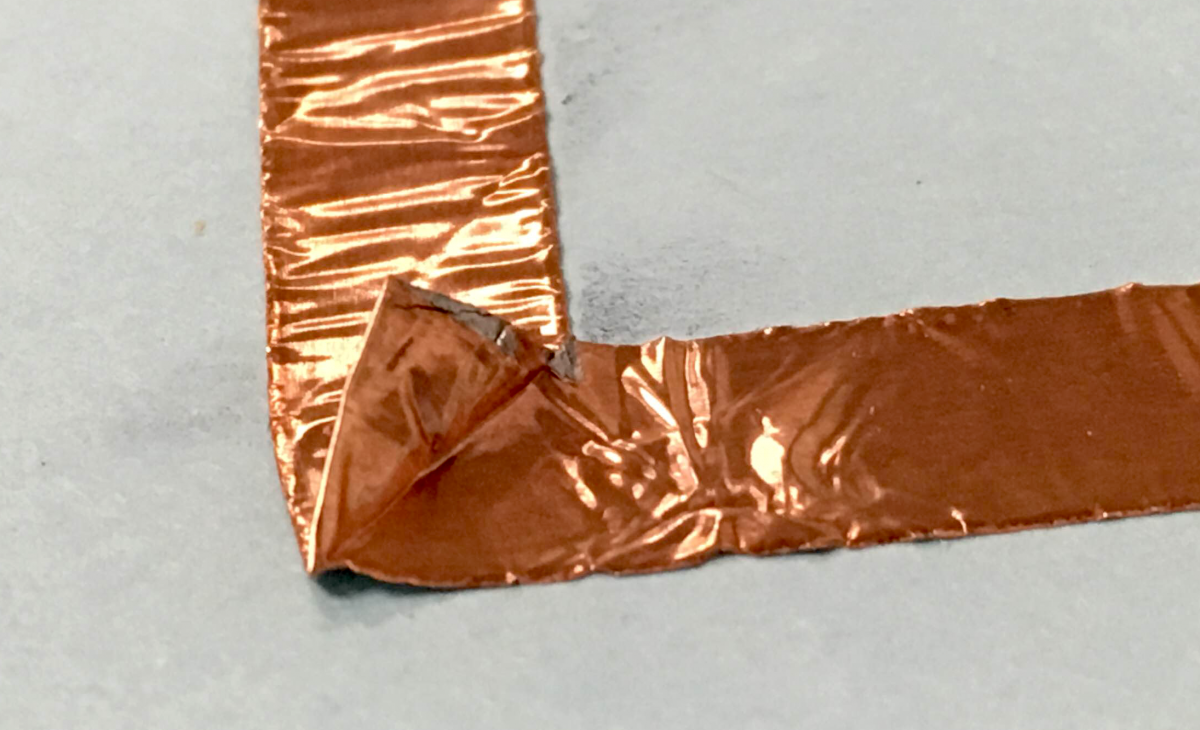
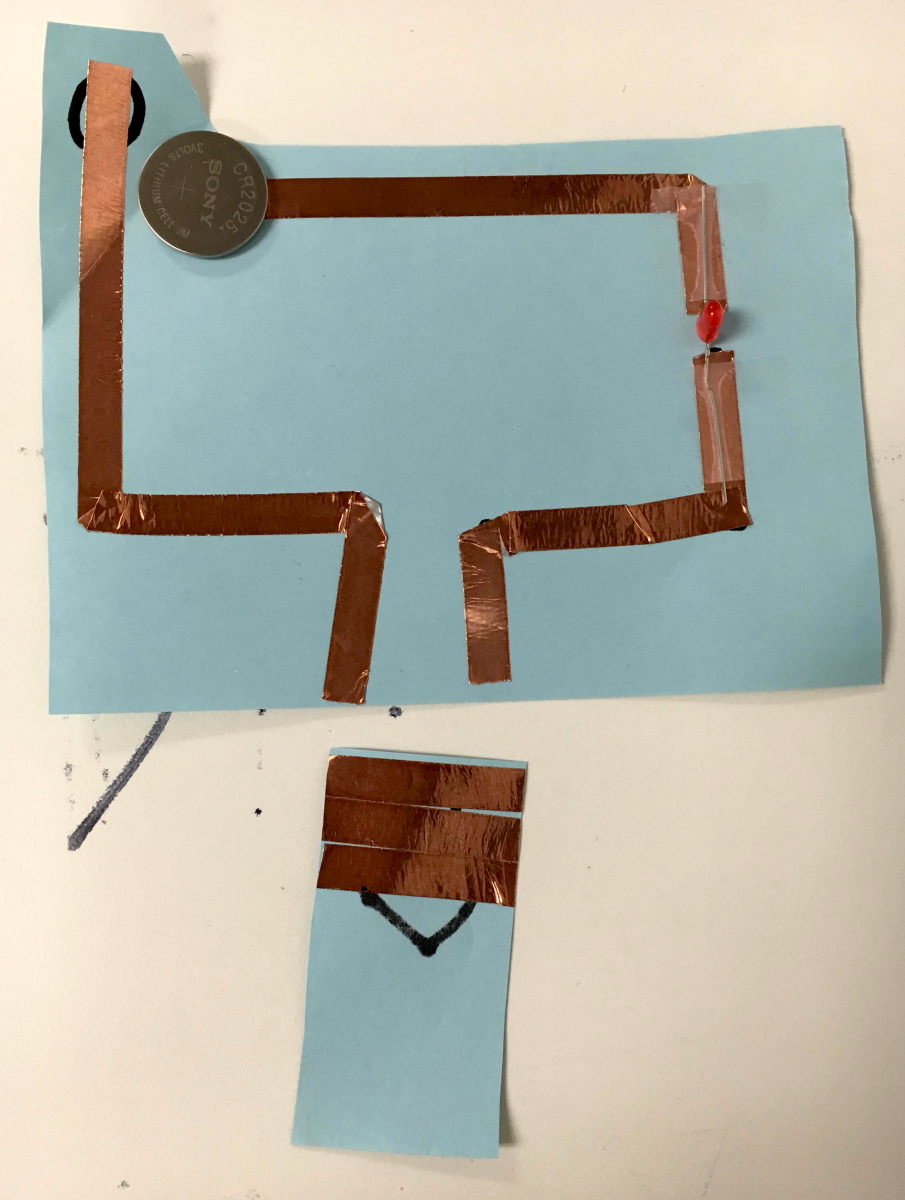
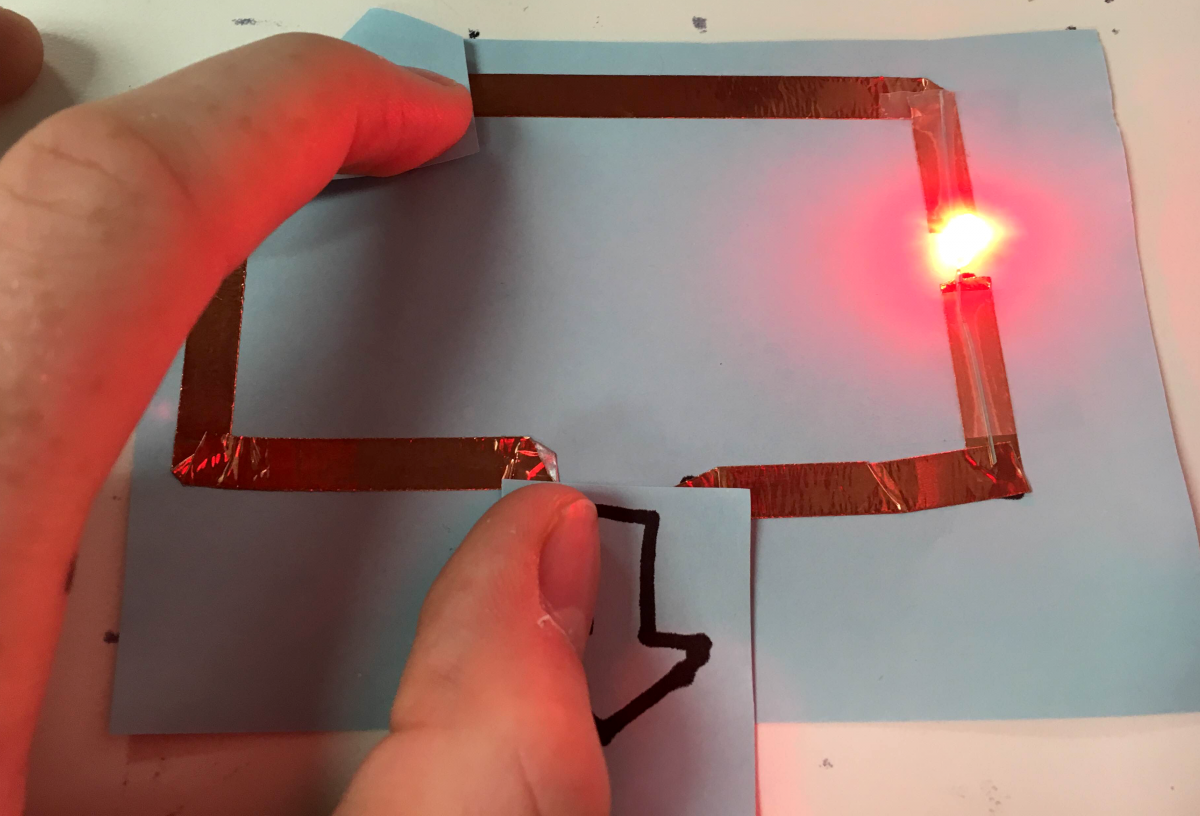
Problems with Connections
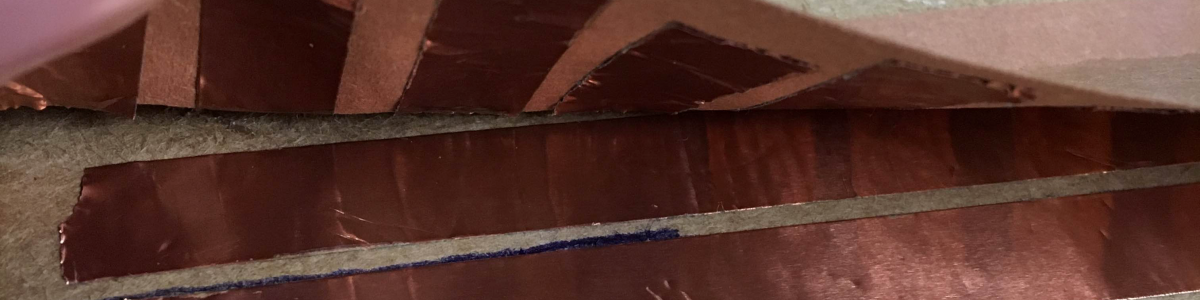
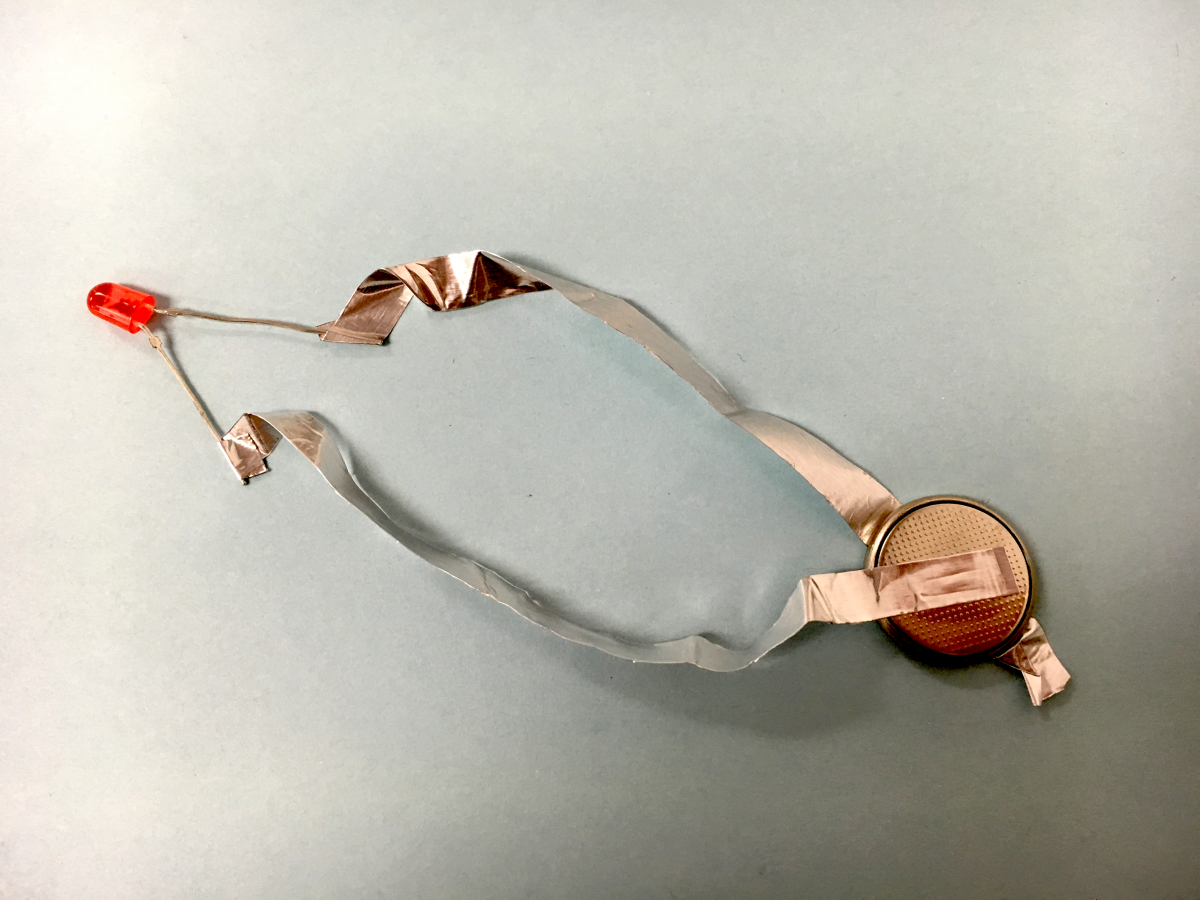
To make the circuit work, make sure to not simply overlap the copper tape. The adhesive on the tap acts as a barrier between the conductive copper layers. At the corners, bend and fold the copper tape so that it is continuous (right picture), rather than separate pieces (left and middle pictures). Failure to do so will lead to an incomplete circuit resulting in an unlit LED.
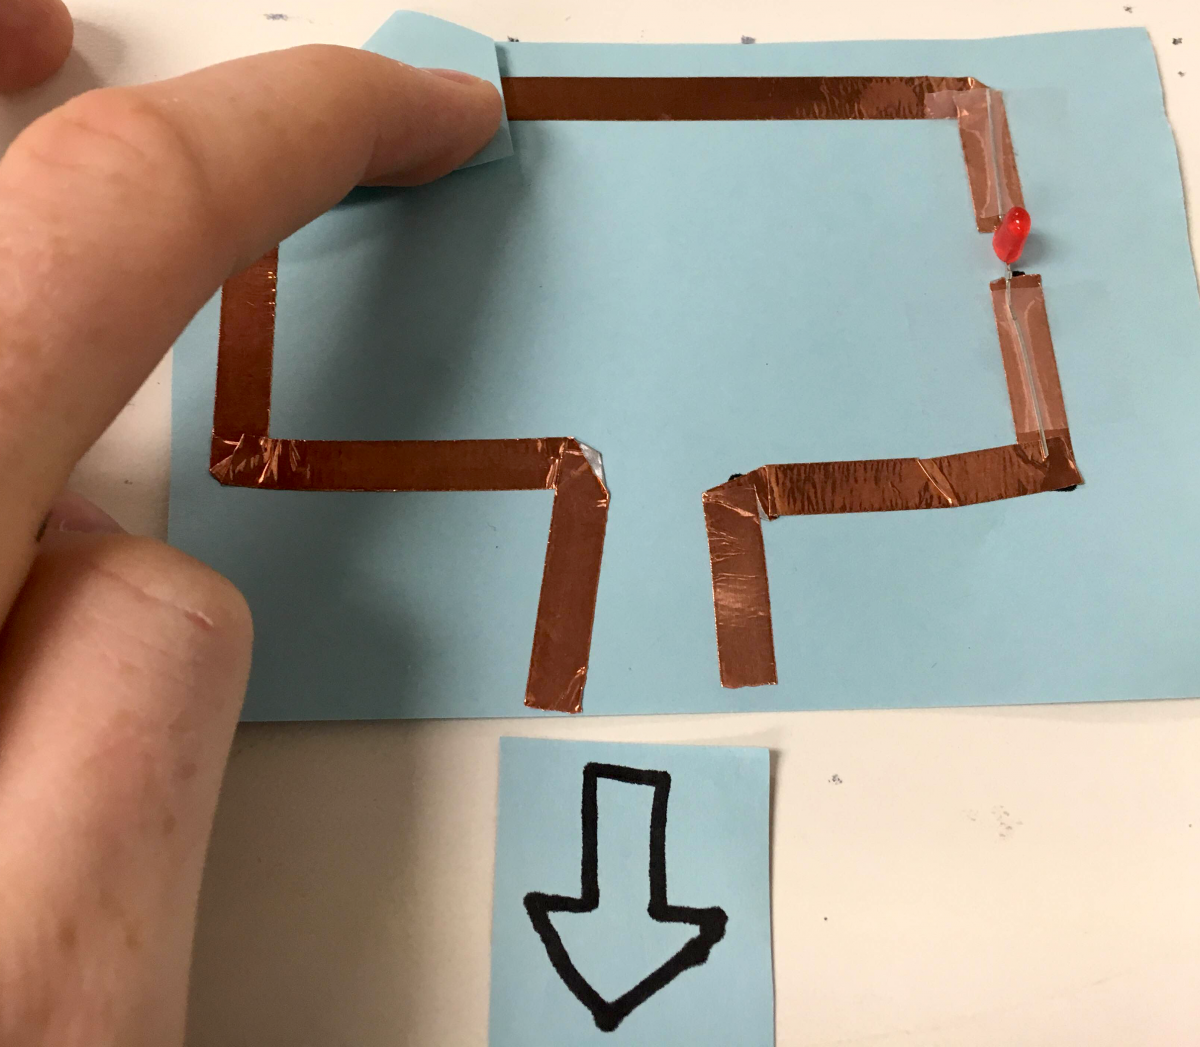
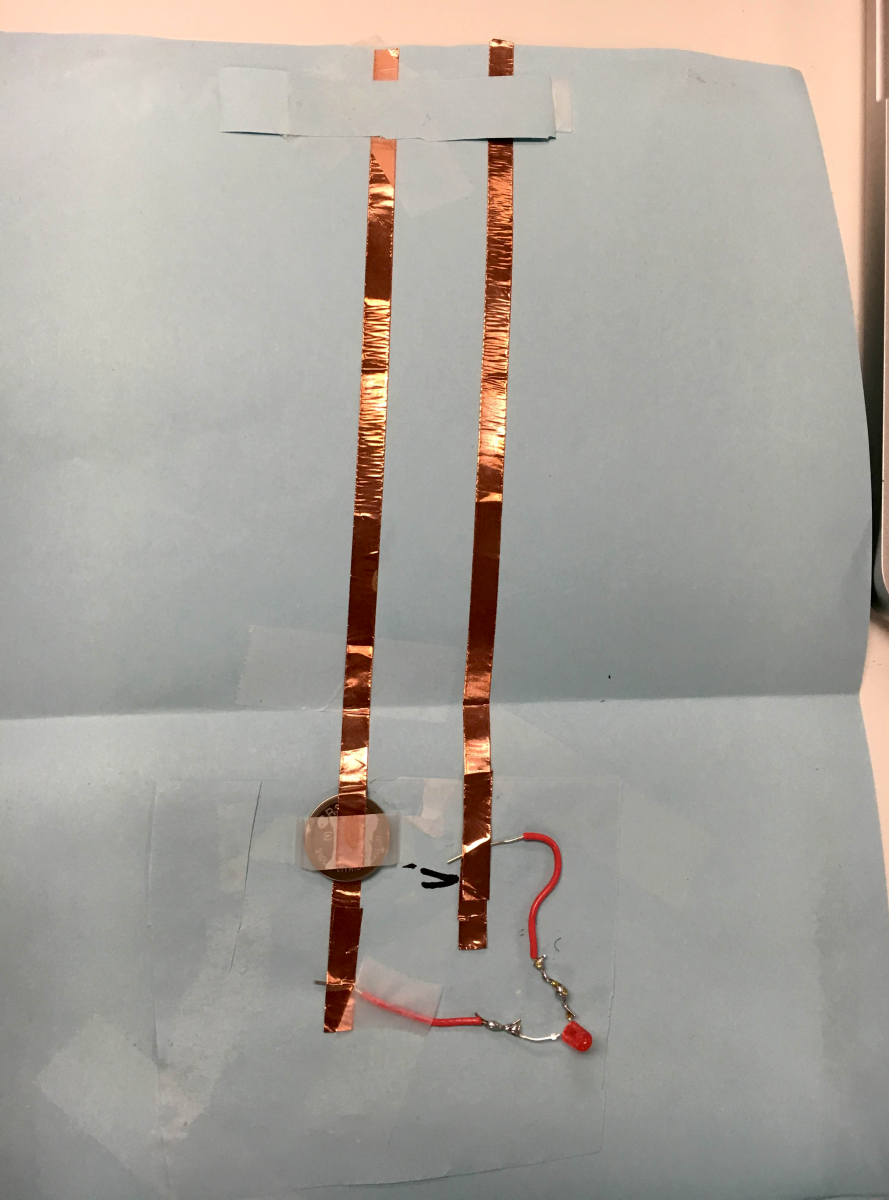
Pull Tab Switch Example
A pull tab switch is an example of a simple switch that works well with paper circuits. The circuit is completed by sliding the switch down.
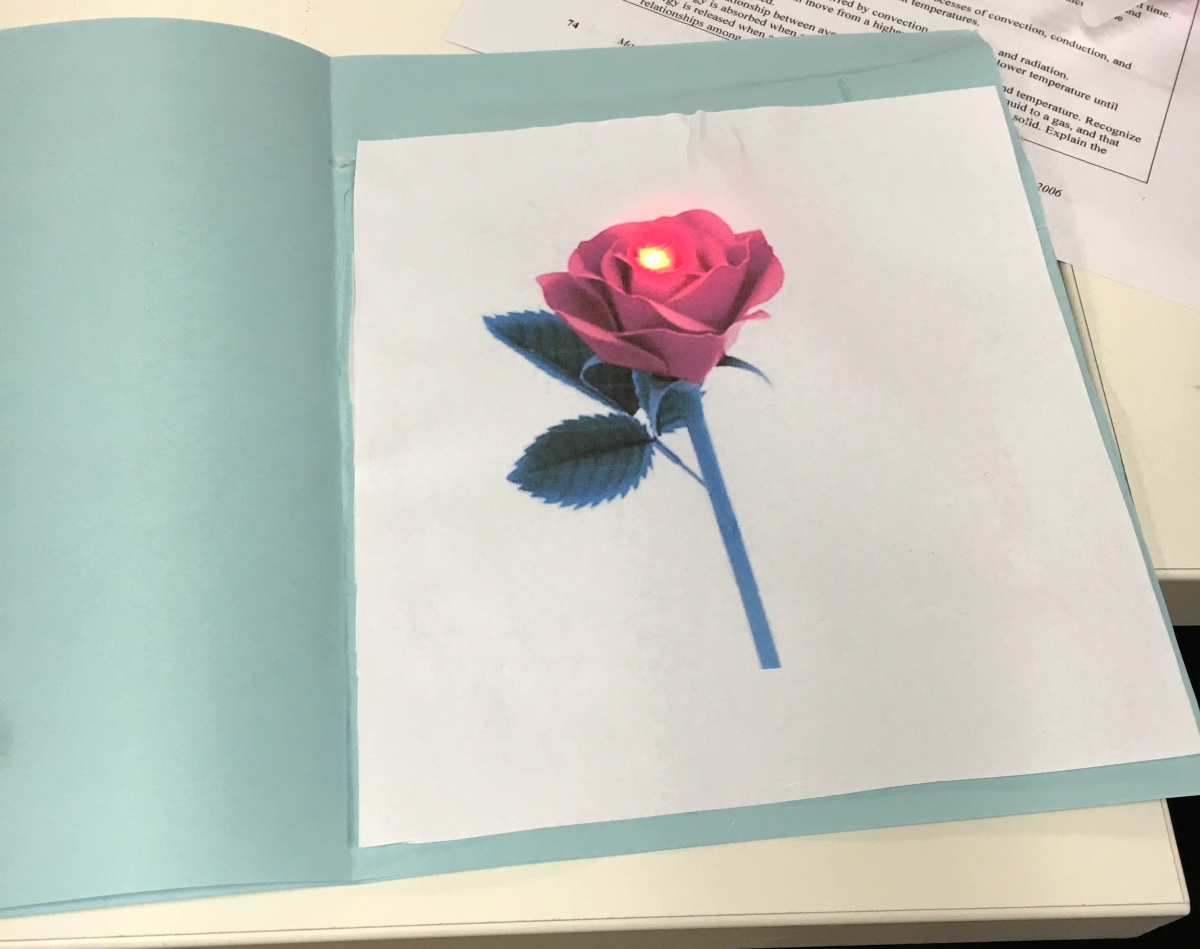
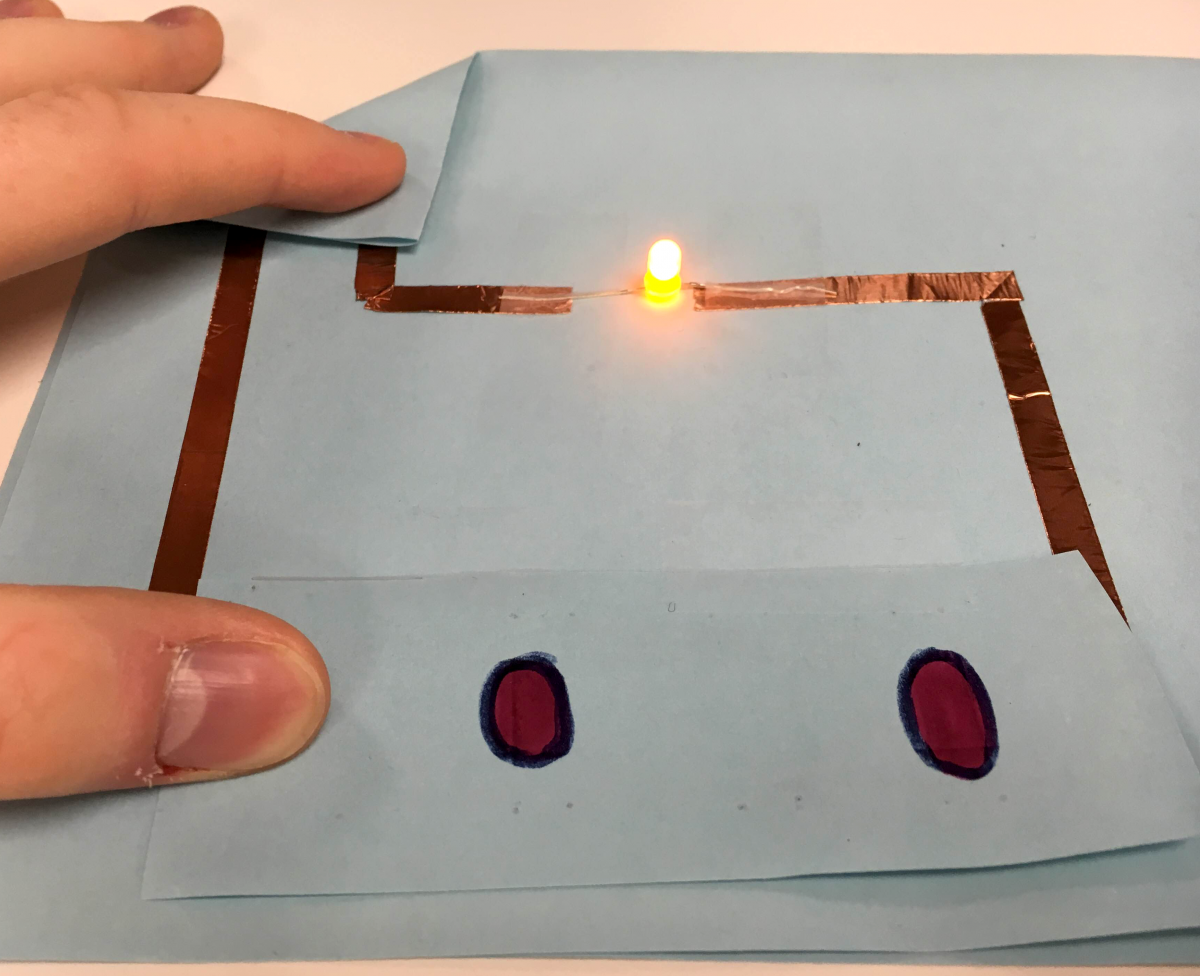
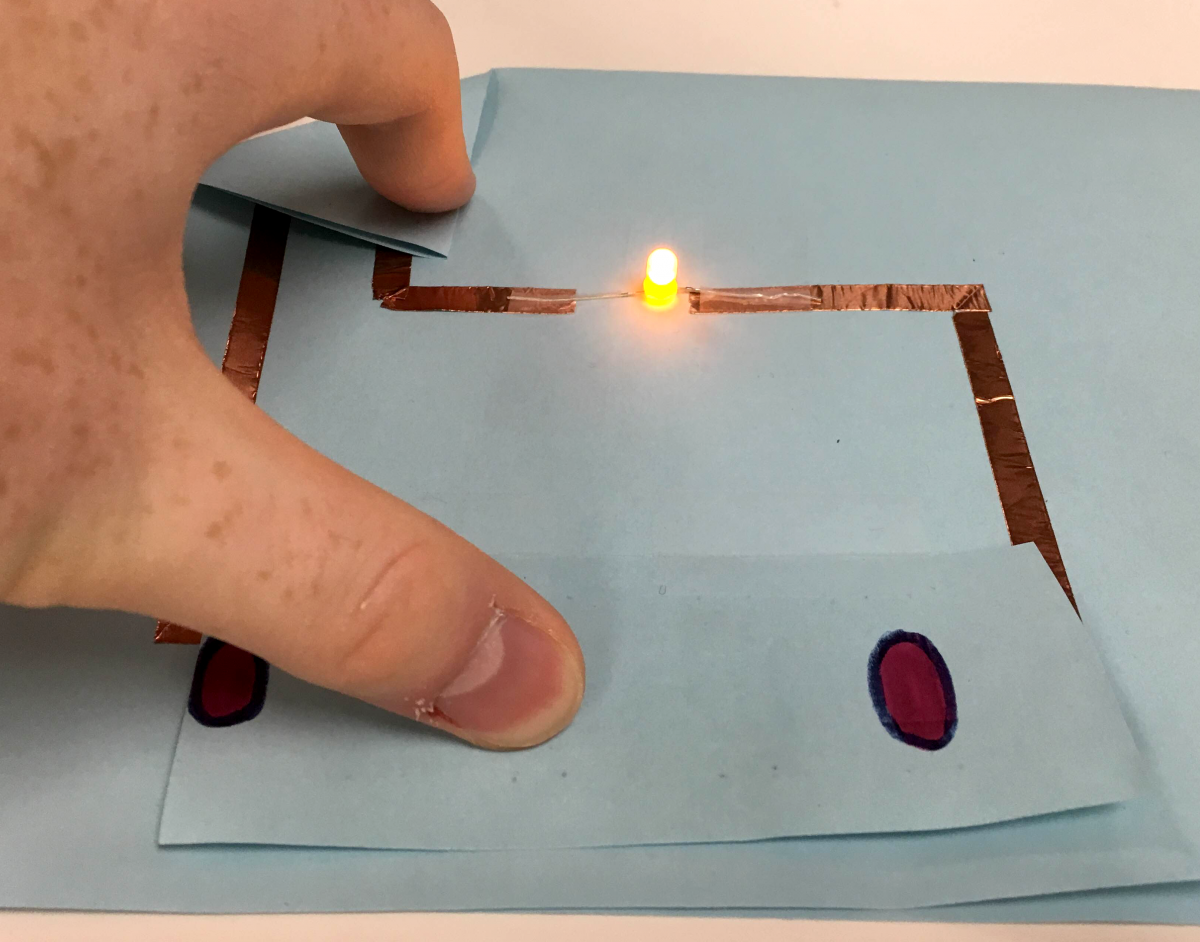
Card Example
A greeting card is a basic example of how to use the knowledge gained to make a personalized item.
Underneath the card is a pressure sensitive switch that is turned on by a person's action of opening the card. Students, can make personalized cards and send them to their friends and family.
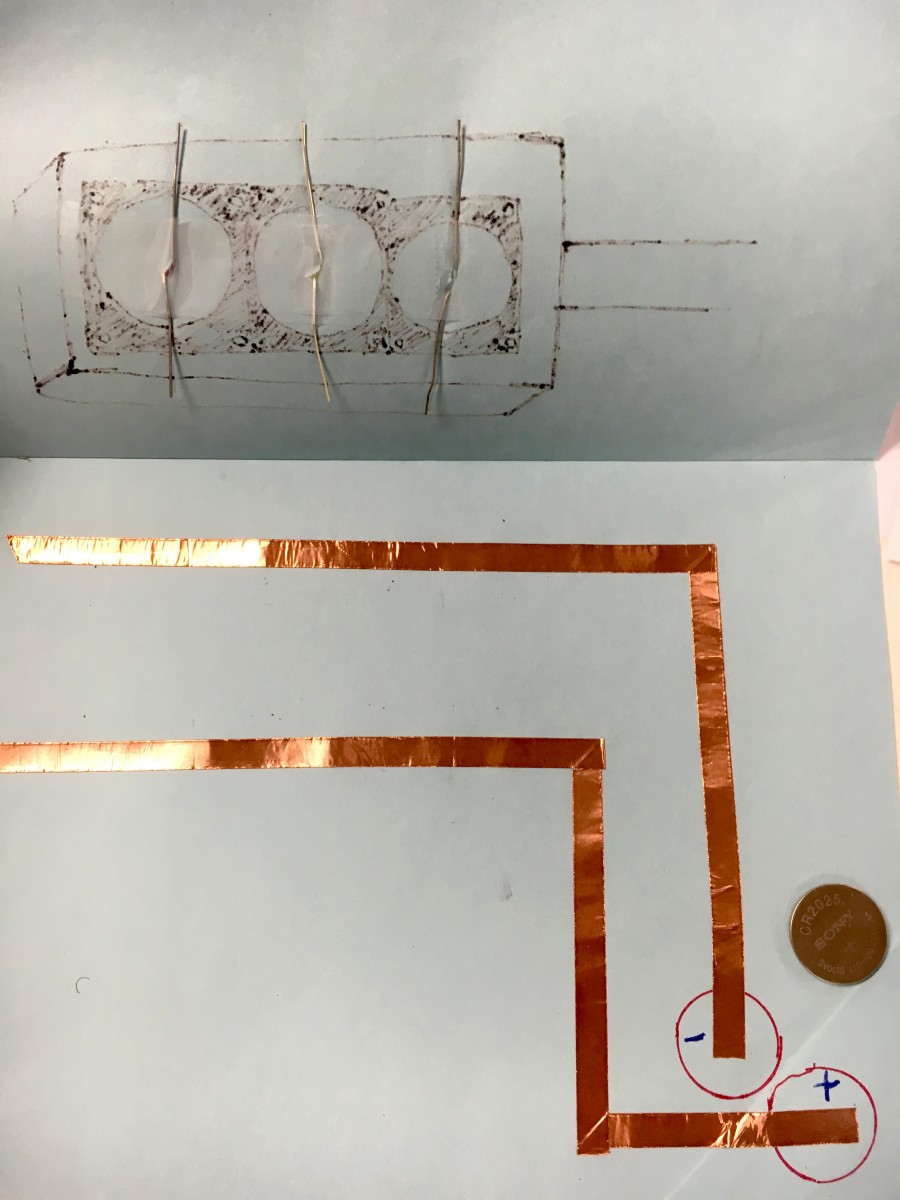
Light Piano Example
This light piano is an example of how to have fun using parallel circuits. The led turns on when its corresponding button is turned on. Even though we used only one LED, students are welcome to use as many LEDs as possible.
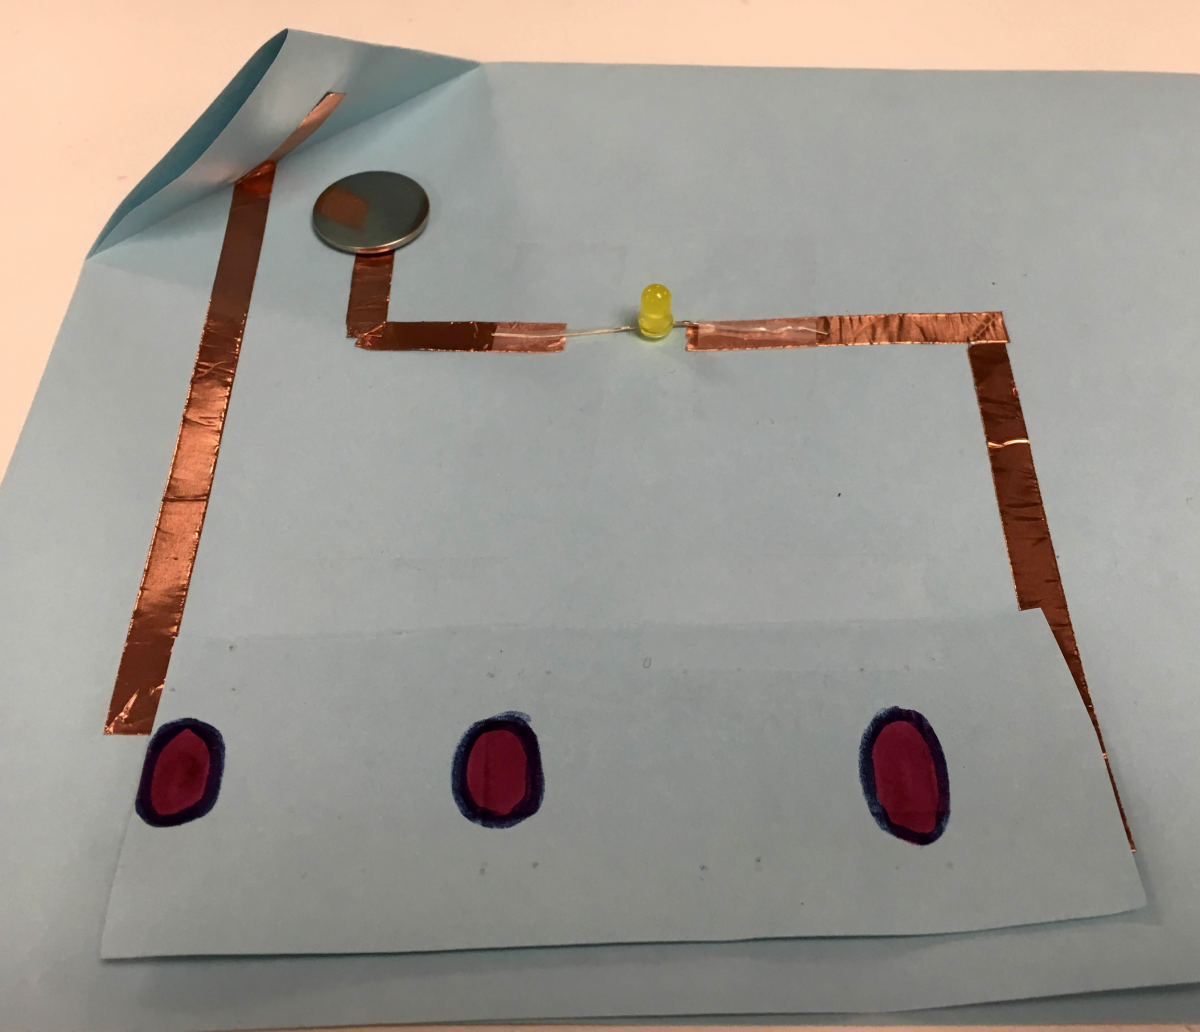

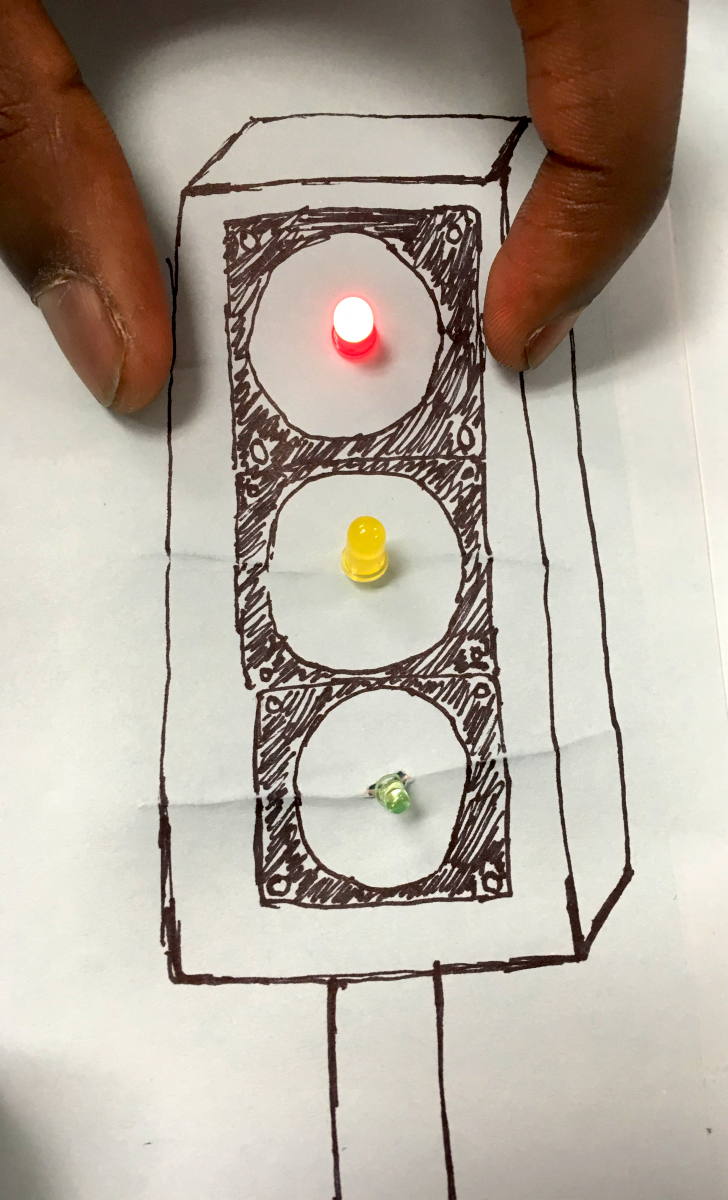
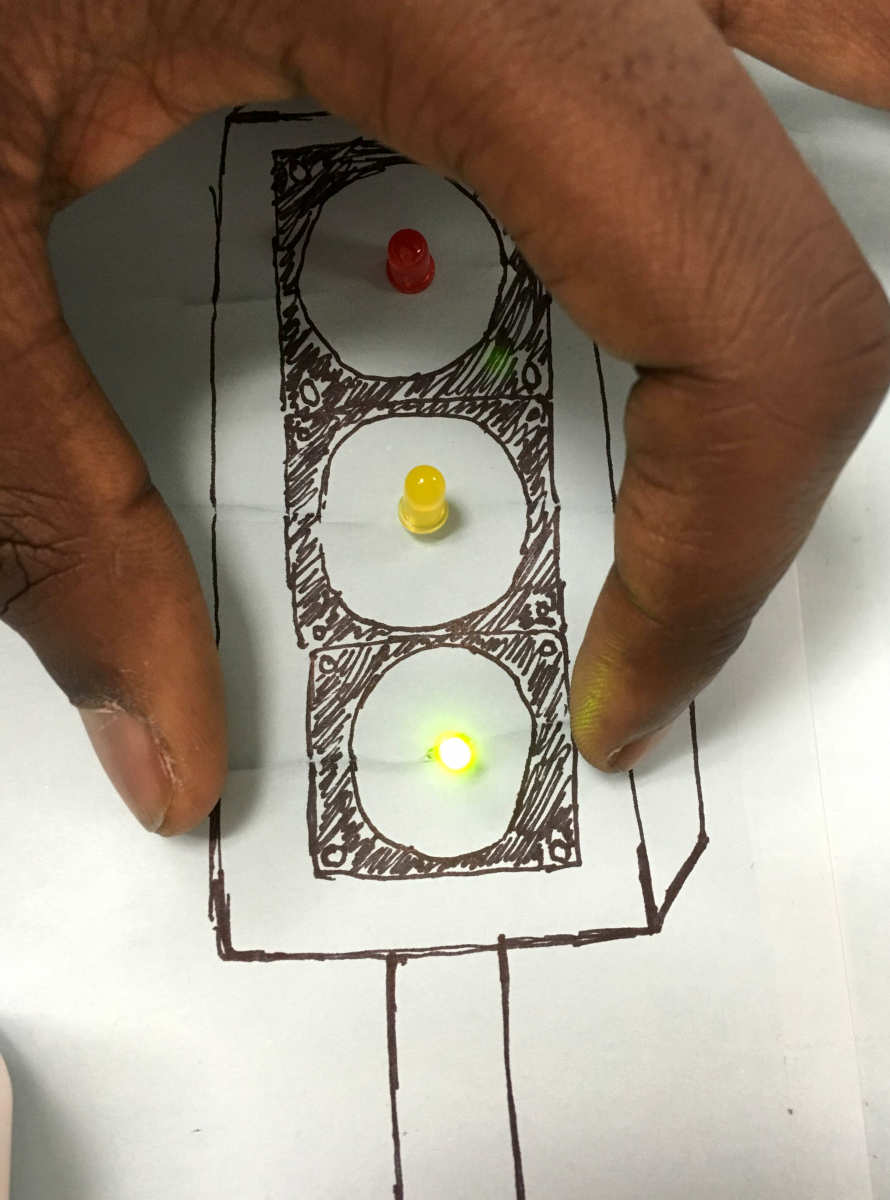
Traffic Light Example
The traffic light makes use of the knowledge of parallel circuits. A light will only light up if its corresponding circuit is closed.
To minimize the use of copper tape and batteries, we overlaid the LEDs on a single incomplete circuit that was connected to a single battery. Pushing down on one LED would make it light up without affecting the others.


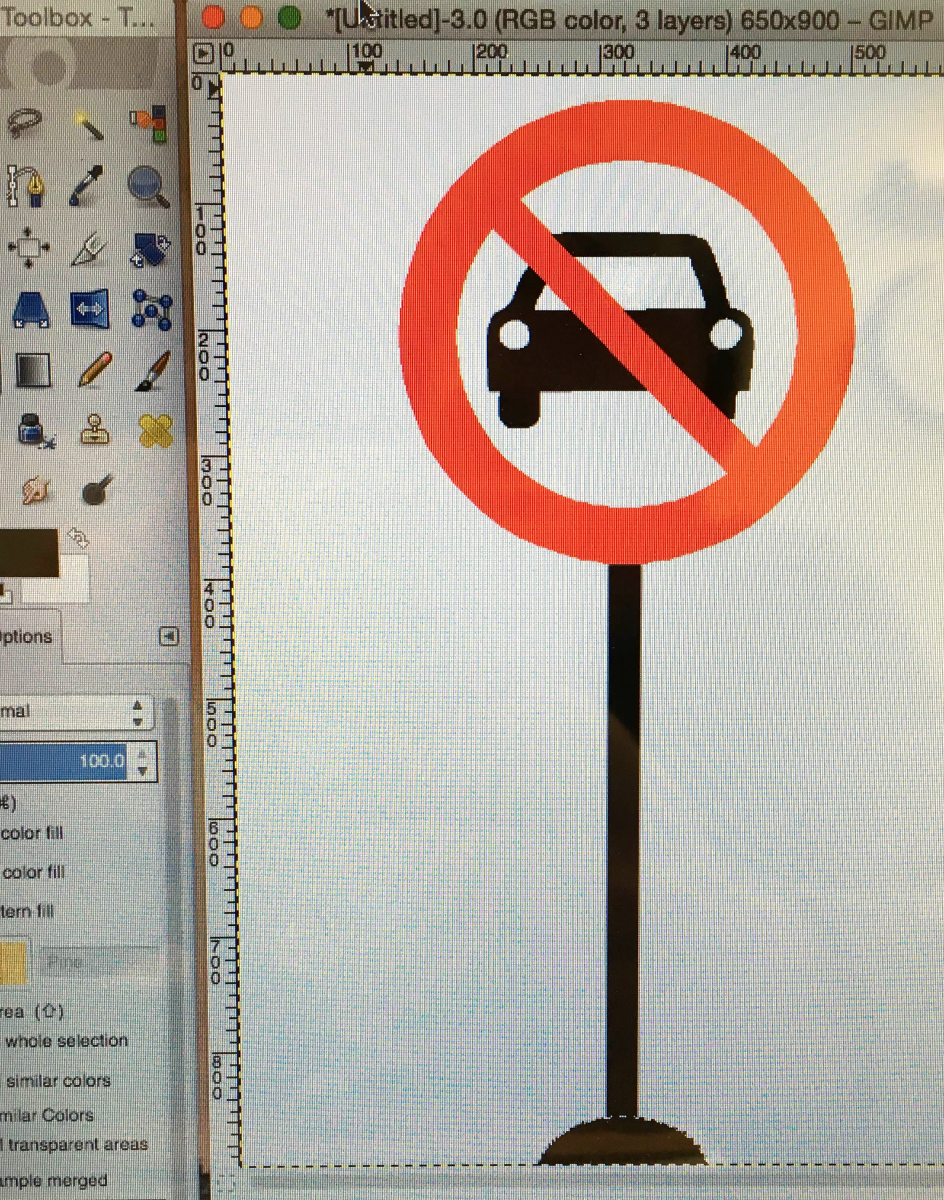
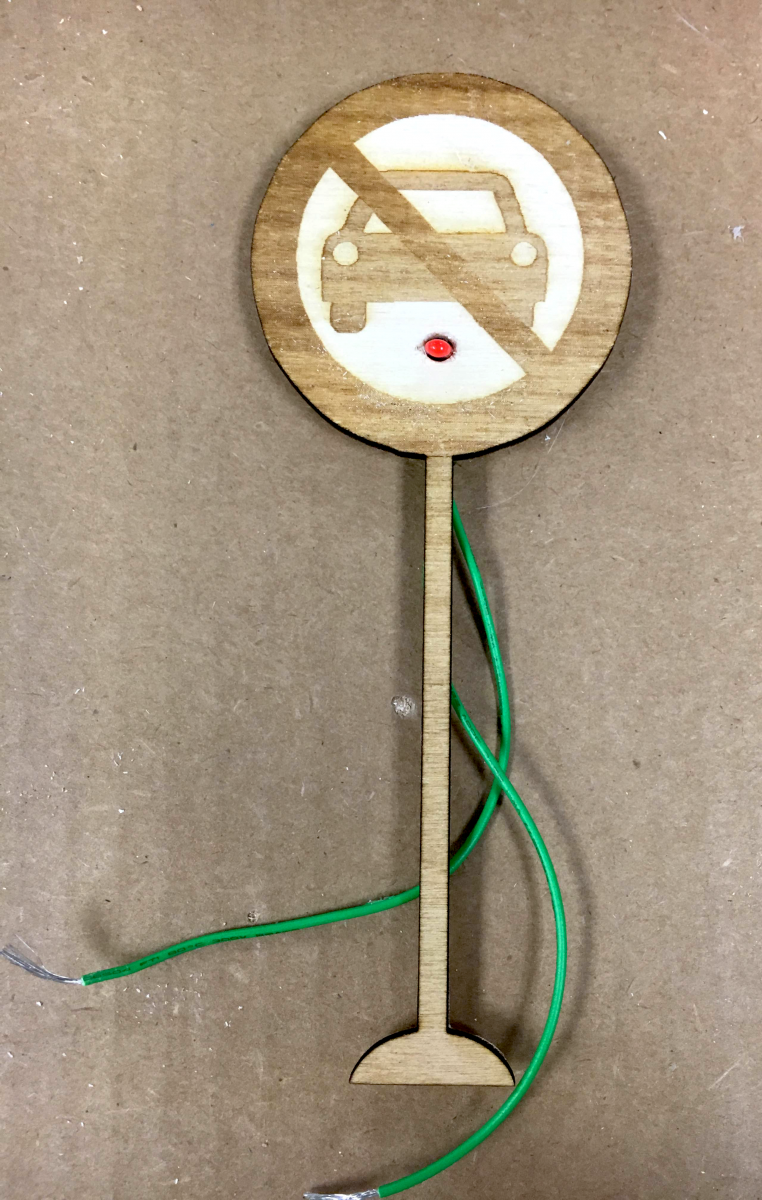
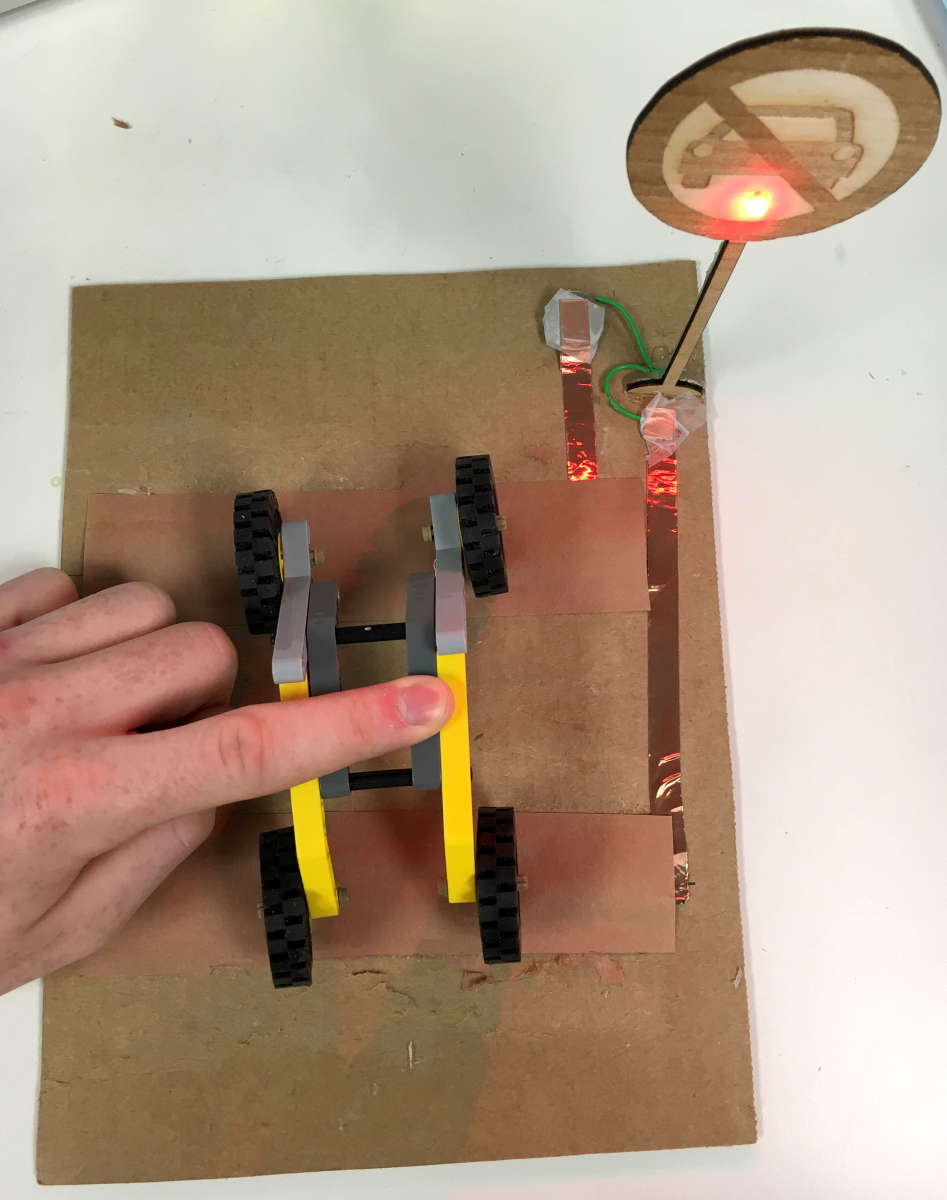
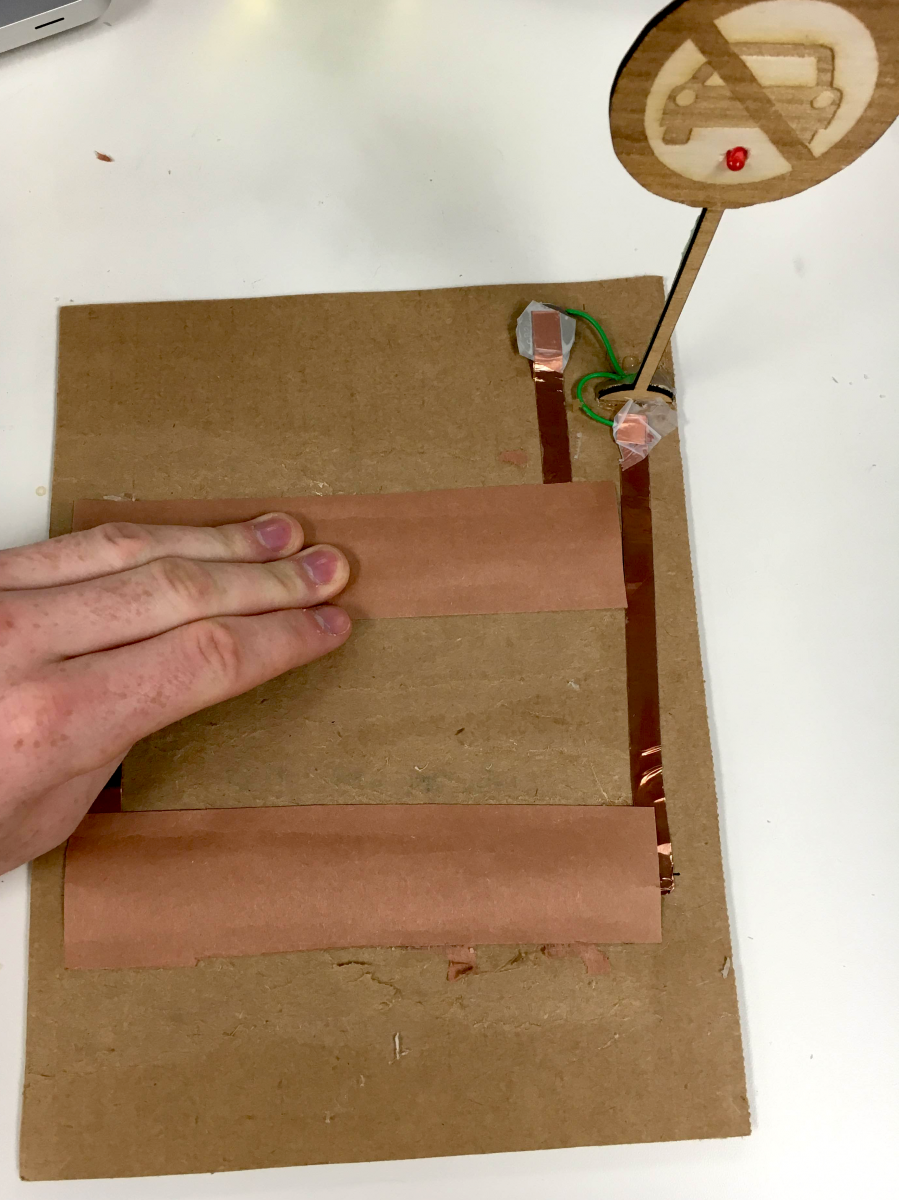
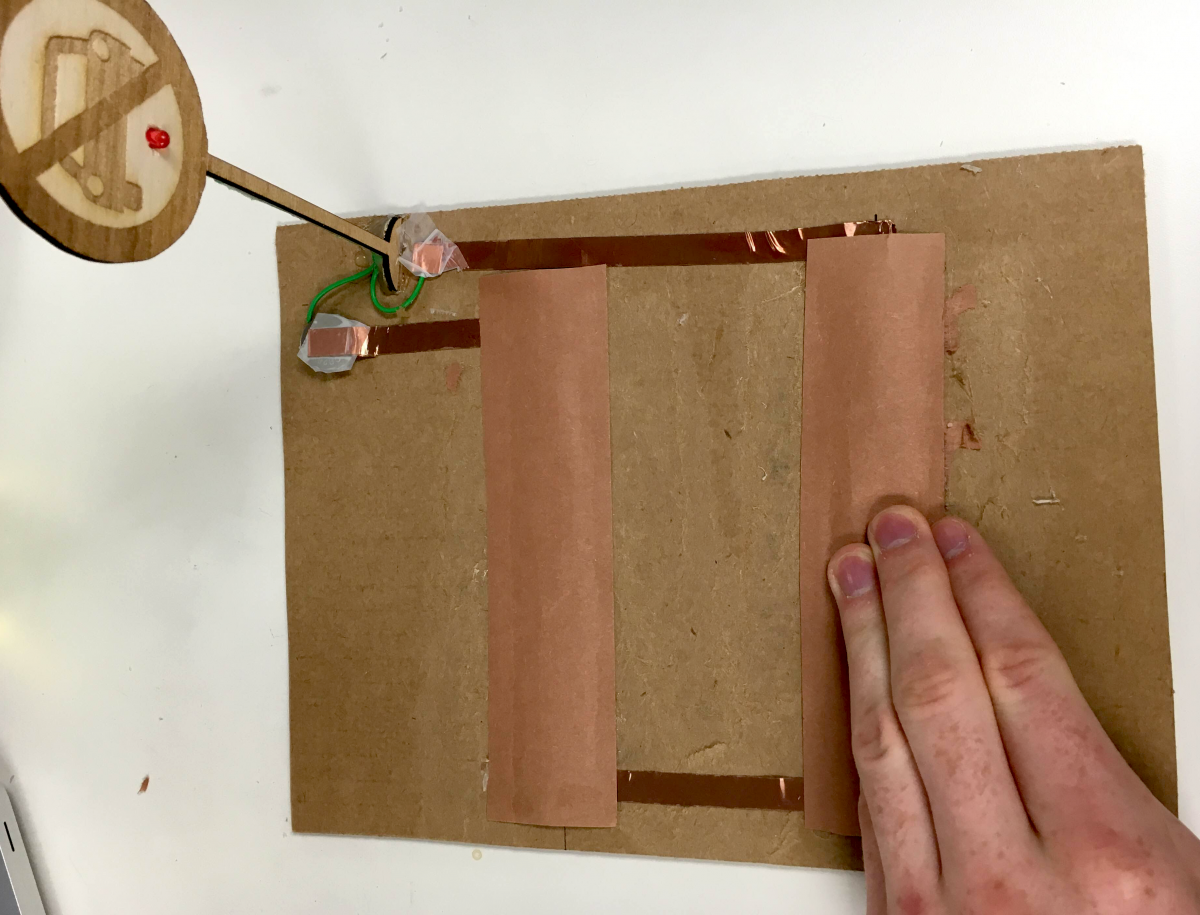
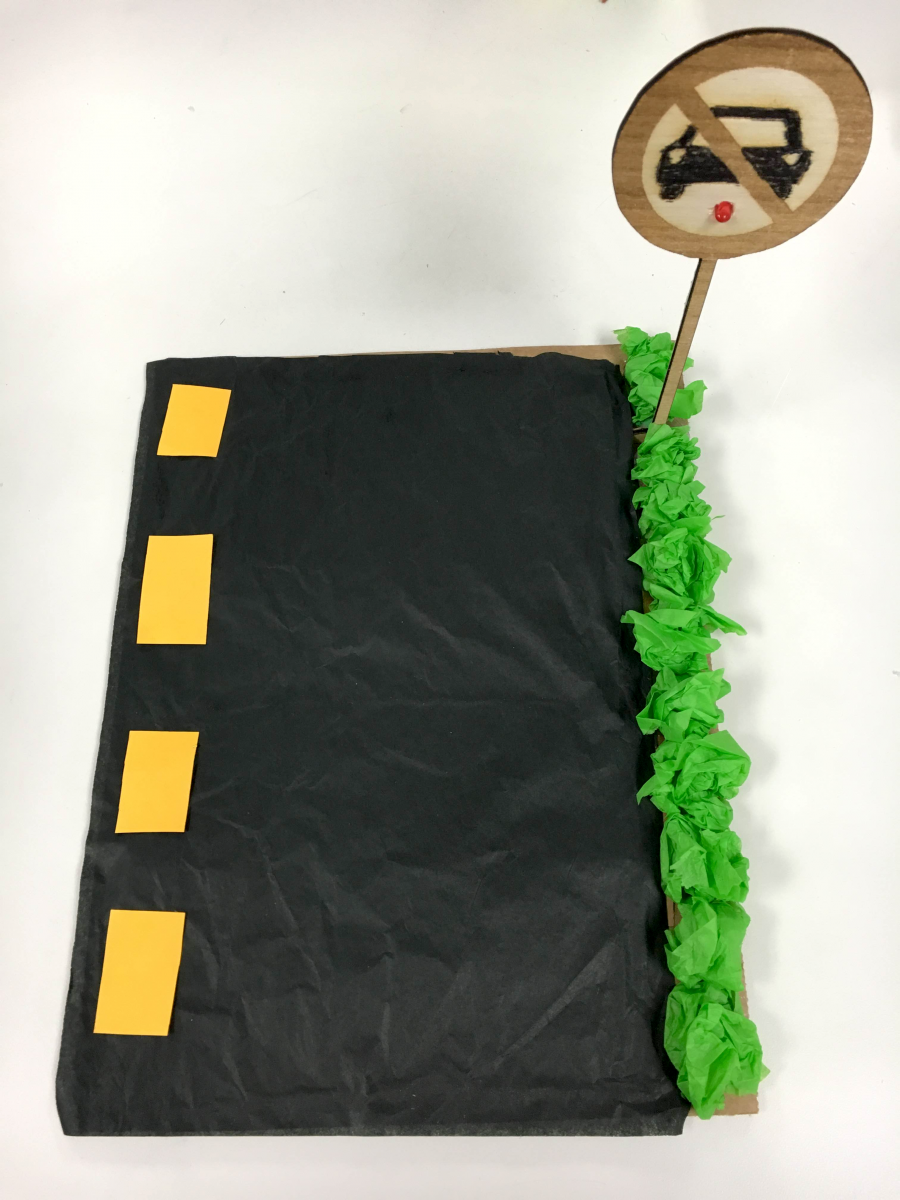
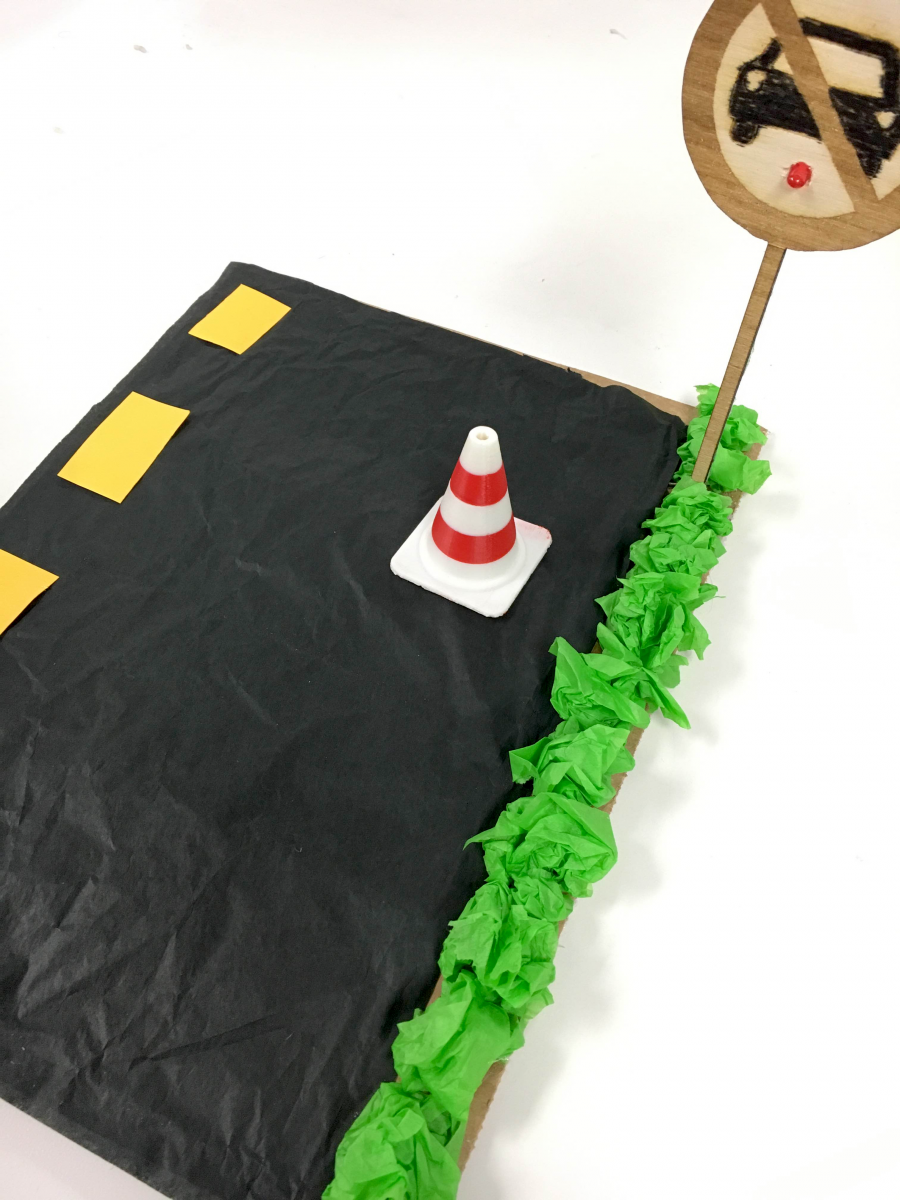
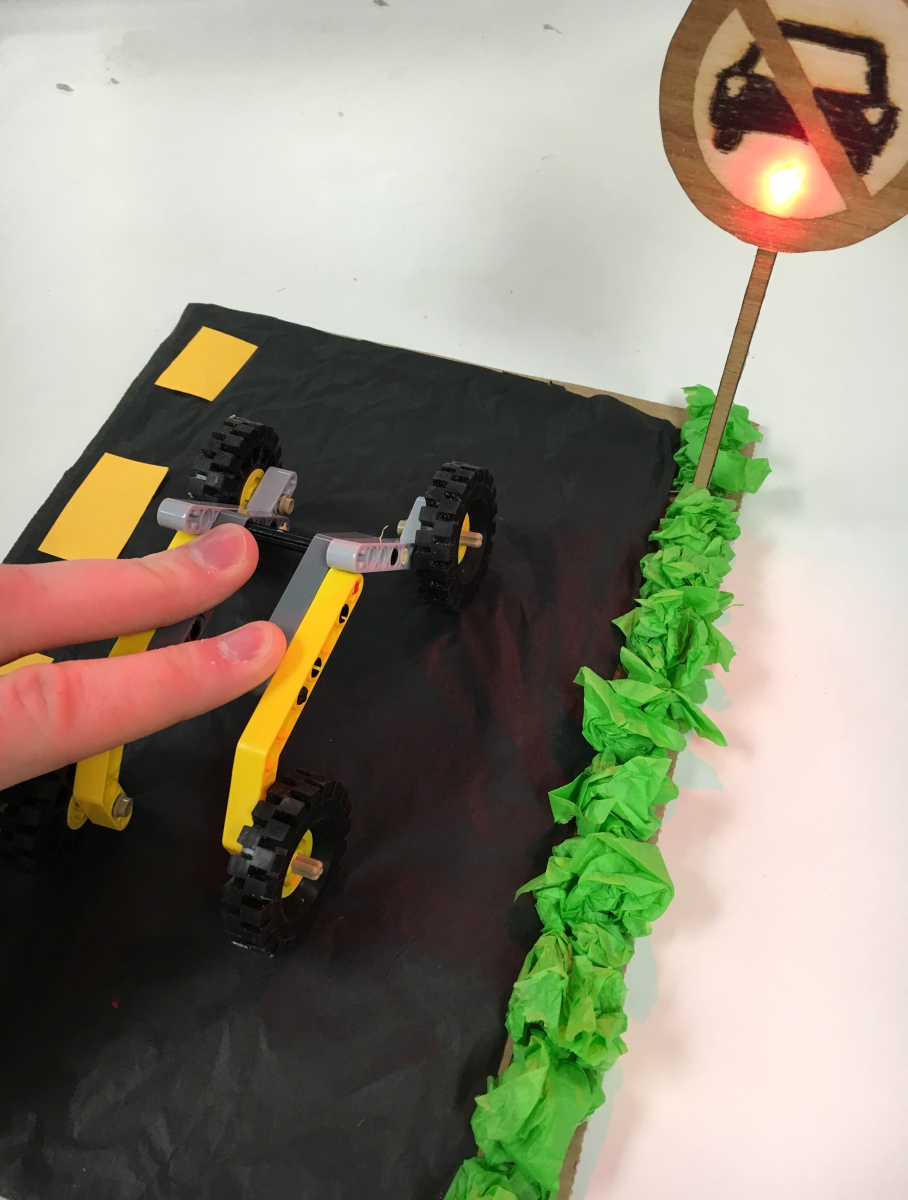
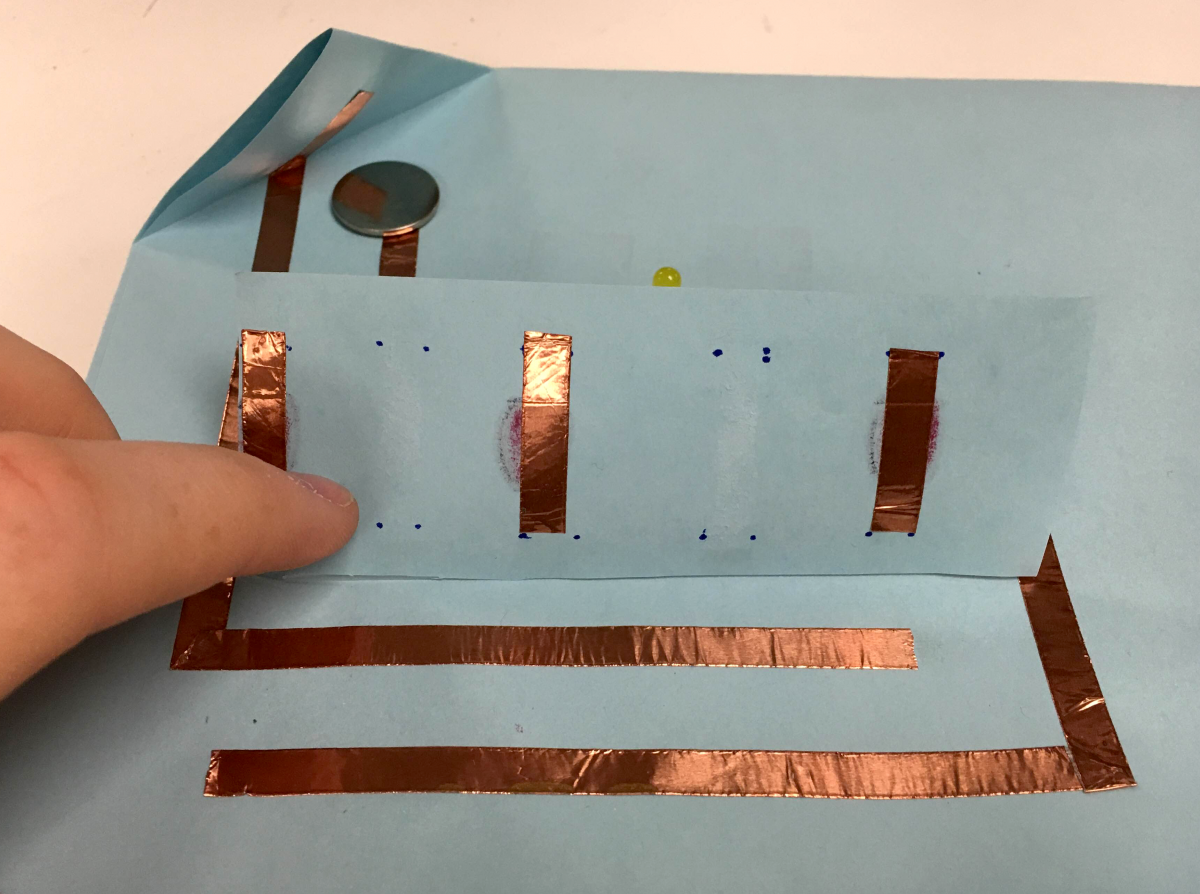
Car-Sensing Road Example
This is a simple circuit that selectively turns on when certain car types pass by. When the desired vehicle passes by, switches on the road will close thereby turning on the 'no entry' lights. The switches are pressure sensitive and are placed at a width such that only that specific car can turn them on when its wheels pass by.
For this project, a laser cutter was used to cut the stoplights, however, one can use a cardboard to achieve a similar effect. Also, two wires were soldered into the red LED in order to make a strong connection. However, copper tapes can still be used provided they provide a strong connection.
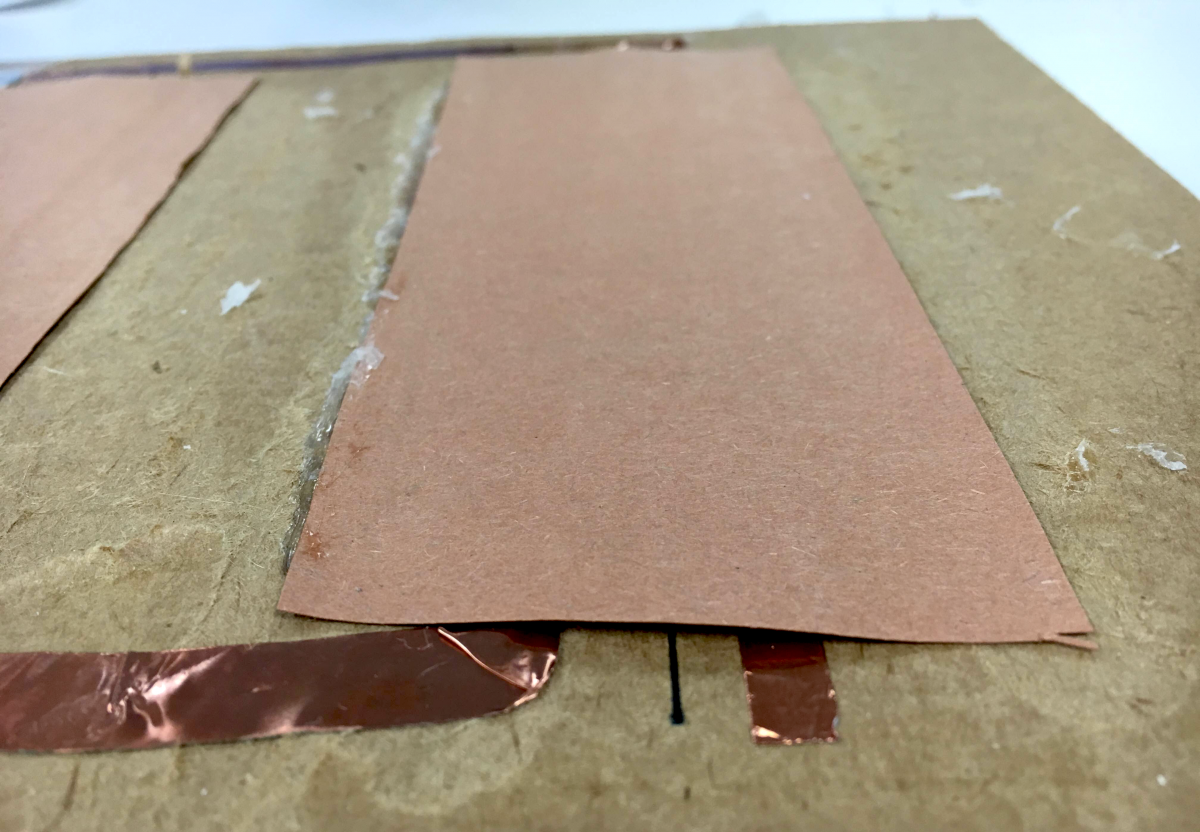
The switches on the road make use of a modified version of a push switch. These switches are turned on when a car drives by. Since they are two in number, only target cars with the set dimensions can turn them on. Both pressure switches need to be pressed at the same time to complete the circuit.
This prevents the sign from being turned on by other vehicles, pedestrians, or objects (shown by the cone not setting off the LED), because these objects do not press both switches simultaneously.
When creating the two pressure sensitive switches, it is important to place the parallel copper tape strips very close together so that any significant pressure from above the surface will close the circuit. If the strips are too far apart, it will be difficult to achieve the closed loop.
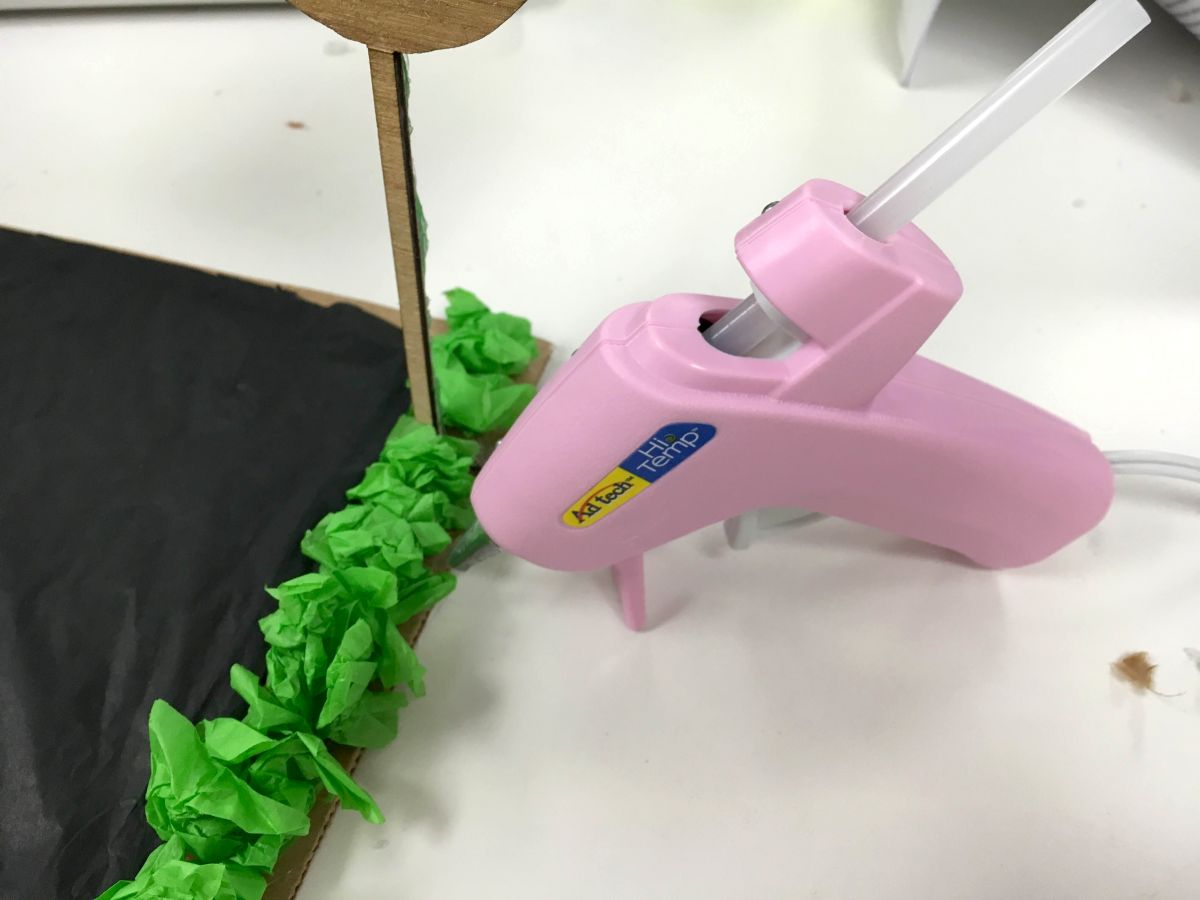
After the circuit was complete and functional, we added decorations to replicate a real-life applicable scenario of a road.