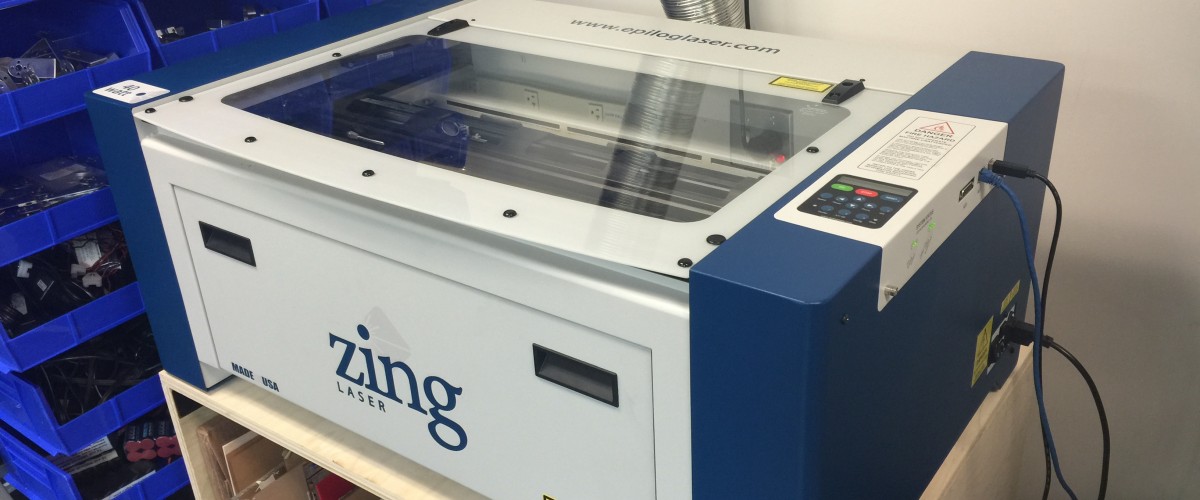
Epilog Zing 24 Laser Cutter
The Epilog Zing 24 within 200 Boston Ave is 40W.
General Usage
The following guide will help you use the laser cutter. A list of materials that can be laser cut can be found here. Please make sure your file is properly set up for etching ands cutting. Follow the instructions here for properly setting up your document.
Setup the Laser Cutter

This turns on and off the laser cutter.
- Open the door to the laser cutter.
- Select your material (ADD LINK ABOUT MATERIALS)
- Place your selected material in the top-left corner of the laser cutter tray. Make sure it is tight against the rulers.
- Turn on the laser cutter by pushing the switch located on the right side of the machine.
Focus the Laser

Use the focus button and the up/down arrows to focus the laser at the correct height.
- Press the focus button on the control pad.
- Locate the focus gauge on the horizontal beam. Release the focus gauge from its hook so that it hangs freely (not touching your material). If the gauge is touching the material, lower the tray height by repeatedly pressing the down arrow on the control pad until the focus gauge hangs freely.
- Adjust the tray height
- Press the up and down arrows on the control pad until your material touches the focus gauge. If the spring on the gauge is bent at all, the tray is too high, and you must lower it.
- Lightly flick the focus gauge. It should swing and briefly and then stop by touching your material. If it misses the material raise the tray and if it is bent you need to lower the tray.
- Replace the gauge onto the hook.
- Press the reset button on the control pad.
Load the File
- If it is not already on, start the computer and log in to ceeostud2.
- If the computer is not already running in Windows 7 on the virtual machine, select the VMware Fusion application in the dock.
- If you are importing a file from a flash drive, p"ug it into the USB hub. When the message show to the right appears, click "Connect to Windows." (If the message does not appear, hold the mouse at the top of the screen in VMWare to bring up the menu. Select "Virtual Machine" -> "USB & Bluetooth" and connect your flash drive.)
- Run Adobe Illustrator in the virtual windows 7 machine. (It must the the PC)
- Open your file by clicking File > Open or place your file on a new document using File > Place. If you haven't already done so, make sure your file is properly set up for cutting and/or engraving by using this Adobe Illustrator tutorial.
- Click File > Print.
Print Preferences

Press setup to enter the print settings dialogue.

Click preferences to edit the setting of the laser cutter.

A vector job will cut. A raster job will the etch. A combined job will do both.

Your piece cannot exceed 24 x 12.
- When the Print window appears, make sure Epilog Engraver WinX64 Zing is selected in the printer selection box.
- Click Setup in the bottom-left corner of the print window.
- In the new Print window, make sure Epilog Engraver WinX64 Zing is selected, then click Preferences.
- When the Epilog Printing Preferences window appears, choose the job type you require:
- Choose the Raster job type if you only want to engrave your material
- Choose the Vector job type if you only want to cut your material
- Choose the Combined job type if you require both engraving AND cutting
- Refer again to the Speed/Power Settings. Find your material under either the Common or User Submitted Settings. Enter the corresponding speed/power/frequency/passes. Choose the desired resolution. (For more information on resolution click here.)
- Set the Horizontal and Vertical Piece Size (inches) to the corresponding dimensions of your file. If you are unsure of your file's dimensions you must return to Adobe Illustrator and check or change file settings. Note: The dimensions of your file must not exceed 24 inches horizontally x 12 inches vertically.
- Click OK then Print.
Locate the workspace

Locate where you want your piece to print.

You can change the location here or in your piece.
- Before you start printing, you must make sure your image will be in the correct position. If you are going to print over something else, measure the X (horizontal) and Y (vertical) position of the upper-left corner of your available space. Use the rulers on laser cutter's tray to guide you.
- Adjust the location either:
- In the document's setting (We recommend making the doc the tray size for convenience)
- Adjust the Placement in the print options X and Y
- Click Print.
Start the Job

Press Go!
- Close the lid of the laser cutter.
- Ensure that the Control Pad of the laser cutter displays the name of your file. (You may need to press Job to return to the job menu)
- If the name is displayed, press Go.
After the job has completed, wait about 30 seconds for the exhaust to clear from inside the chamber before opening the top door to retrieve your finished piece.
WARNING: If you have cut pieces, do not move your work piece yet. Tap a few of the pieces without lifting the whole piece. If it has cut all the way through they should move a little. If they were not cut all the way through do not move the workpiece, close the lid and cut again.
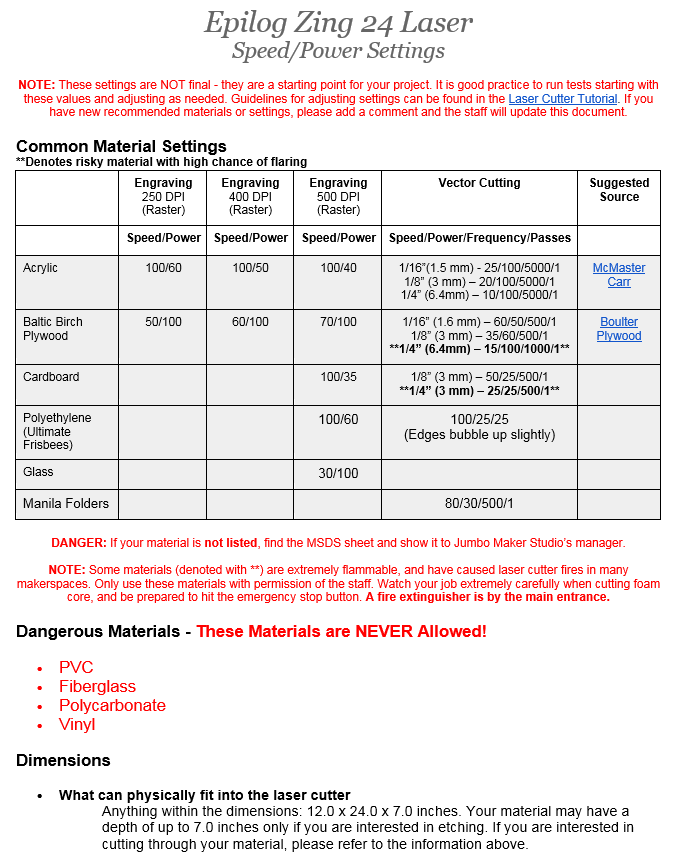
Settings and Materials
| Raster Settings | 250 DPI Speed/Power |
400 DPI Speed/Power |
500 DPI Speed/Power |
|---|---|---|---|
| Acrylic | 100/60 | 100/50 | 100/40 |
| Baltic Birch Plywood | 50/100 | 60/100 | 70/100 |
| Polyurethane (frisbees) | 100/60 | ||
| Glass | 30/100 |
| Vector Settings | Thickness | Speed | Power | Frequency | Passes |
|---|---|---|---|---|---|
| Acrylic | 1/16" | 25 | 100 | 5000 | 1 |
| 1/8" | 20 | 100 | 5000 | 1 | |
| Baltic Birch Plywood | 1/16" | 60 | 50 | 500 | 1 |
| 1/8" | 35 | 60 | 500 | 1 | |
| 1/4"* | 15 | 100 | 5000 | 1 | |
| Polyurethane (frisbees) | 100 | 25 | 25 | 1 | 1 |
| Manila folder | 80 | 30 | 500 | 1 | 1 |
* NOTE: These materials are extremely flammable and have caused fires in other makerspaces. Only use these with permission from the staff.
Below are the manufacturer's recommendations for the laser cutter. They should be a starting point. Test cuts and etches are always good before a final product. A small flame may occur with some materials.