
LEGO EV3
This handbook covers the basics of robot construction, programming, computer vision, event-based programming, artificial intelligence, and elementary controls using the LEGO MINDSTORMS EV3 Robotics kit and LabVIEW.
Hardware
Introduction
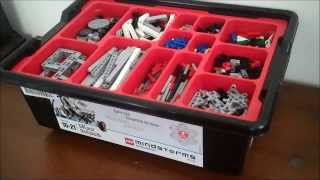
Overview of the LEGO MINDSTORMS EV3 Kit

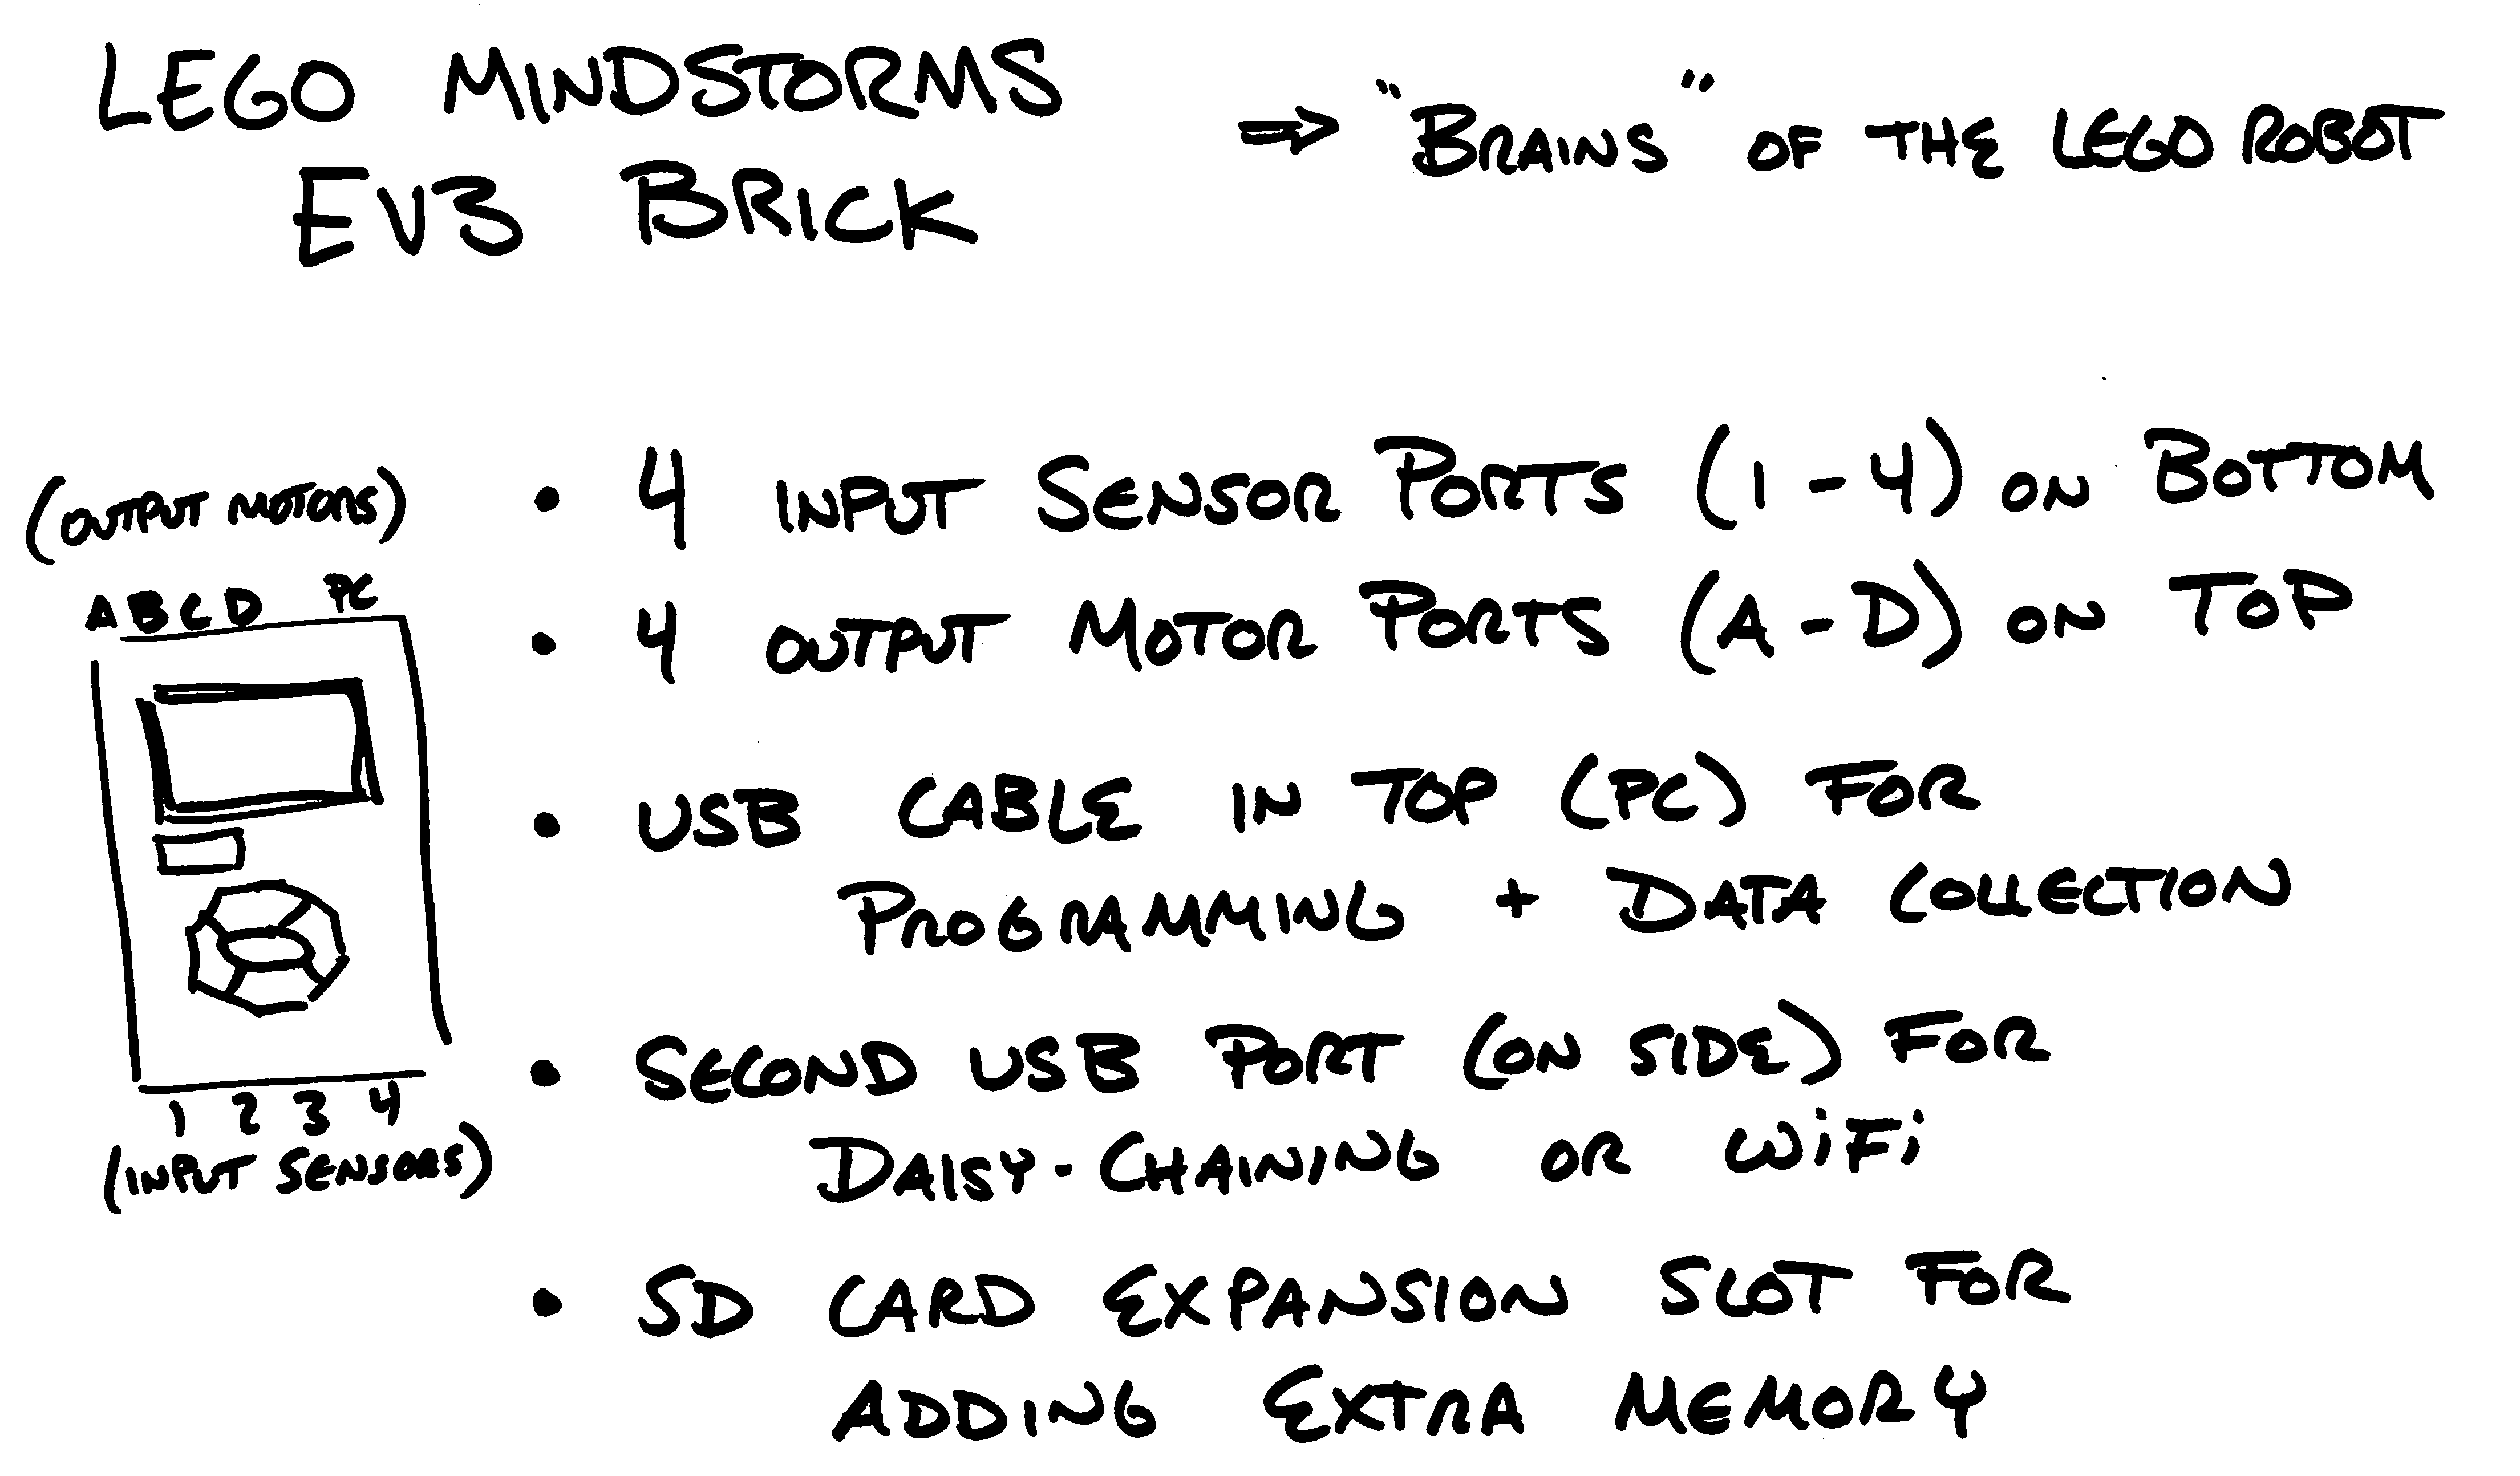
Overview of the EV3 Brick
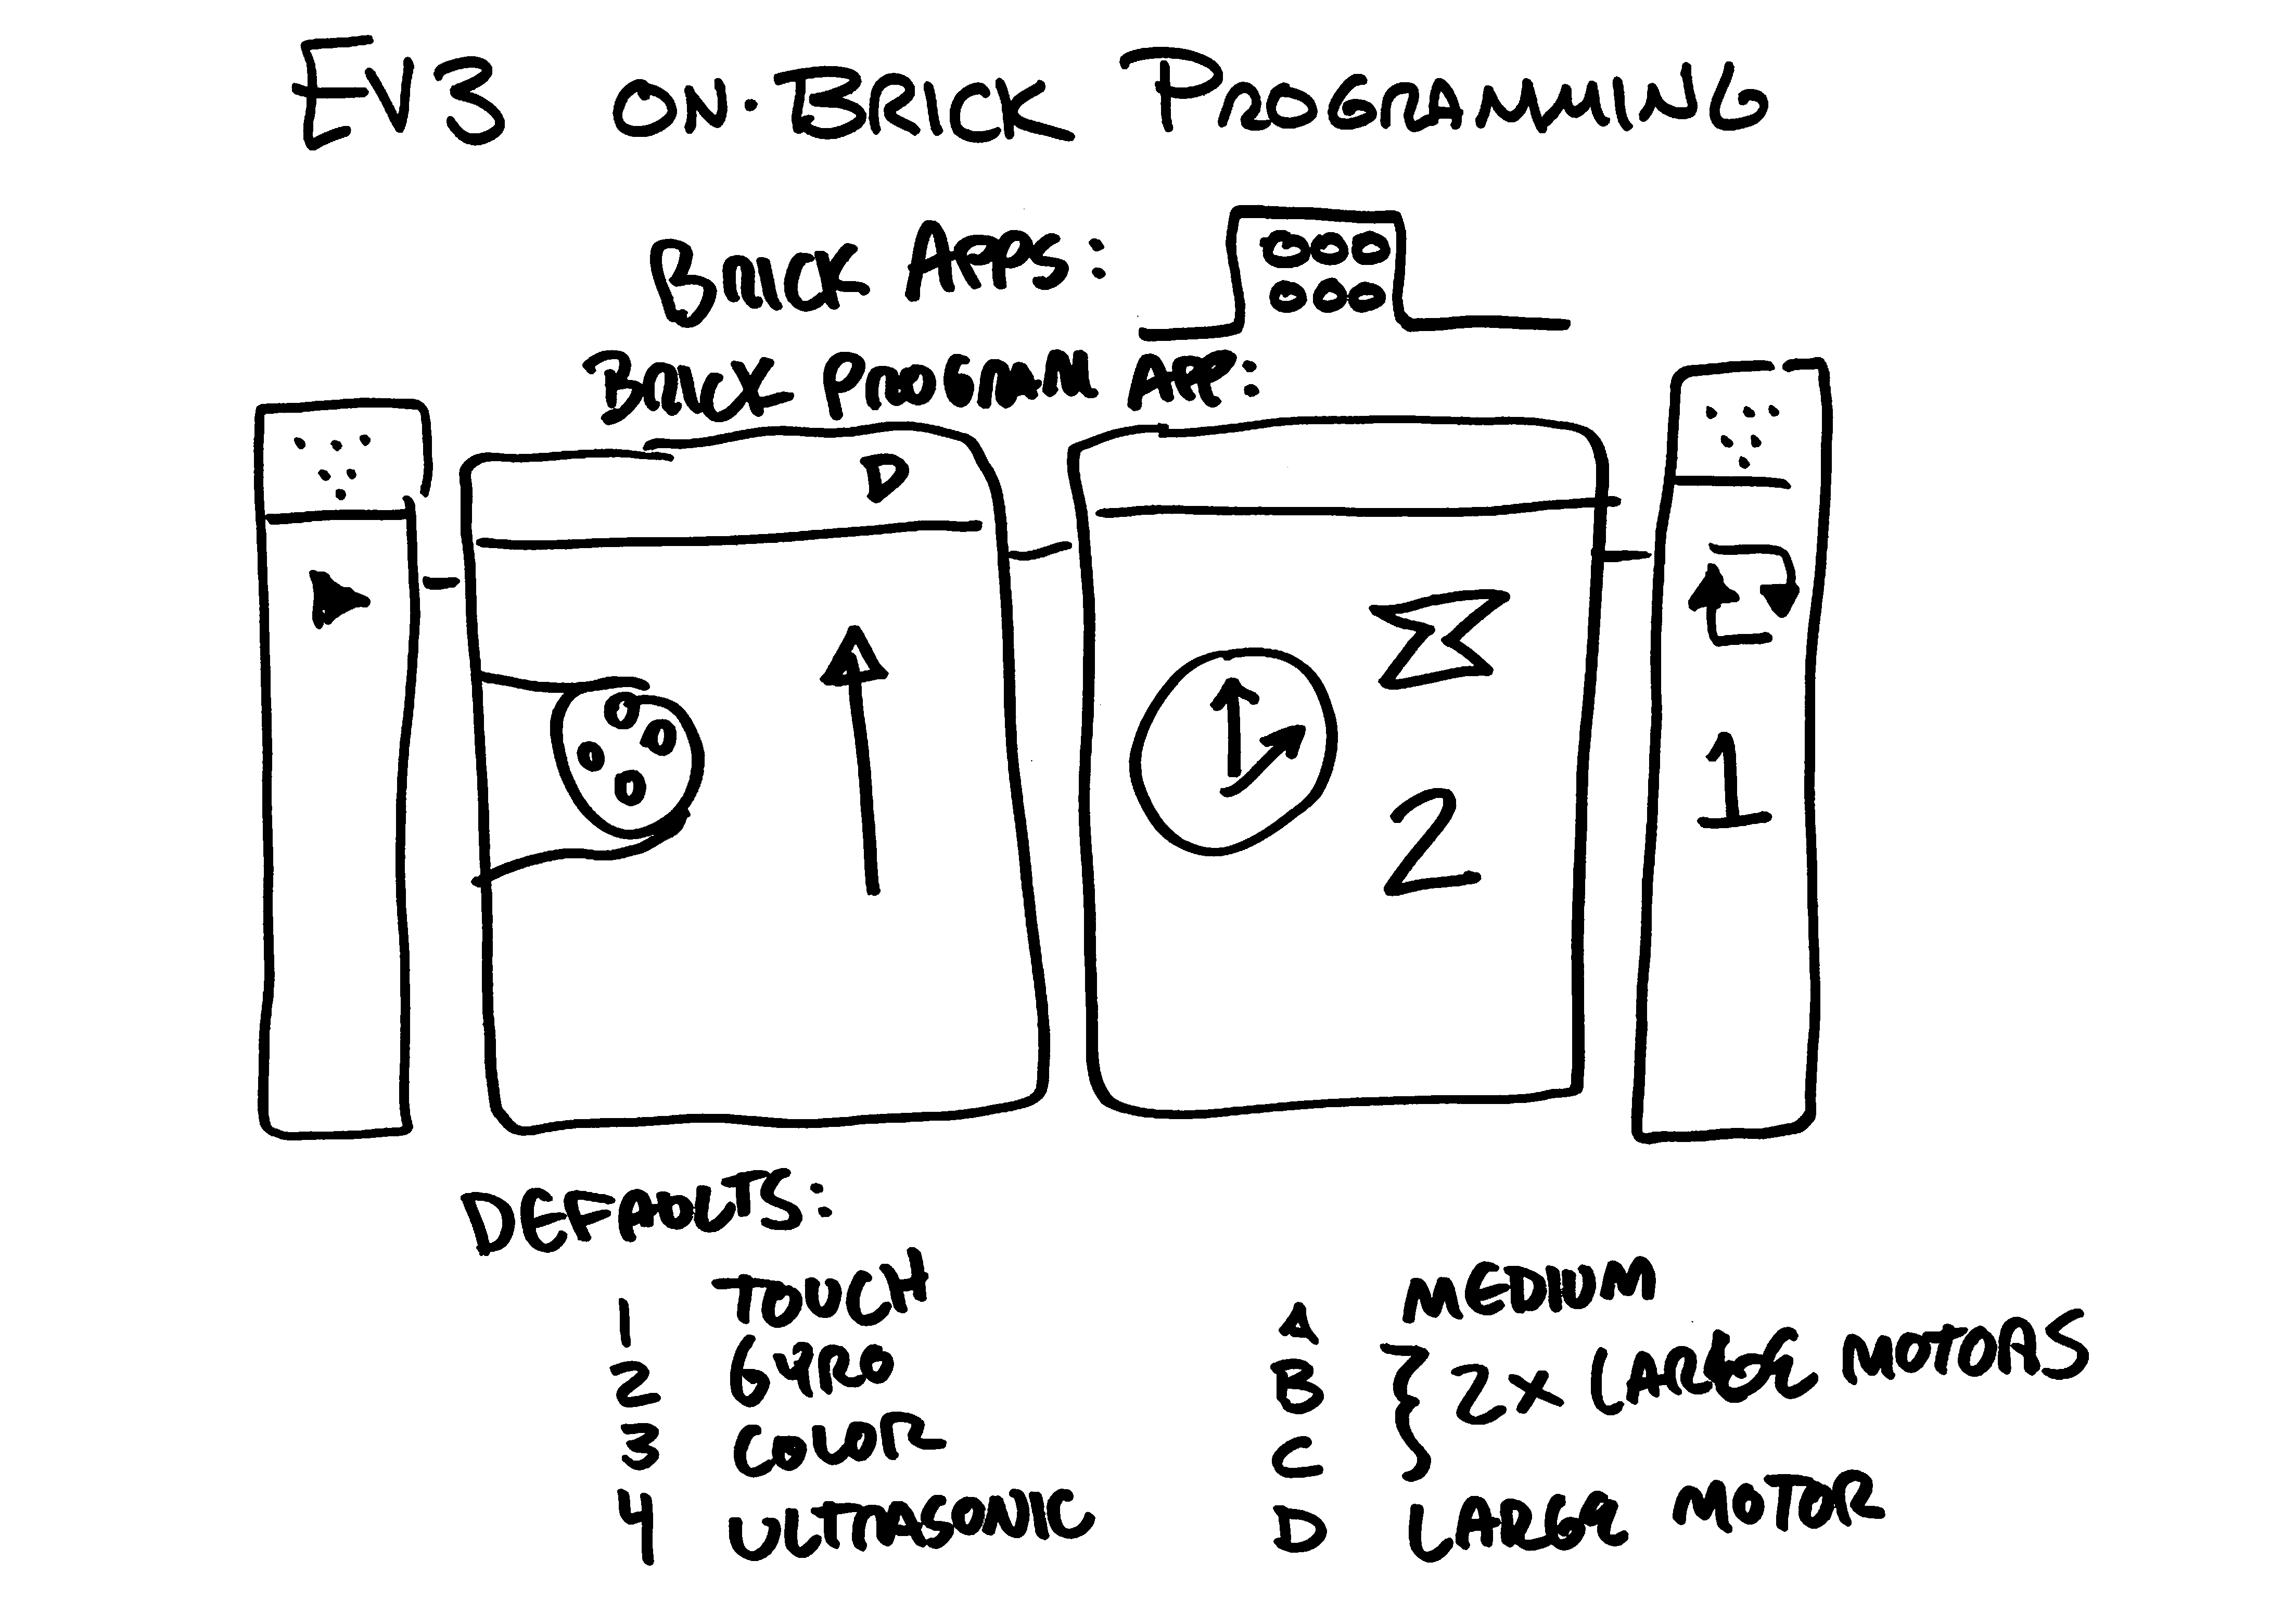
How to do On Brick Programming
Building
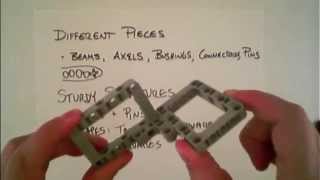
Different Pieces


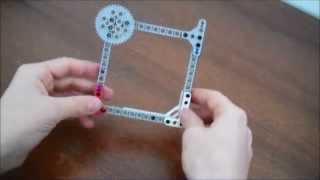
Sturdy Structures
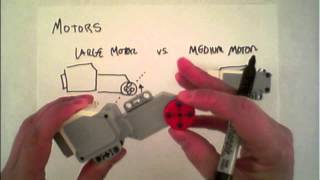
Motors

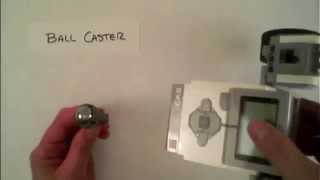
Ball Caster
Tracks

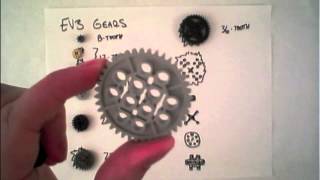
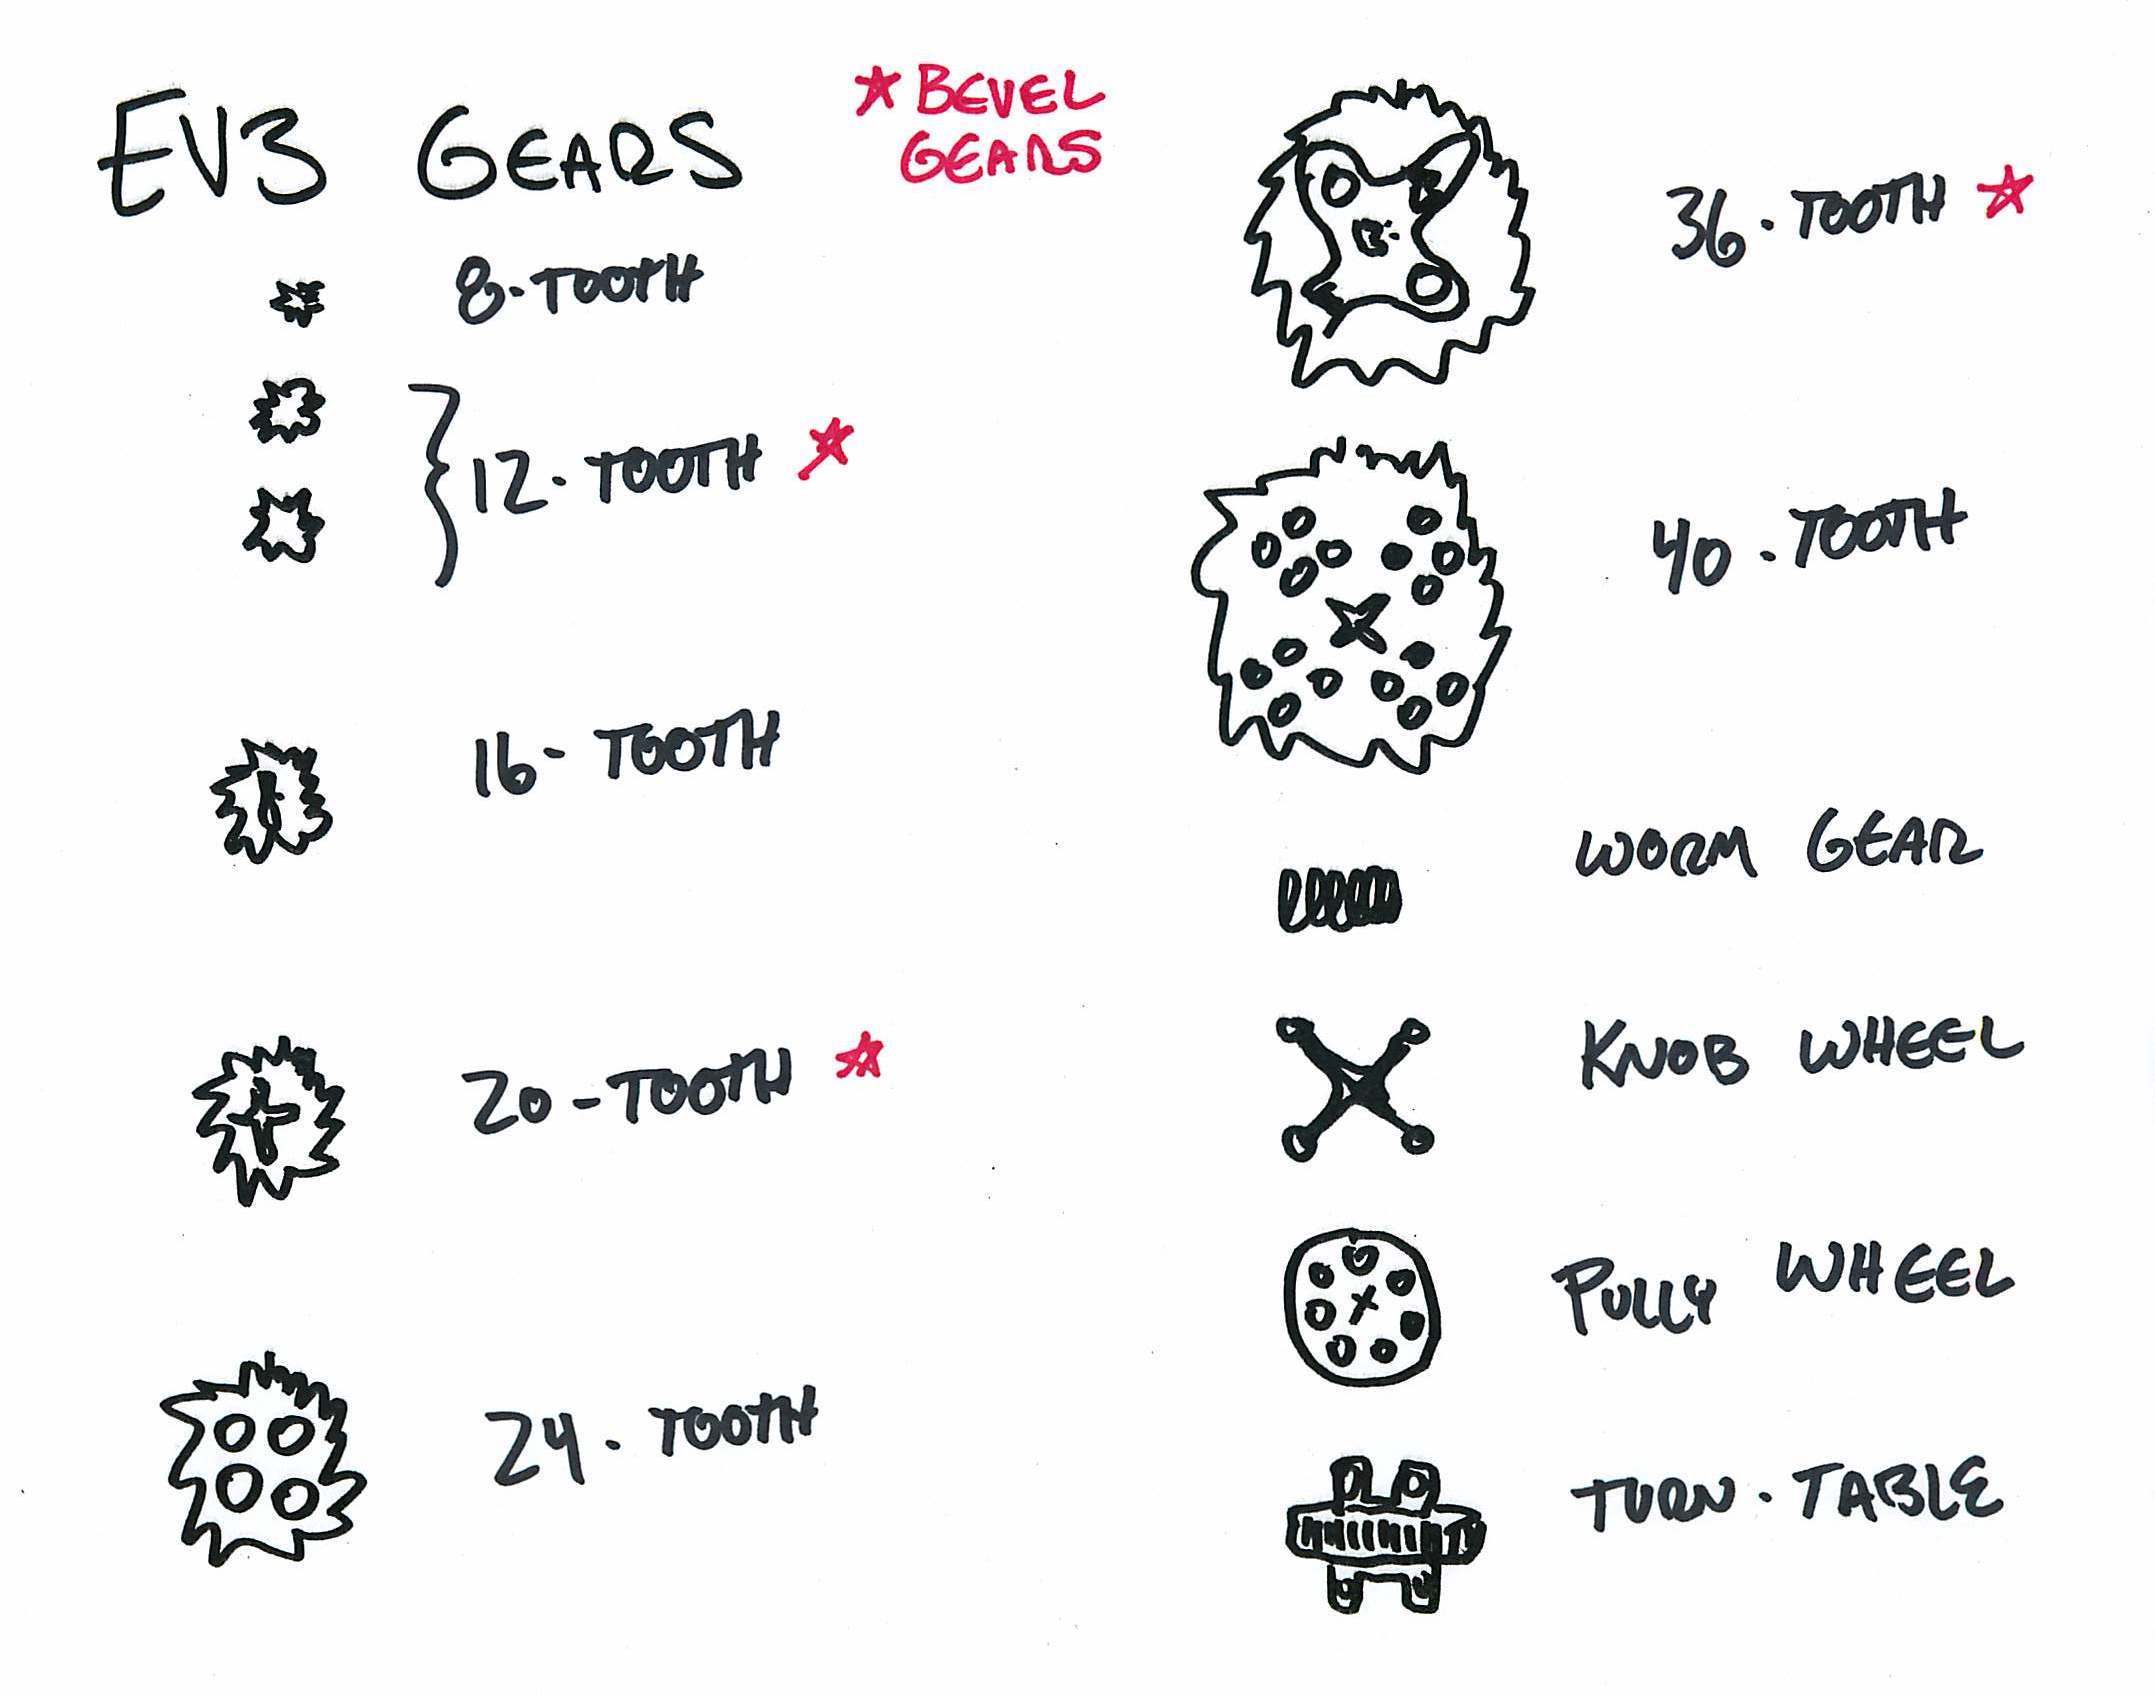
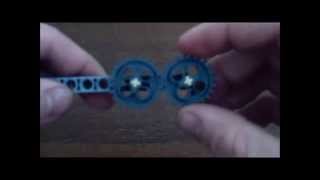
Gears
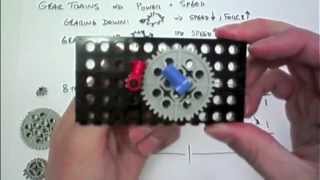
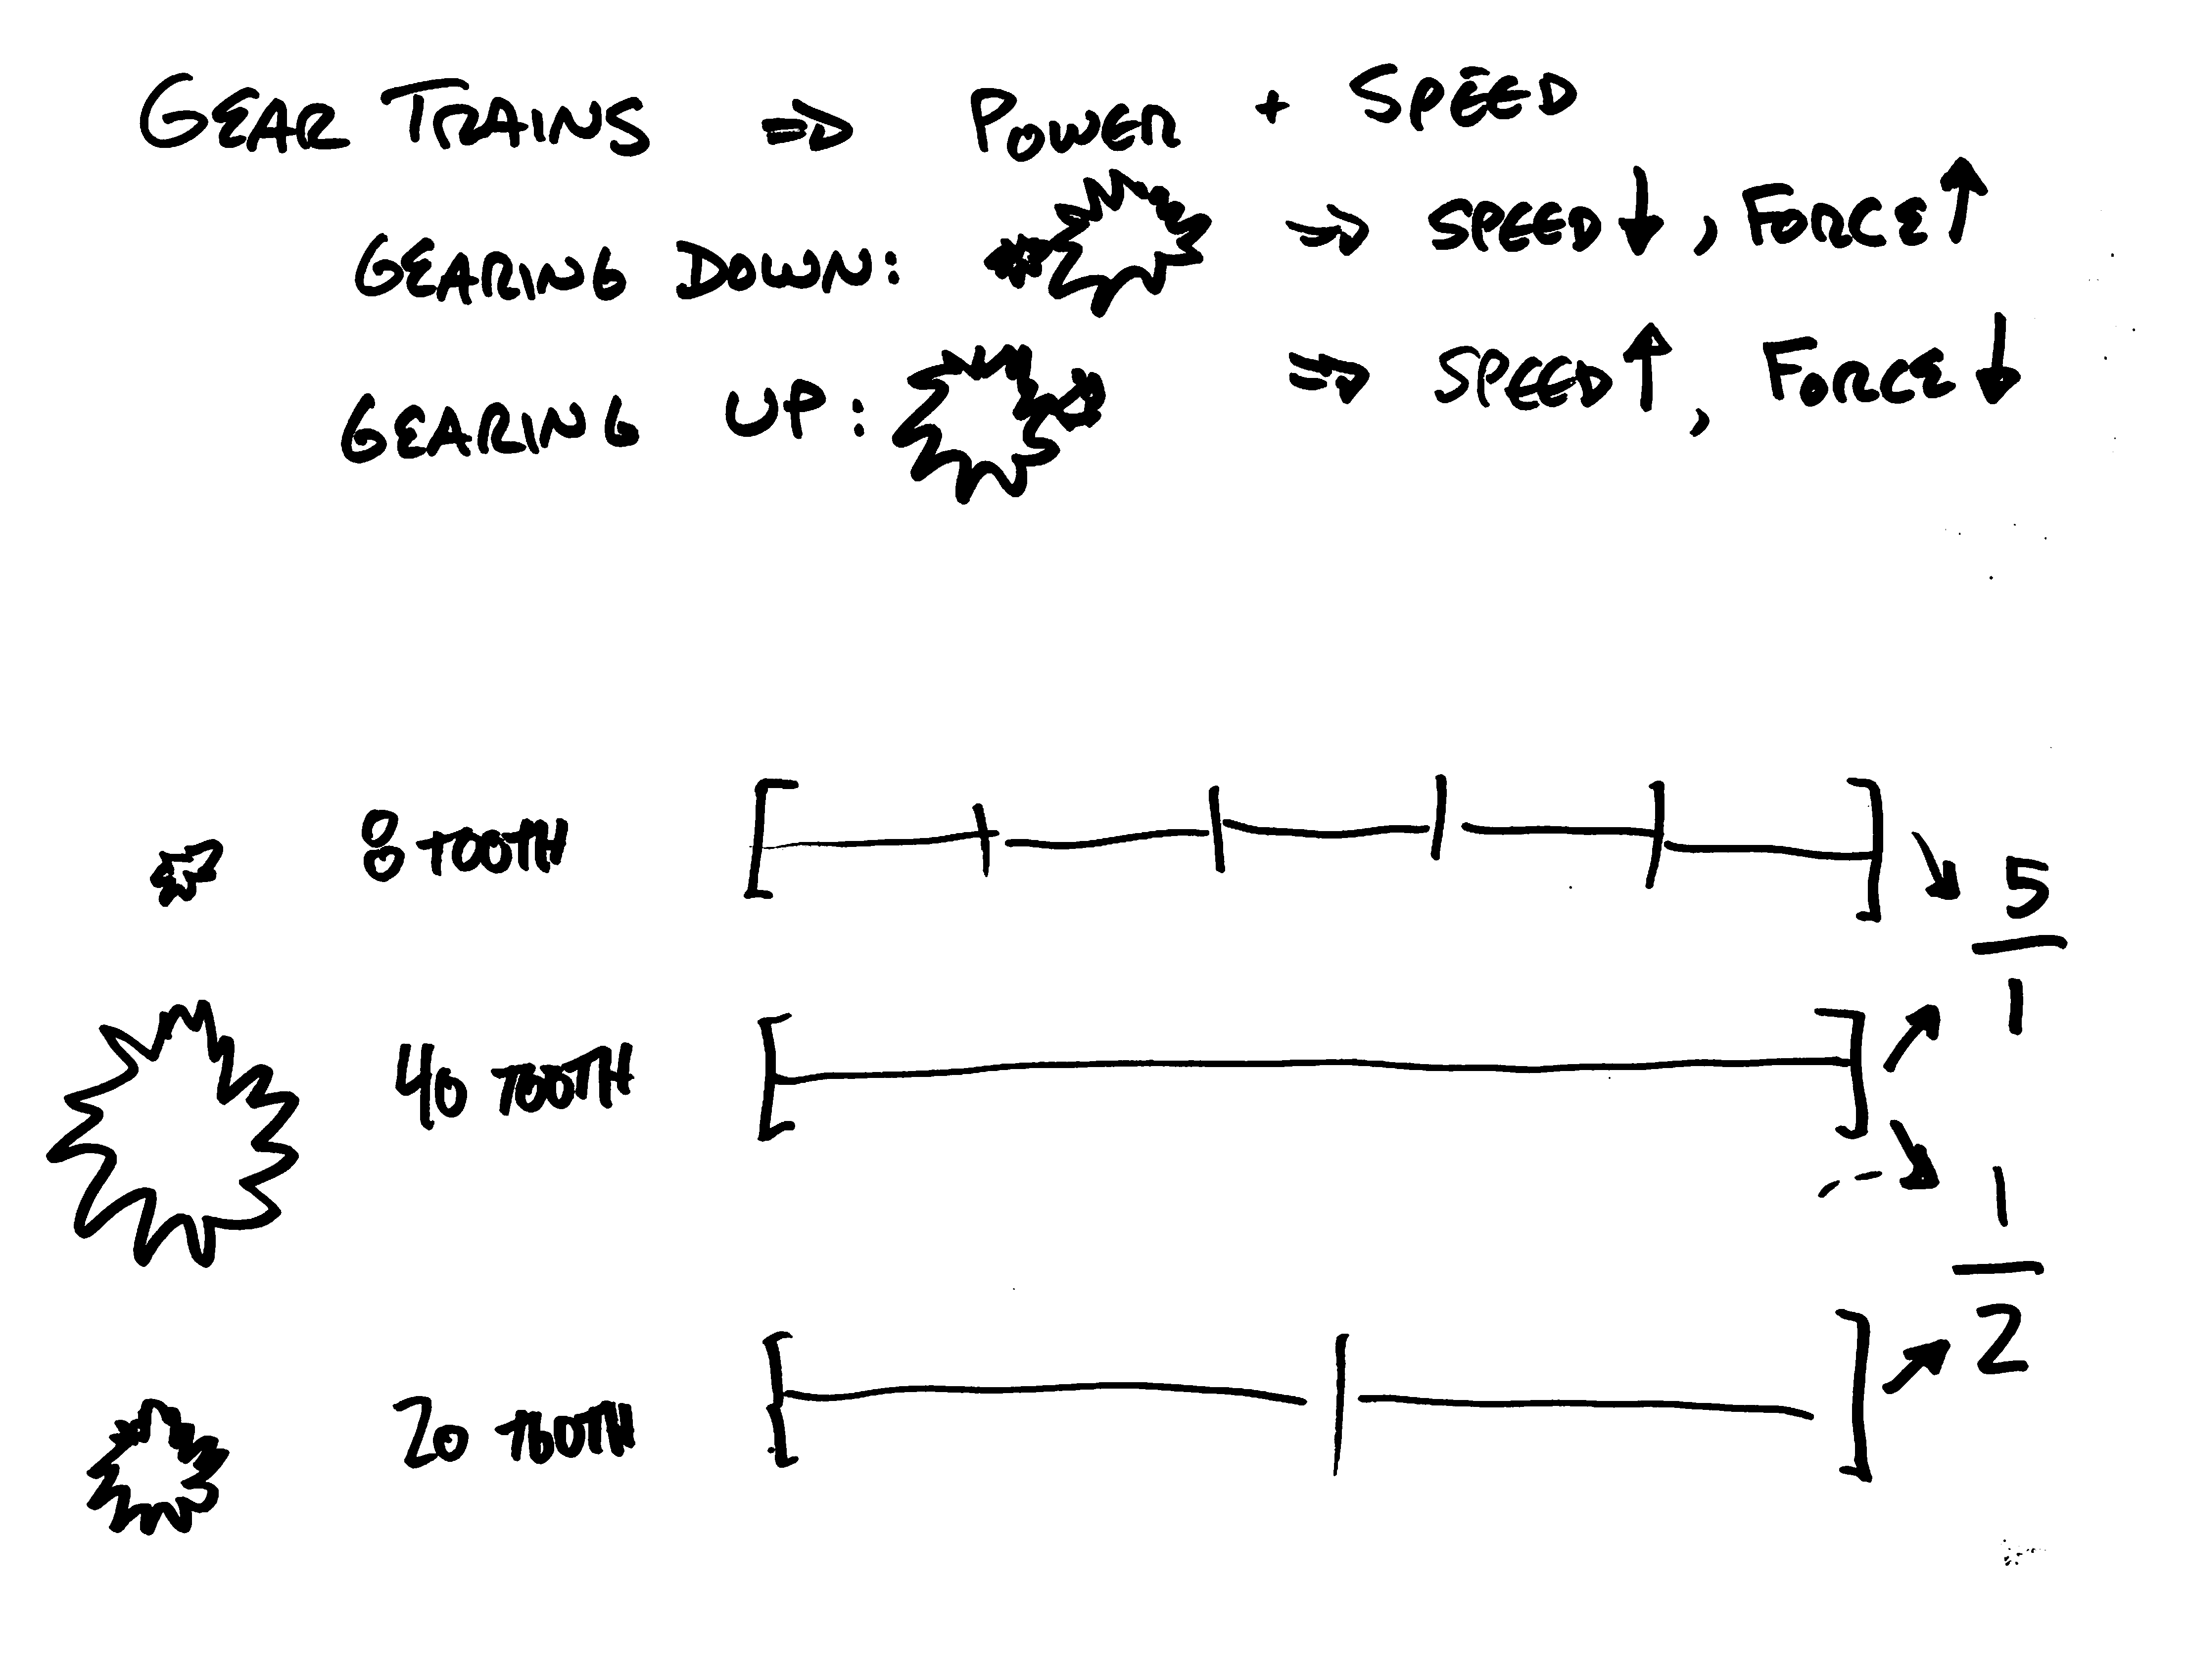
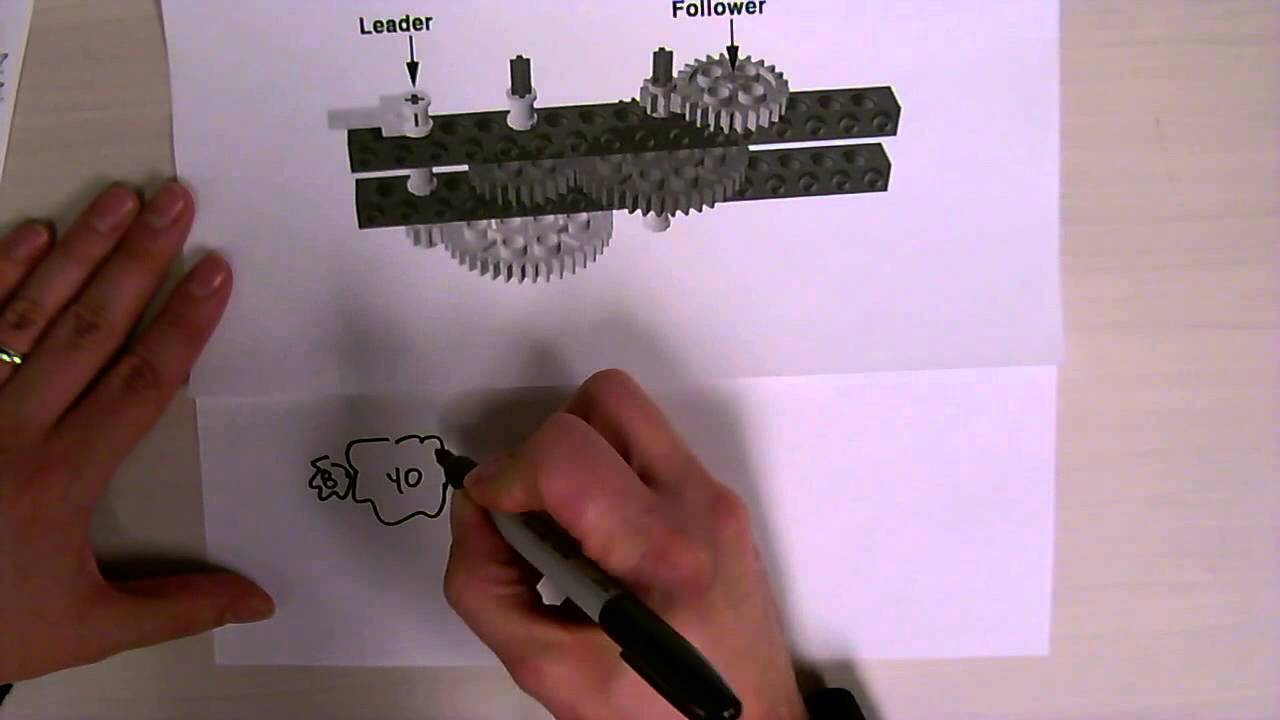
Gear Overview
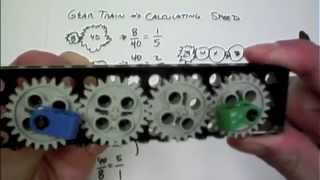
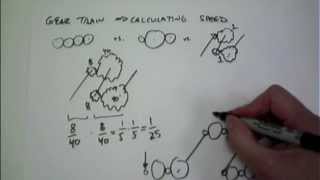
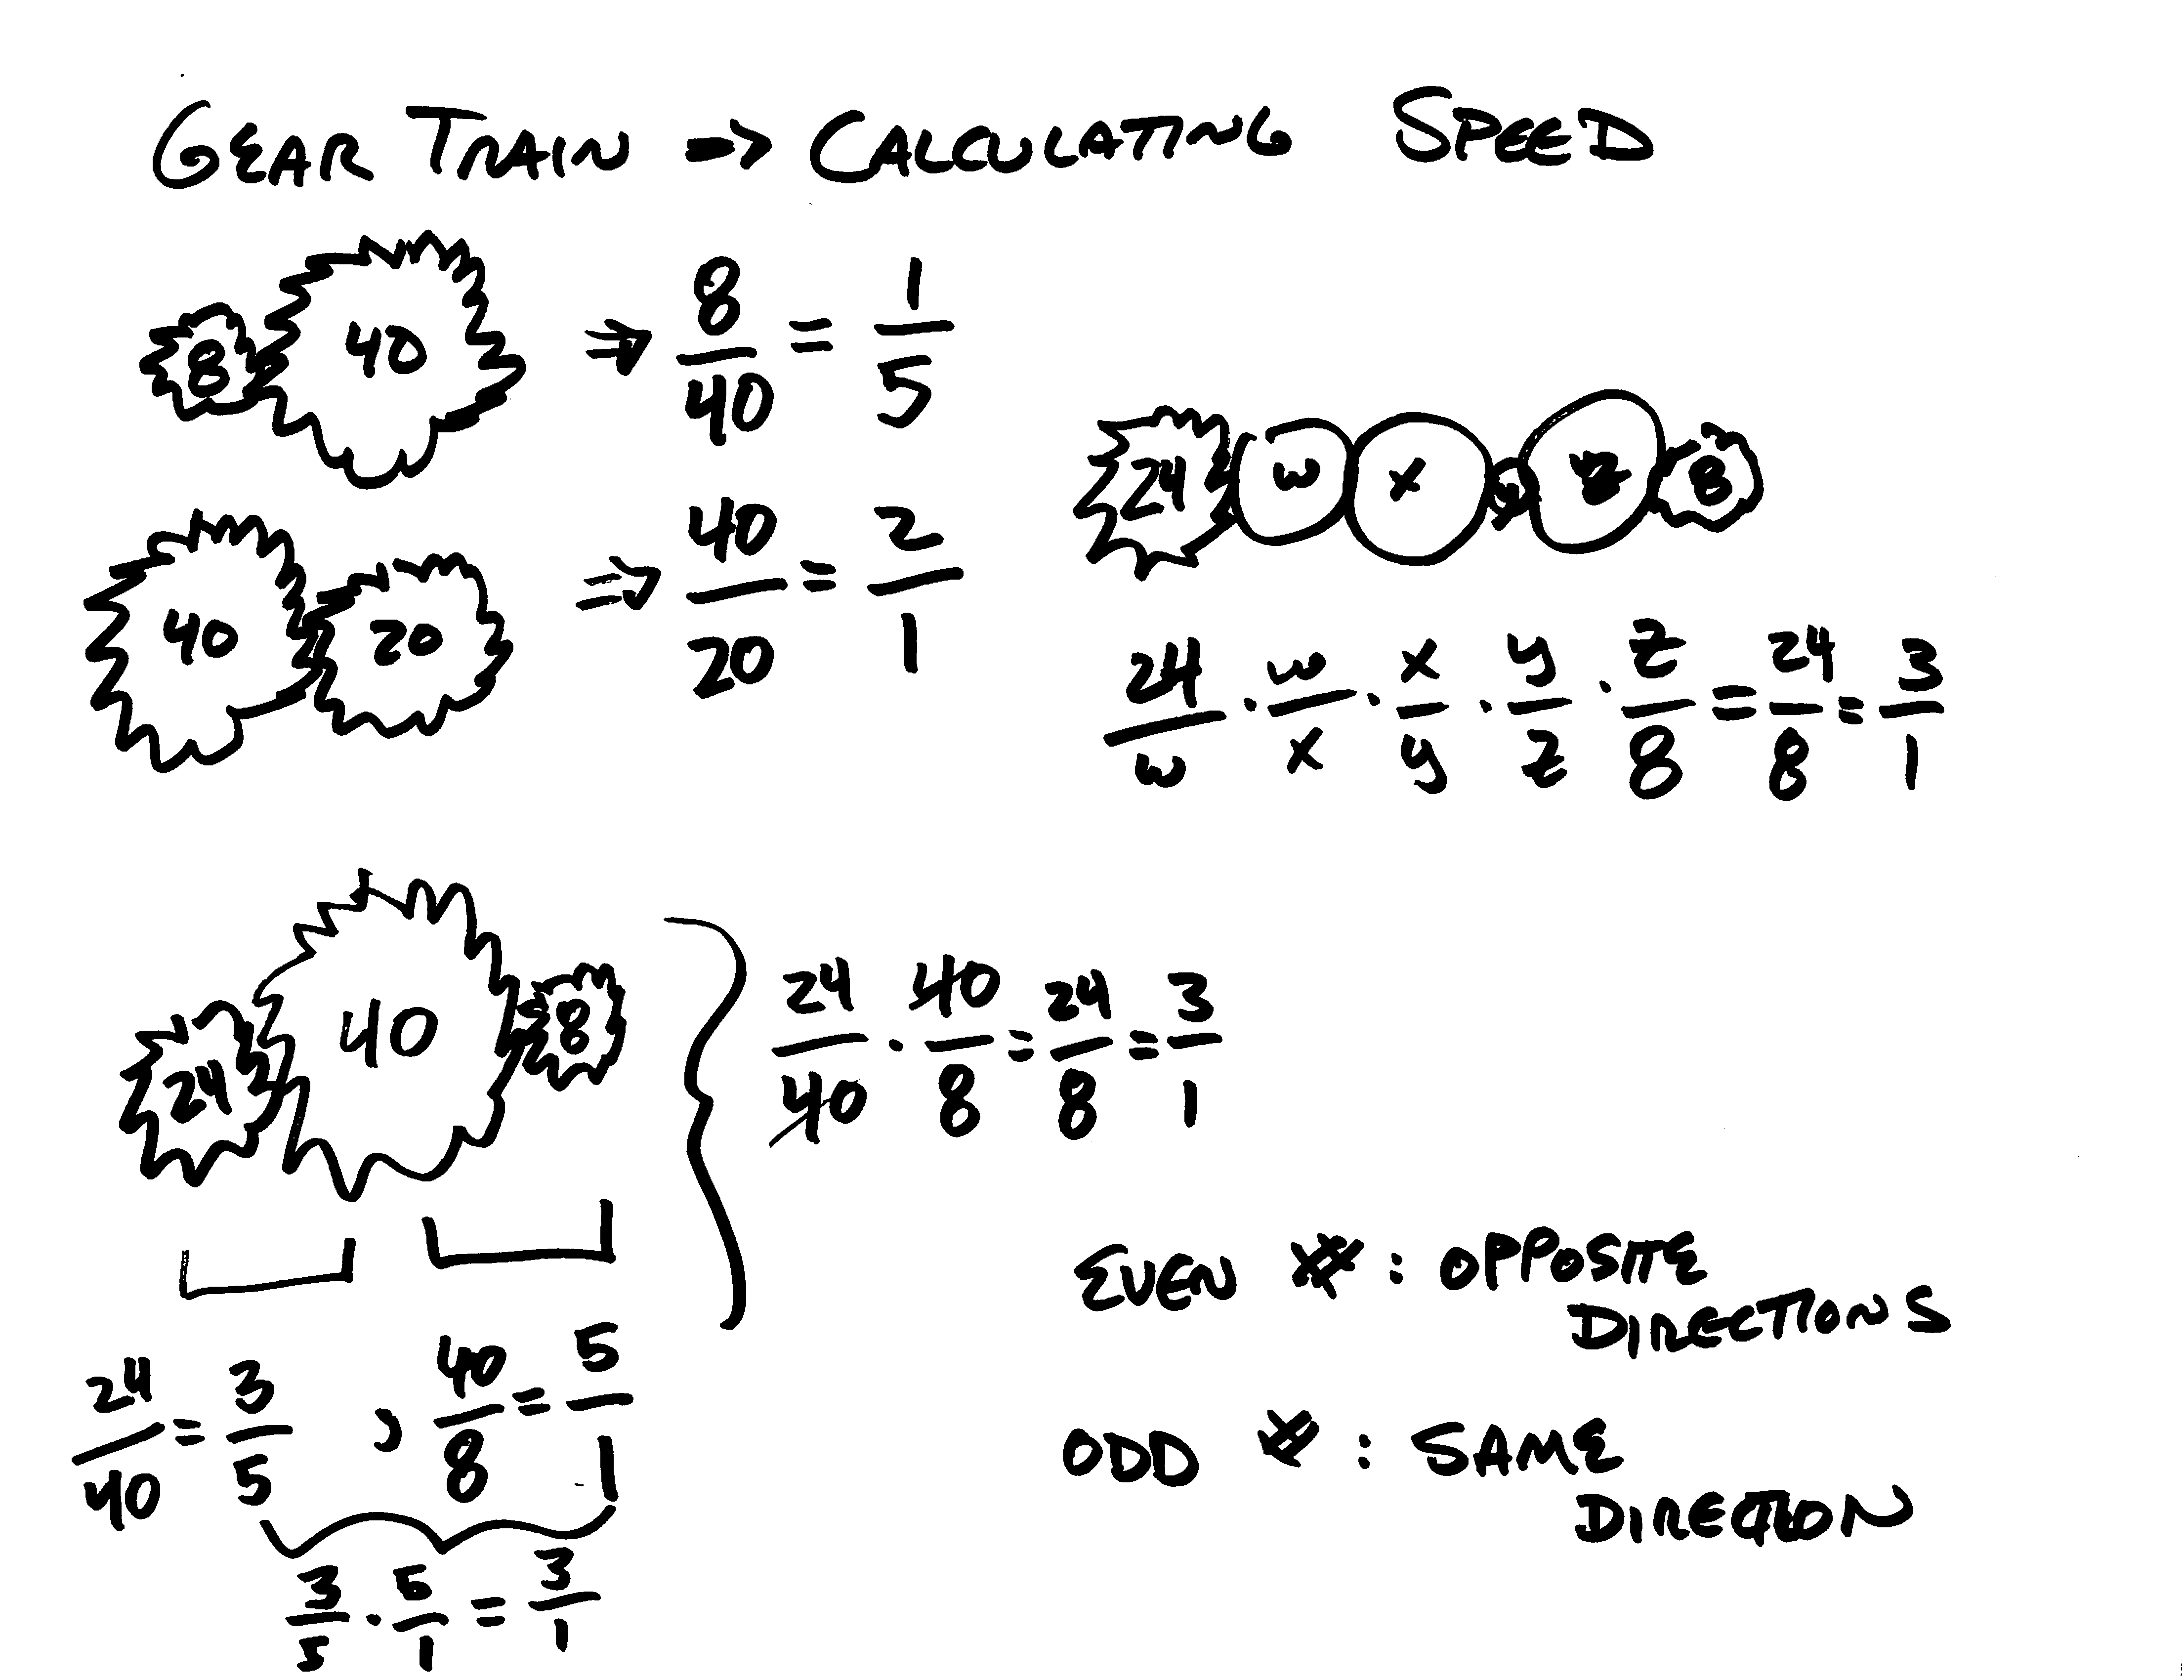
Calculating Gear Trains

Bevel Gears

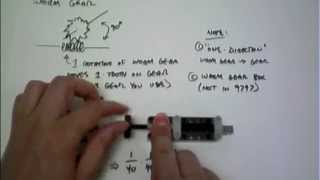
Worm Gear

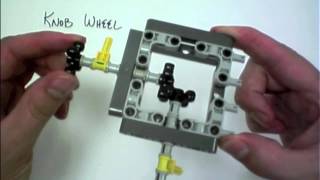
Knob Wheel
Turntable Gear

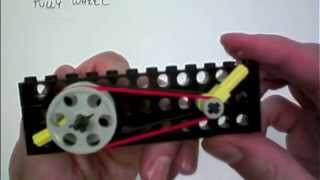
Pulley Wheel
Sensors
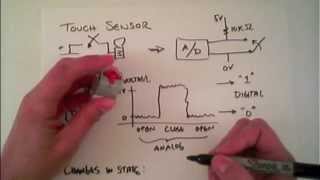
EV3 Touch Sensor
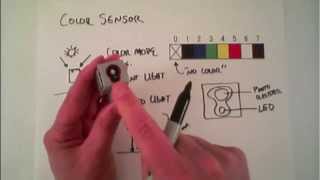
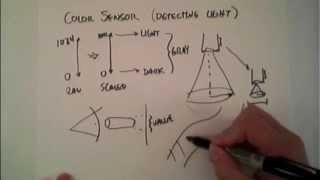
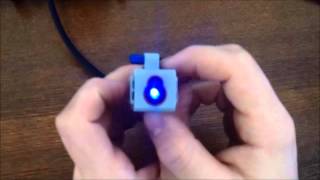
EV3 Color Sensor
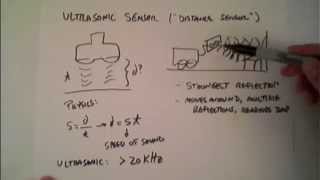
EV3 Ultrasonic "Distance" Sensor
EV3 Gyro Sensor

LabVIEW Basics
Introduction
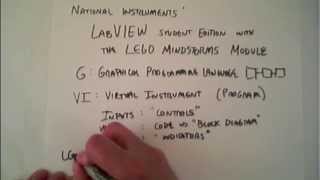
Intro to LabVIEW
Be sure to install the LEGO MINDSTORMS module in addition to LabVIEW.
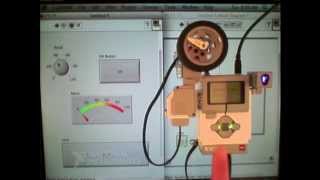
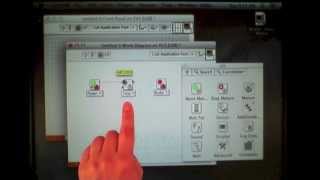
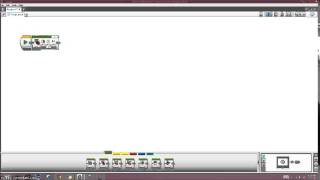
Front Panel and Block Diagram
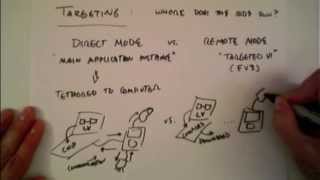
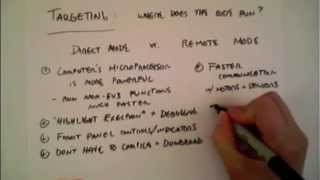
Targeting in LabVIEW
Direct mode vs remote mode.
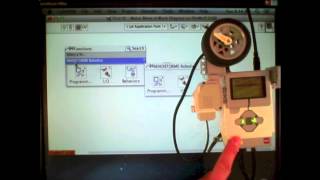
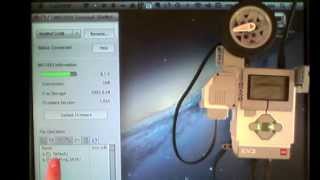
The Terminal
Used to access and update the EV3.
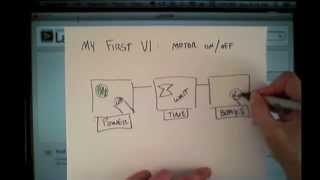
Making your first VI
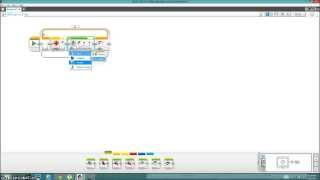
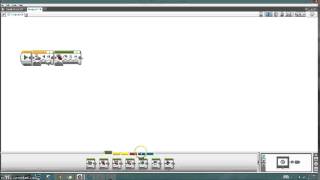
First VI
Modifying First VI
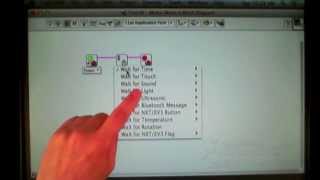
Wait for Sensor
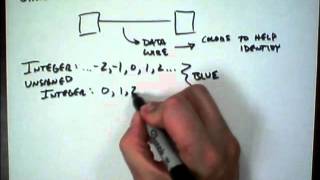
LabVIEW Data Types
Note: these videos were created for LabVIEW 2012 and the MINDSTORMS Module for NXT
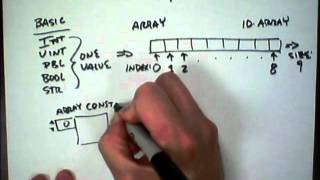
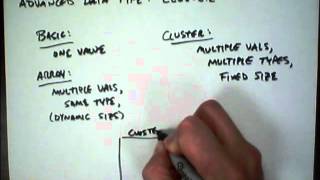
Basic Data Types
Int, Unsigned Int, Double, Boolean, String
Array Data Type
Cluster Data Type
LabVIEW Structures
Overview
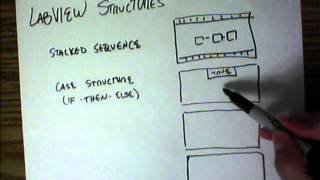
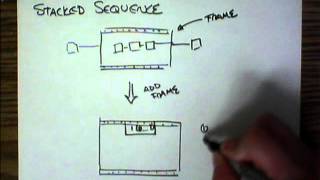
Stacked Sequence
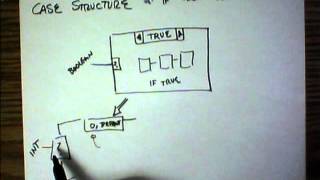
Case Structure
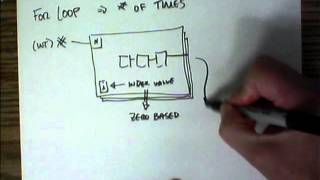
For Loop
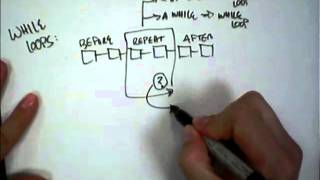
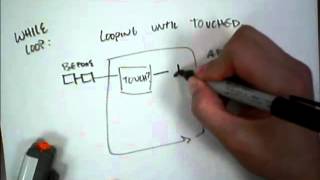
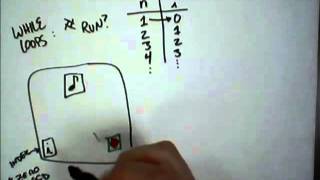
While Loop

Input Tunnel Mode
Output Tunnel Mode
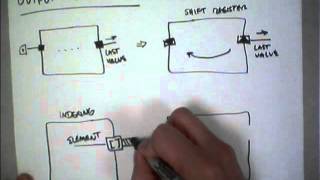
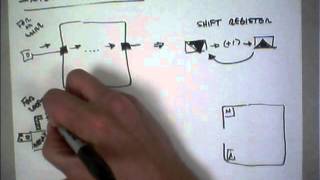
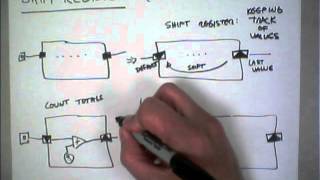
Shift Registers
LabVIEW Tips and Tricks
Overview
Here are some general ideas for generating good, readable code.

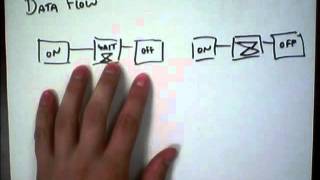
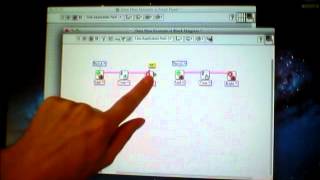
Data Flow
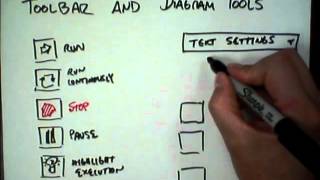
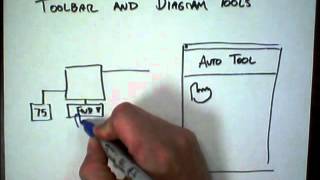
Toolbar and Diagram Tools
Code Layout
Wiring Tricks
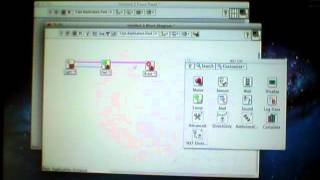
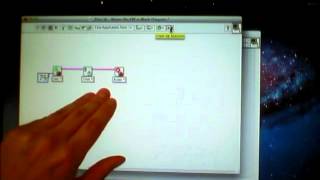
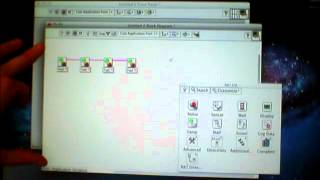
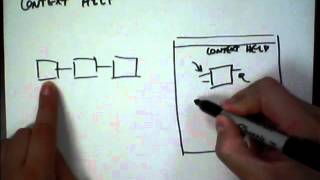
Context Help
Run Button and Debugging
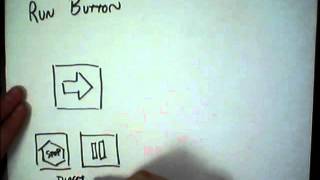

Highlight Execution
The Highlight Execution feature is helpful for tracing the execution of your program.

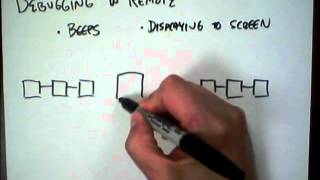
Beeps and Displays (Debugging)
Having the NXT make beeps or display to the screen can be helpful for debugging, especially in Remote Mode.
How Do I?
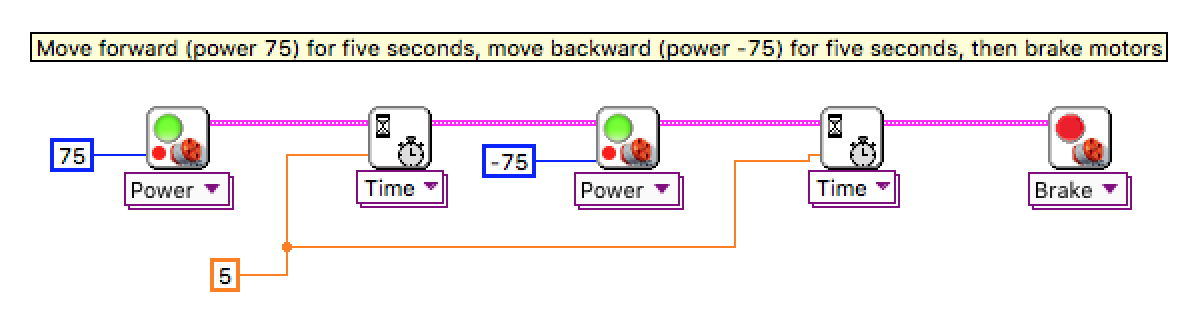
Motor forward and backward
How to move a motor forward 5 seconds and backward 5 seconds.
Motor Direction via Touch Sensor
Change the motor direction via the Touch Sensor. That is: every time you press the touch sensor, it changes the motor direction.
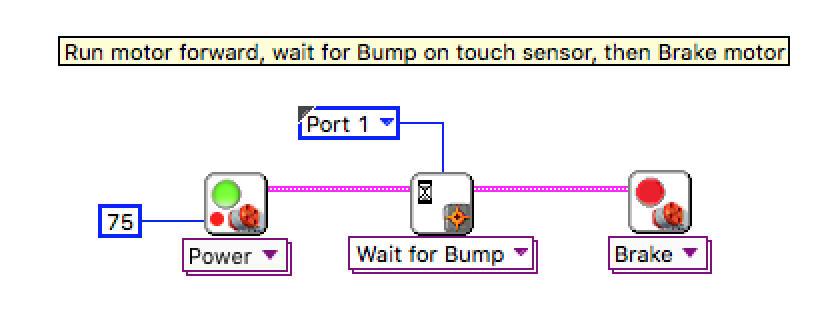
This (version 1) runs the motor until the Touch Sensor is pressed. Then stops the motor.
Motor Direction via Touch v1.vi
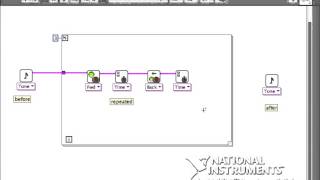
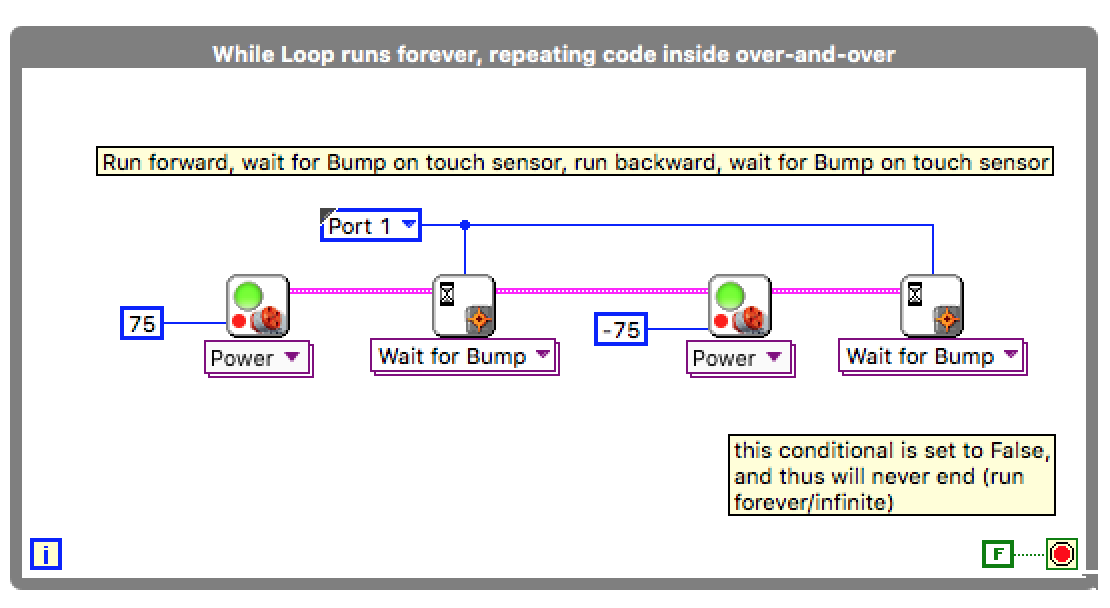
This (version 2) runs the motor forward, waits for touch, then backward, waits for touch. If you want to do this several times in a row, you could copy-and-paste this second of code over and over. (But there is a better way, using loops; see version 3.)
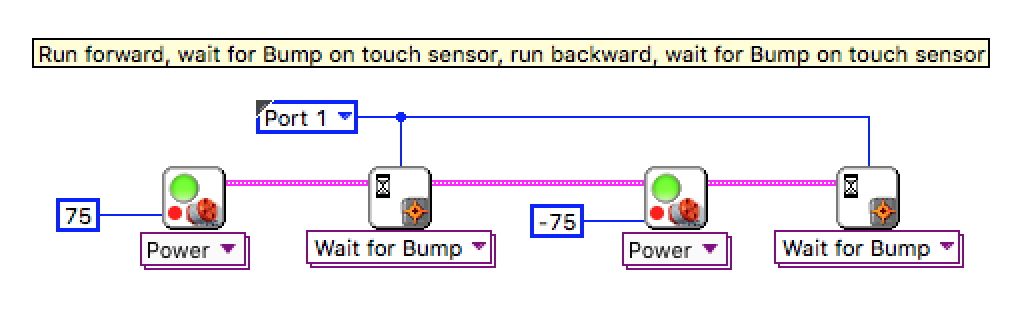
Motor Direction via Touch v2.vi
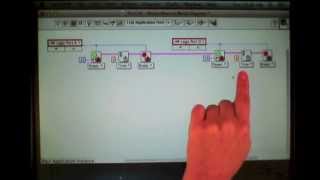
This (version 3) does the forward/wait/backward/wait sequence in a While Loop, and runs forever.
Motor Direction via Touch v3.vi
This (version 4) accomplishes the same as version 3, but with only ONE motor command. Each time the loop executes (each time the button is pressed), the loop counter is used to determine the direction. If it is even, the motor goes forward; if it is odd, the motor goes backward.
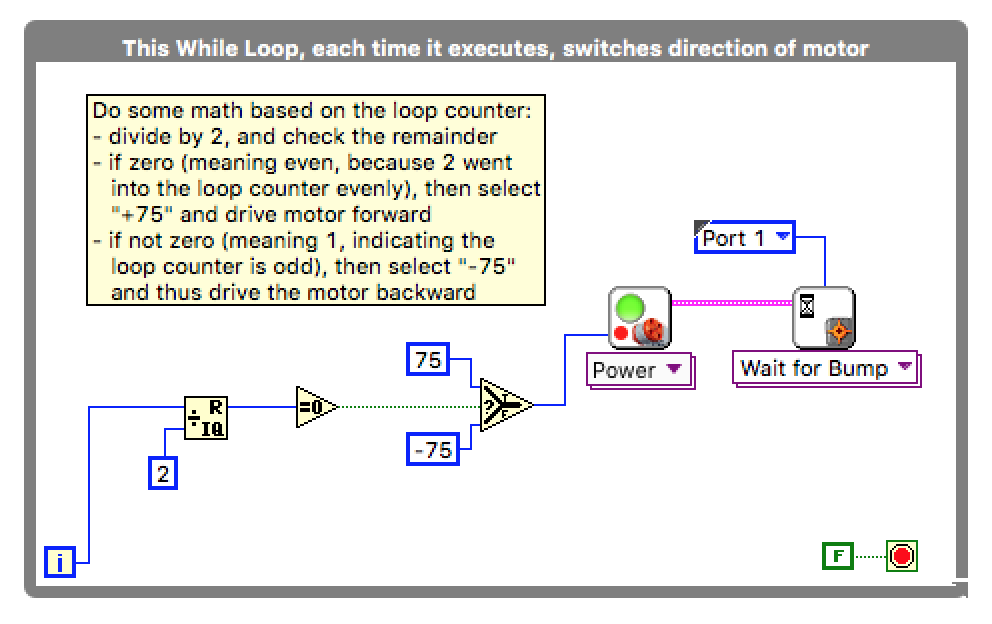
Motor Direction via Touch v4.vi
Motor Speed via Light Sensor
How to control the speed of a motor based on the value read on the light sensor.
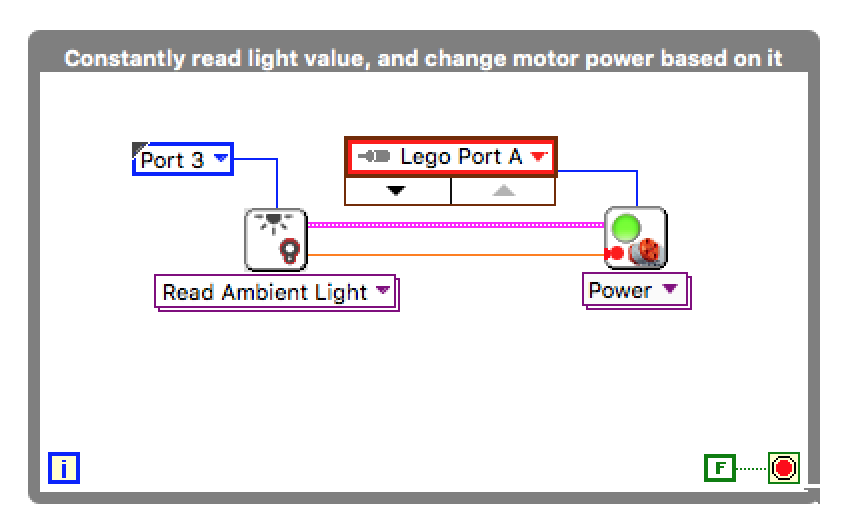
This (Version 1) reads the ambient light in the room and drives the power of the motor. It happens continuously and instantly. Covering up the light sensor (making it "go to zero") will stop the motor; putting the light sensor up to a bright light will drive the motor forward really fast.
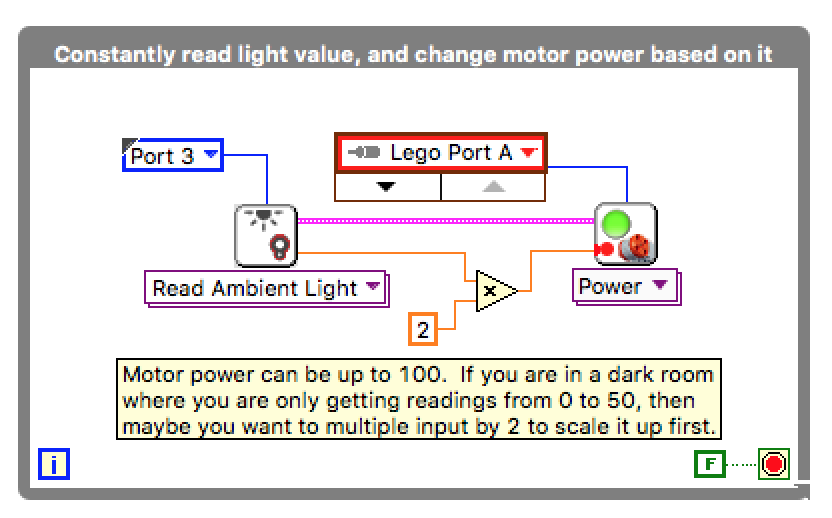
This (version 2) multiplies the value of the light by 2. This is helpful if you are in a dark room where the values read by the light sensor range from 0 (dark) to ~50 (just "kinda light"). This then takes advantage of the full forward range of the motor (0 to 100) by multiplying the light sensor value by two prior to setting the motor speed.
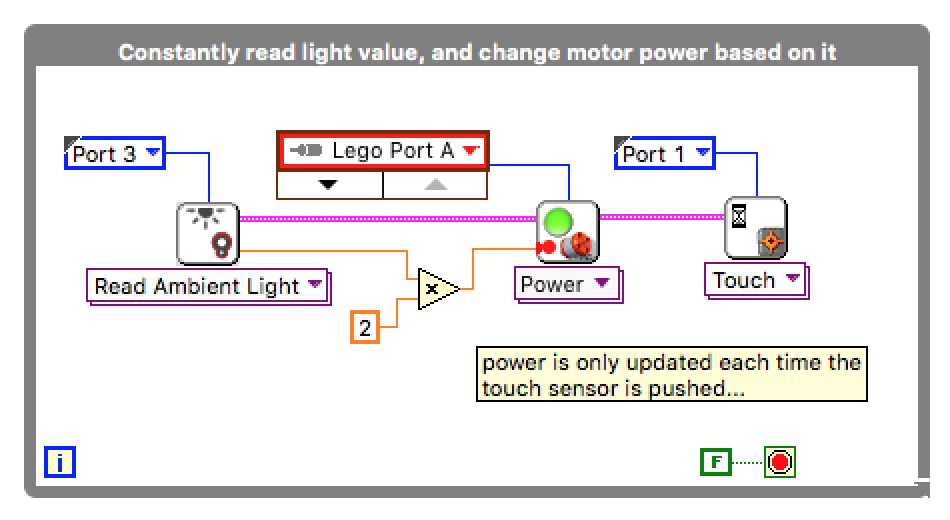
The prior examples continuously/instantly updated the motor speed. This ONLY updates the motor speed with the new light value when the touch sensor is bumped. Note: the bumped function could go at the beginning of the code sequence or at the end (as it currently is). The only difference is the initial case (first time through the loop).
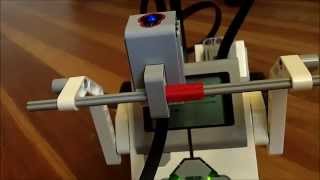
Motor Speed via Motor Rotation
Drive the speed of one motor by the amount of rotation of a second.
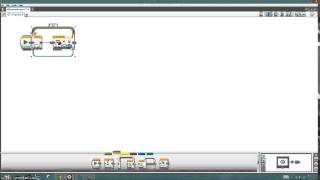
This (version 1) directly inputs the value of the B motor into the power of the A motor. The "reset rotation" at the beginning of the code, before the start of the While Loop, just ensures when the program starts it is set at zero.

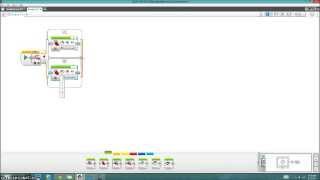
In the prior example (version 1), it is very easy to "exceed" the range of motor powers. So this code "divides the rotation by 10" before inputting it into the drive motor function. In this way, this version (version 2) will read the motor from -1000 degrees to 1000 degrees (over 2.5 full turns in either direction).

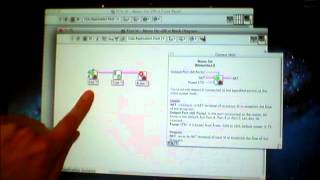
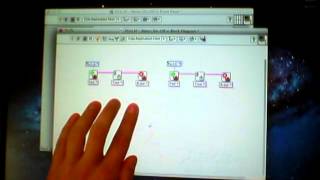
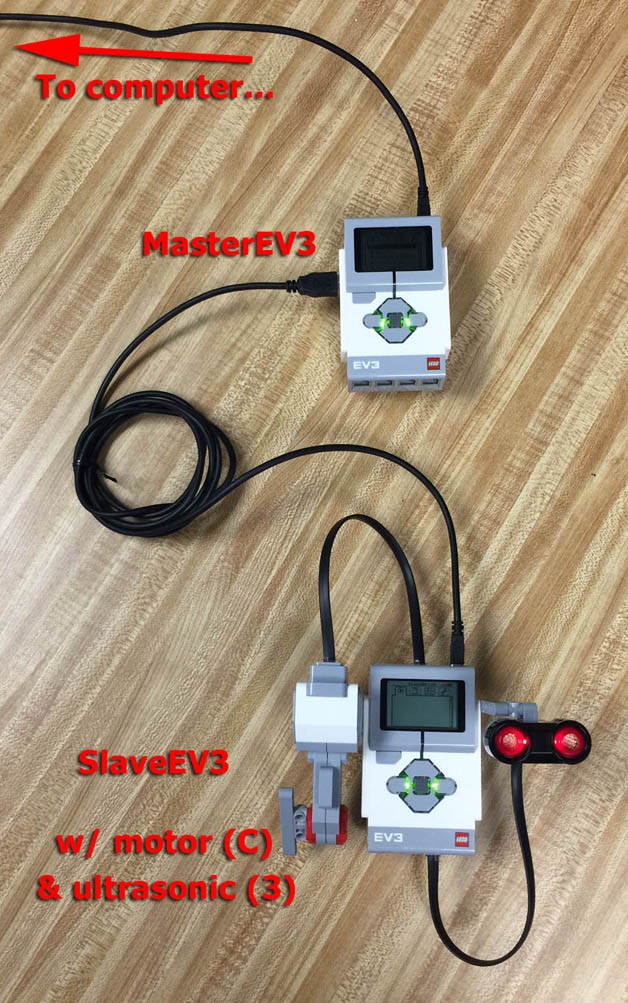
Daisy-chaining Multiple EV3s
You can create up to four linked EV3s (a "Master" and three layers of "Slaves"). Refer tutorial attached for instructions.
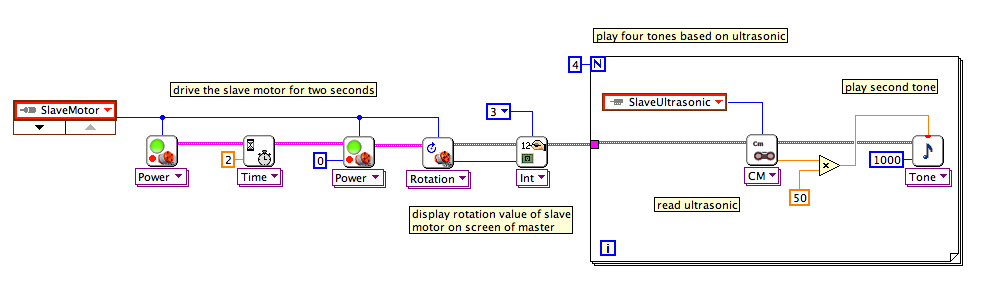
To access sensor values on a sensor connected to a Slave, you need to use the "Sensor Port" constant. It is not possible to do this by simply "right-click > create constant" on the Read Sensor function. Below is an example configuration, program, and indication of where the Sensor Port constant is located (IO >> Complete >> Sensors >> Sensor Port). This will then use the configuration you previously specified.
Daisychaining Sample VI file.vi


Playing Sound in LabVIEW
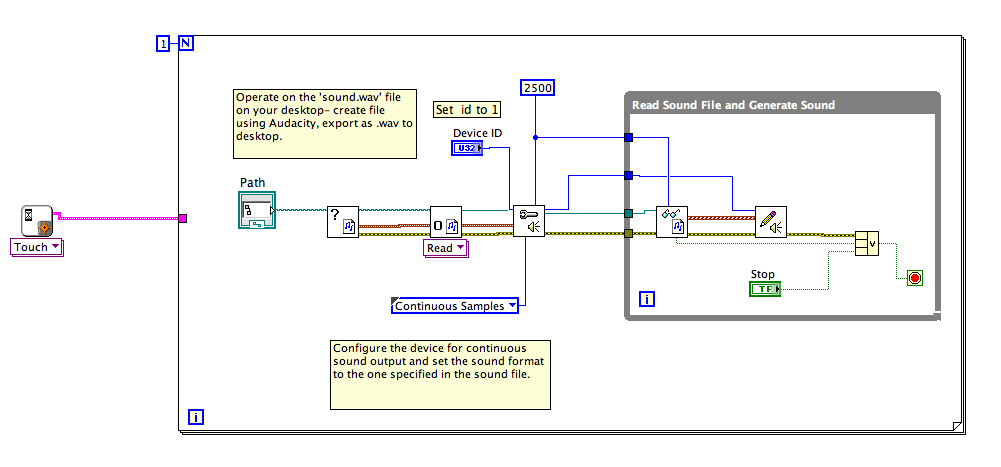
- Create a sound file using Audacity or a similar program. Export the edited file in .wav format to your desktop.
- In the LabVIEW Front Panel, create a path to the file ( Modern—String and Path—File Path). Use the Operate Value (finger) to locate (provide a path to) your sound file on the desktop.
- Write or modify a program to play the sound file. We started with the one found under LabView—Help—Find examples—Hardware—Sound. Most of the blocks can be found under Programming—Graphics and Sound—Sound—Output, Files, plus one function from Programming— Numeric Arithmetic.
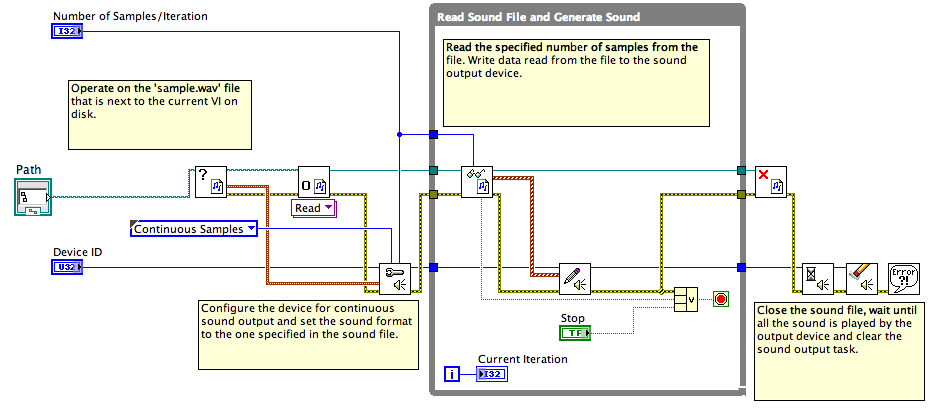
The Device ID seemed to work if I set it to 1. The number of samples can just be a constant - I set it to the default of 2500.
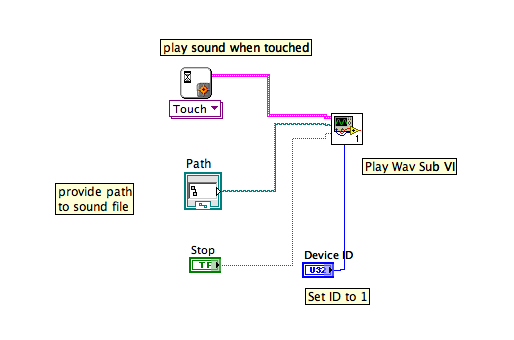
The above program seemed to have a lot of extra stuff in it, so I reduced it to this version - it plays the sound when I push a button on the EV3.
To neaten it up further still, you can make most of the code into a Sub VI (Custom block), which could be reused to play various sound recordings when needed:
Bluetooth with NXT
These are some tutorials used in Fall 2013 when the class used the NXT brick (the previous LEGO MINDSTORMS before the EV3) on how to do NXT-to-NXT communication (both with Bluetooth and other techniques).
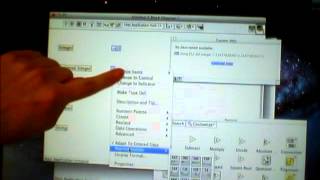
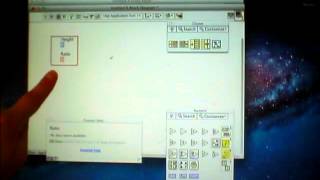
Front Panel Picture Control (pt 1)
This example shows how to draw circles on a Front Panel Picture Control and then control circles position via the LEGO motor.
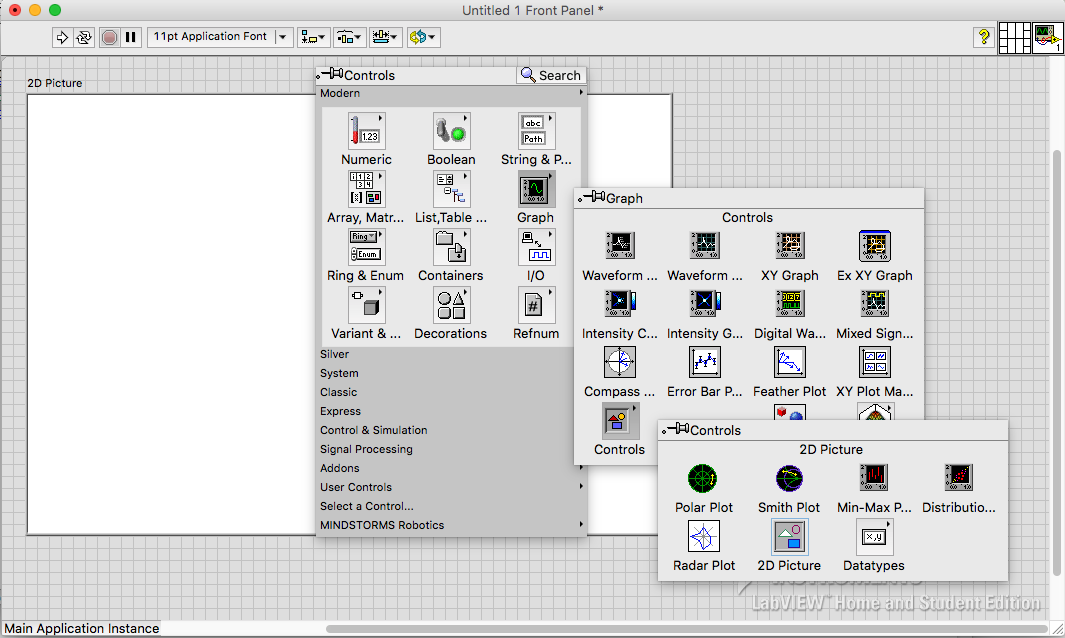
Location of Front Panel Picture Control - add to your Front Panel
Here is the "output" of the code, drawing two empty circles for eyes and then controlling (by the motor) the inner filled-in circles as pupils.


Front Panel Picture Control Eyes.vi
Front Panel Picture Control (pt 2)
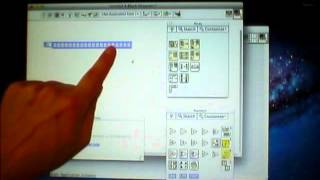
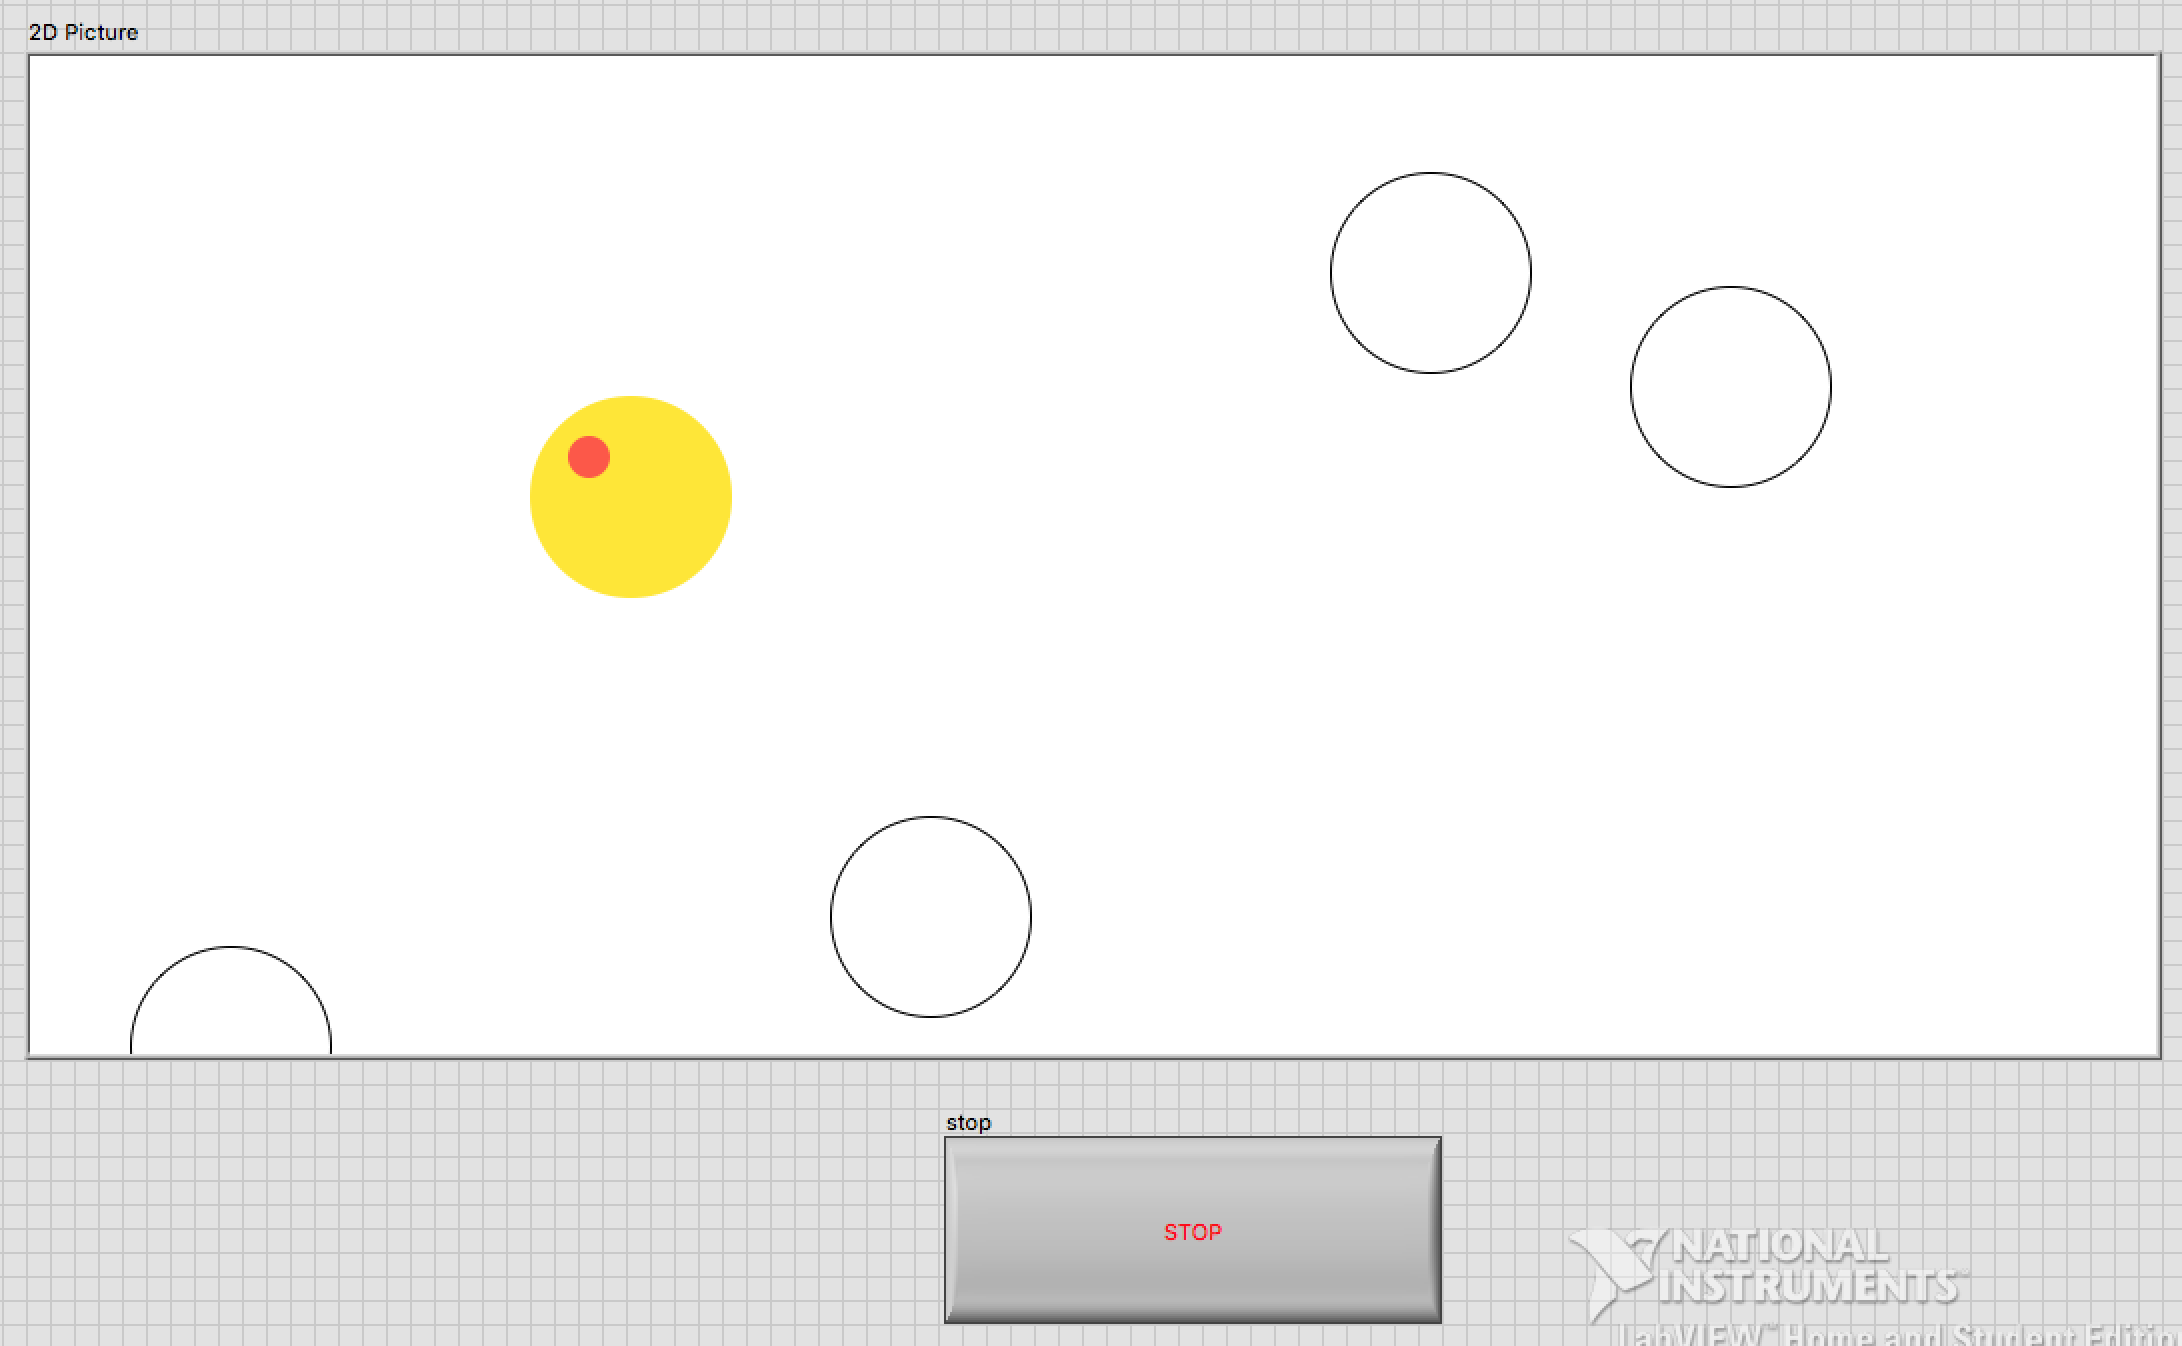
This code introduces arrays. It creates two different arrays: the first (for the horizontal position), is a constant array of 5 elements that are hard-coded/pre-set. The second (for the vertical position), randomly generates the five points (so different each time the code is run). Version one of the code controls a small dot on the screen "back and forth" (via the motor). When it intersects with one of the bigger circles, it changes their color.
This is what the Front Panel Picture Control looks like, when the code is running and the small red dot intersects one of the empty-white circles (changing it to yellow).
Here is the code that runs this interface.
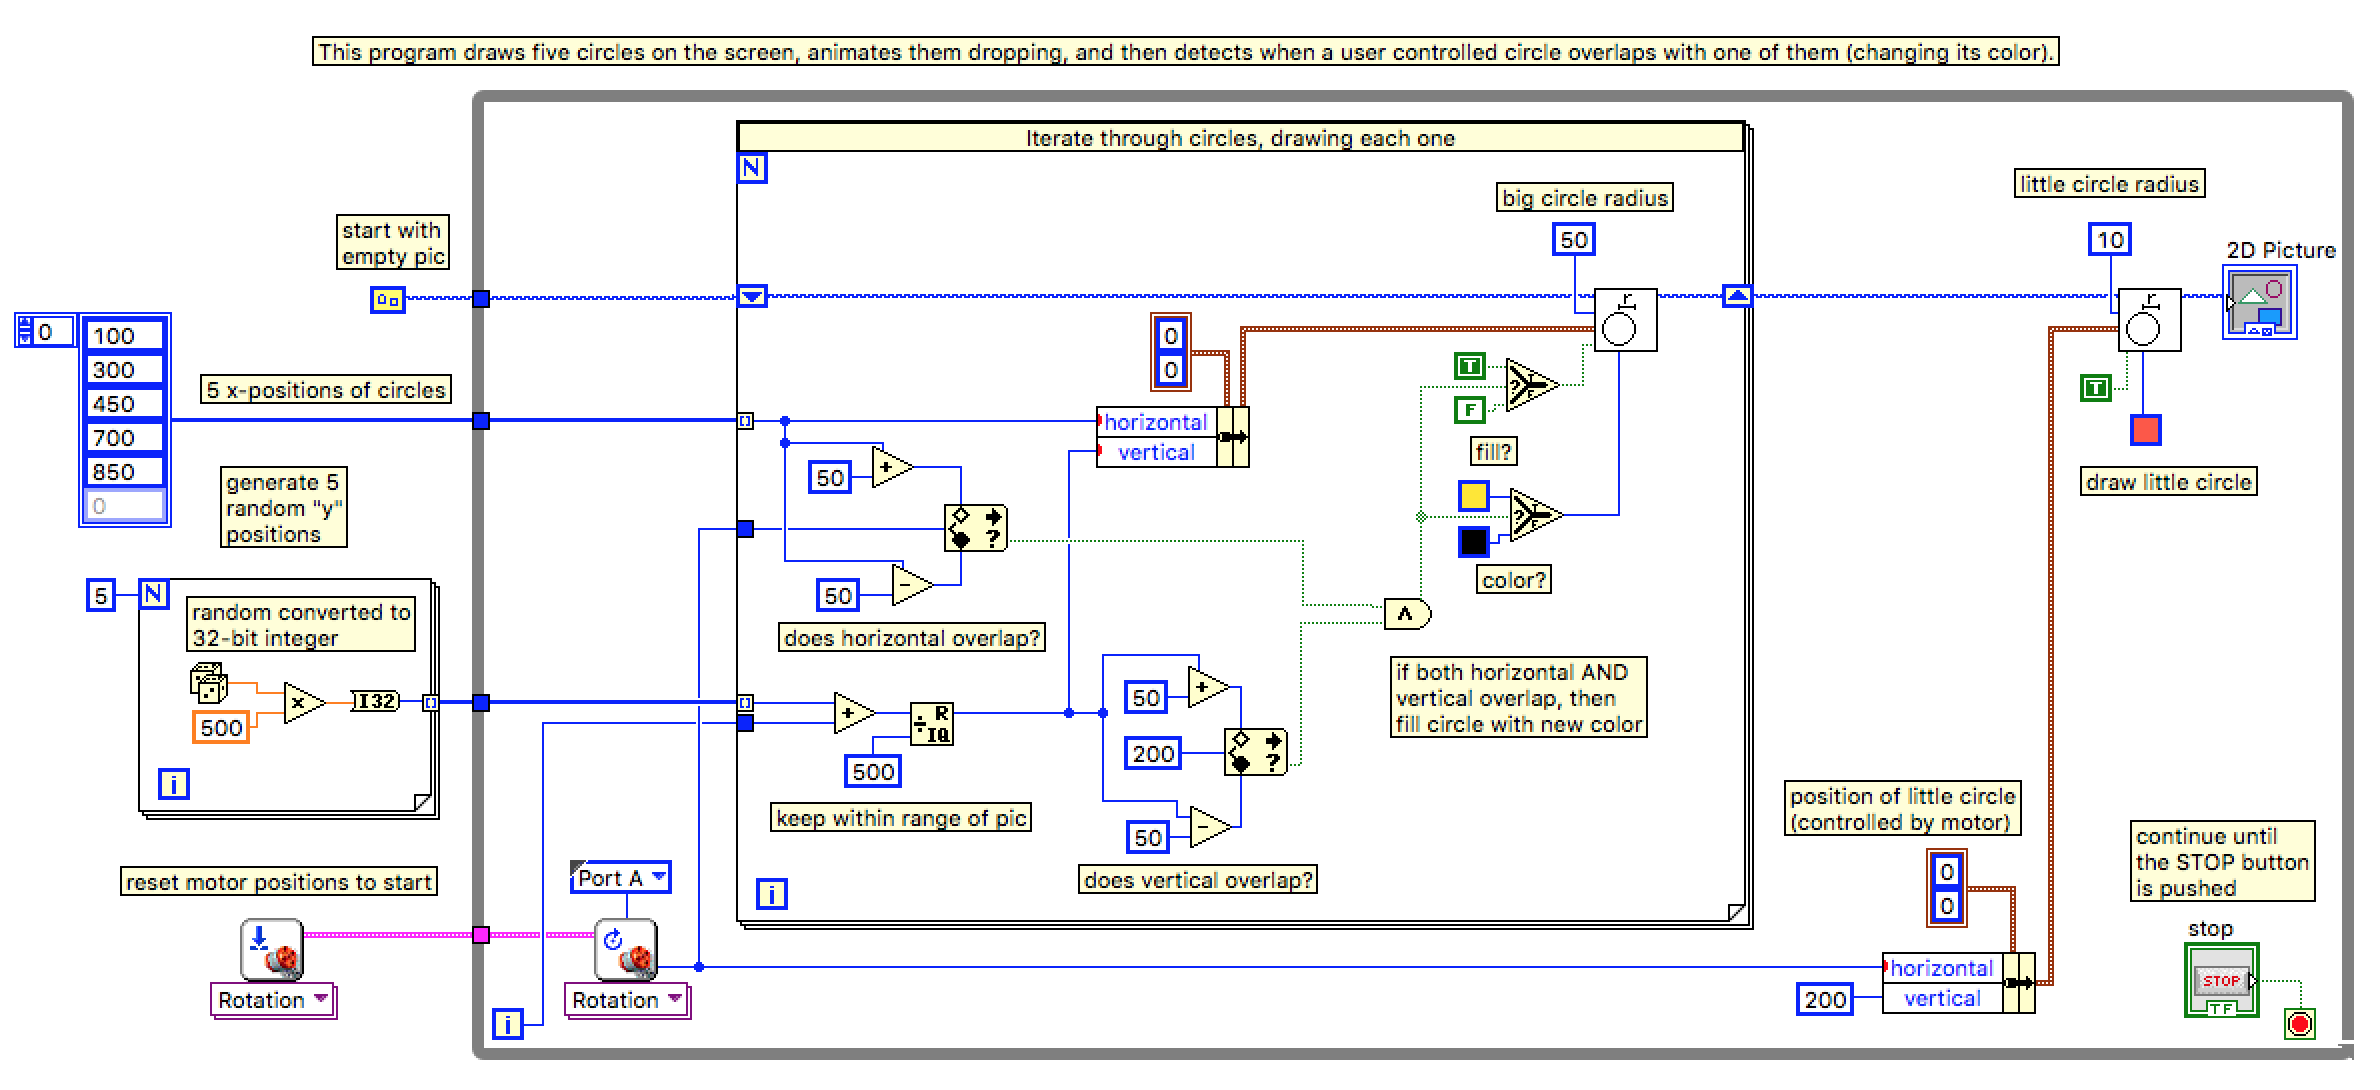
Front Panel Picture Control Falling Balls v1.vi
A small change for "version 2" (v2) of the code: by adding this, the "falling balls" (the white circles) now "bounce" off the bottom and top of the picture control, going back and forth. (Note: the picture control is 500 tall.)
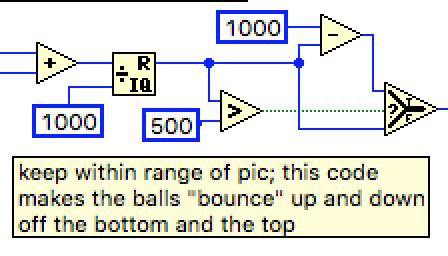
Front Panel Picture Control Falling Balls v2.vi
In version 3 (v3), when they red dot intersects with the white circles, it "deletes them" (moves off screen, effectively hiding them). Once all five have been deleted (e.g. none have a positive position anymore), the loop/animation exits.
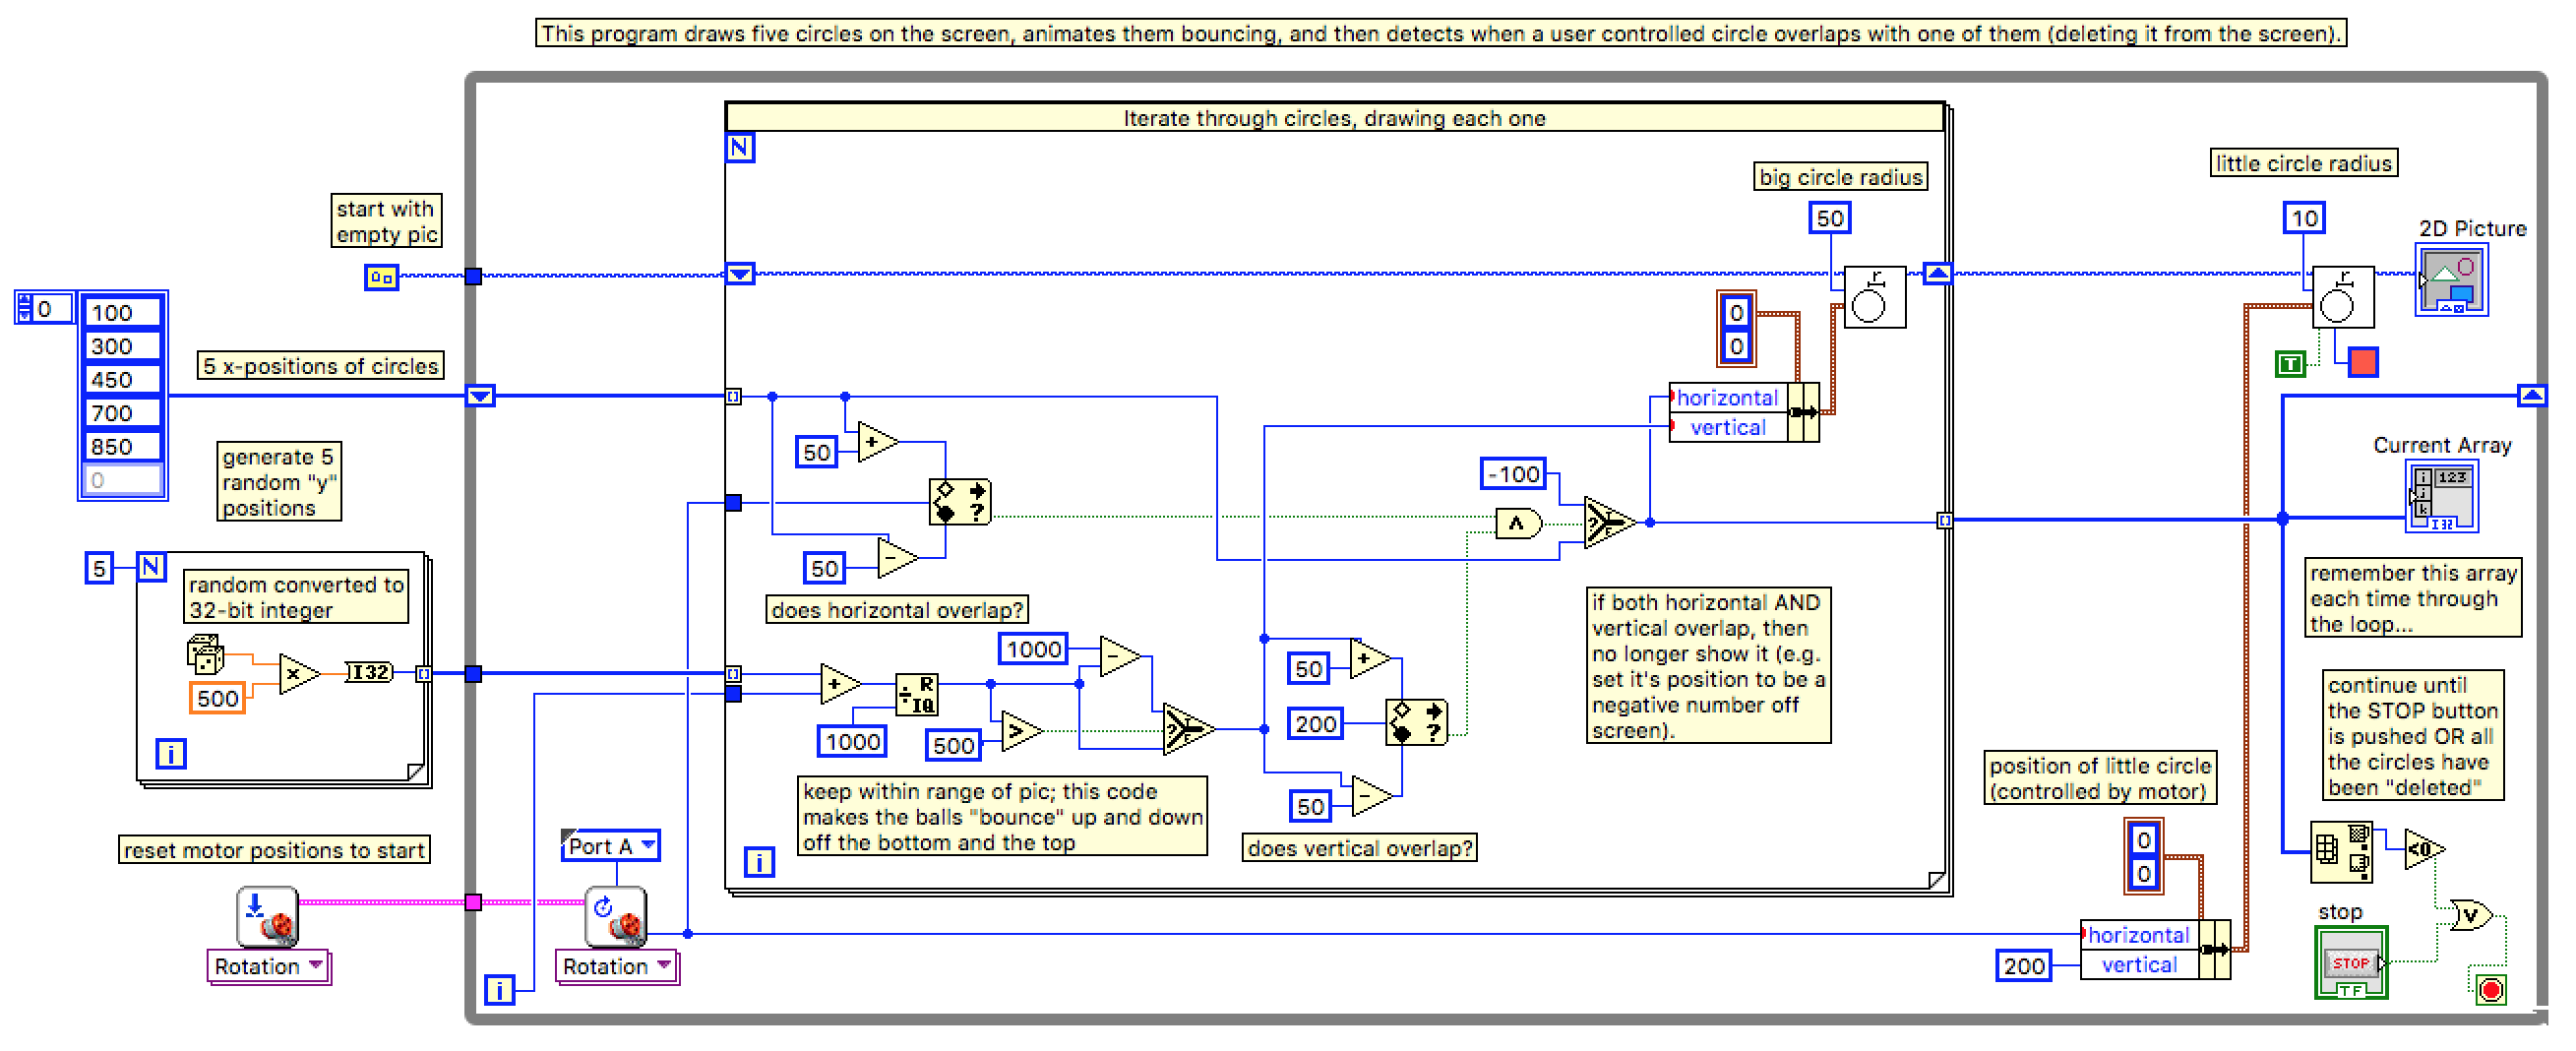
Front Panel Picture Control Falling Balls v3.vi
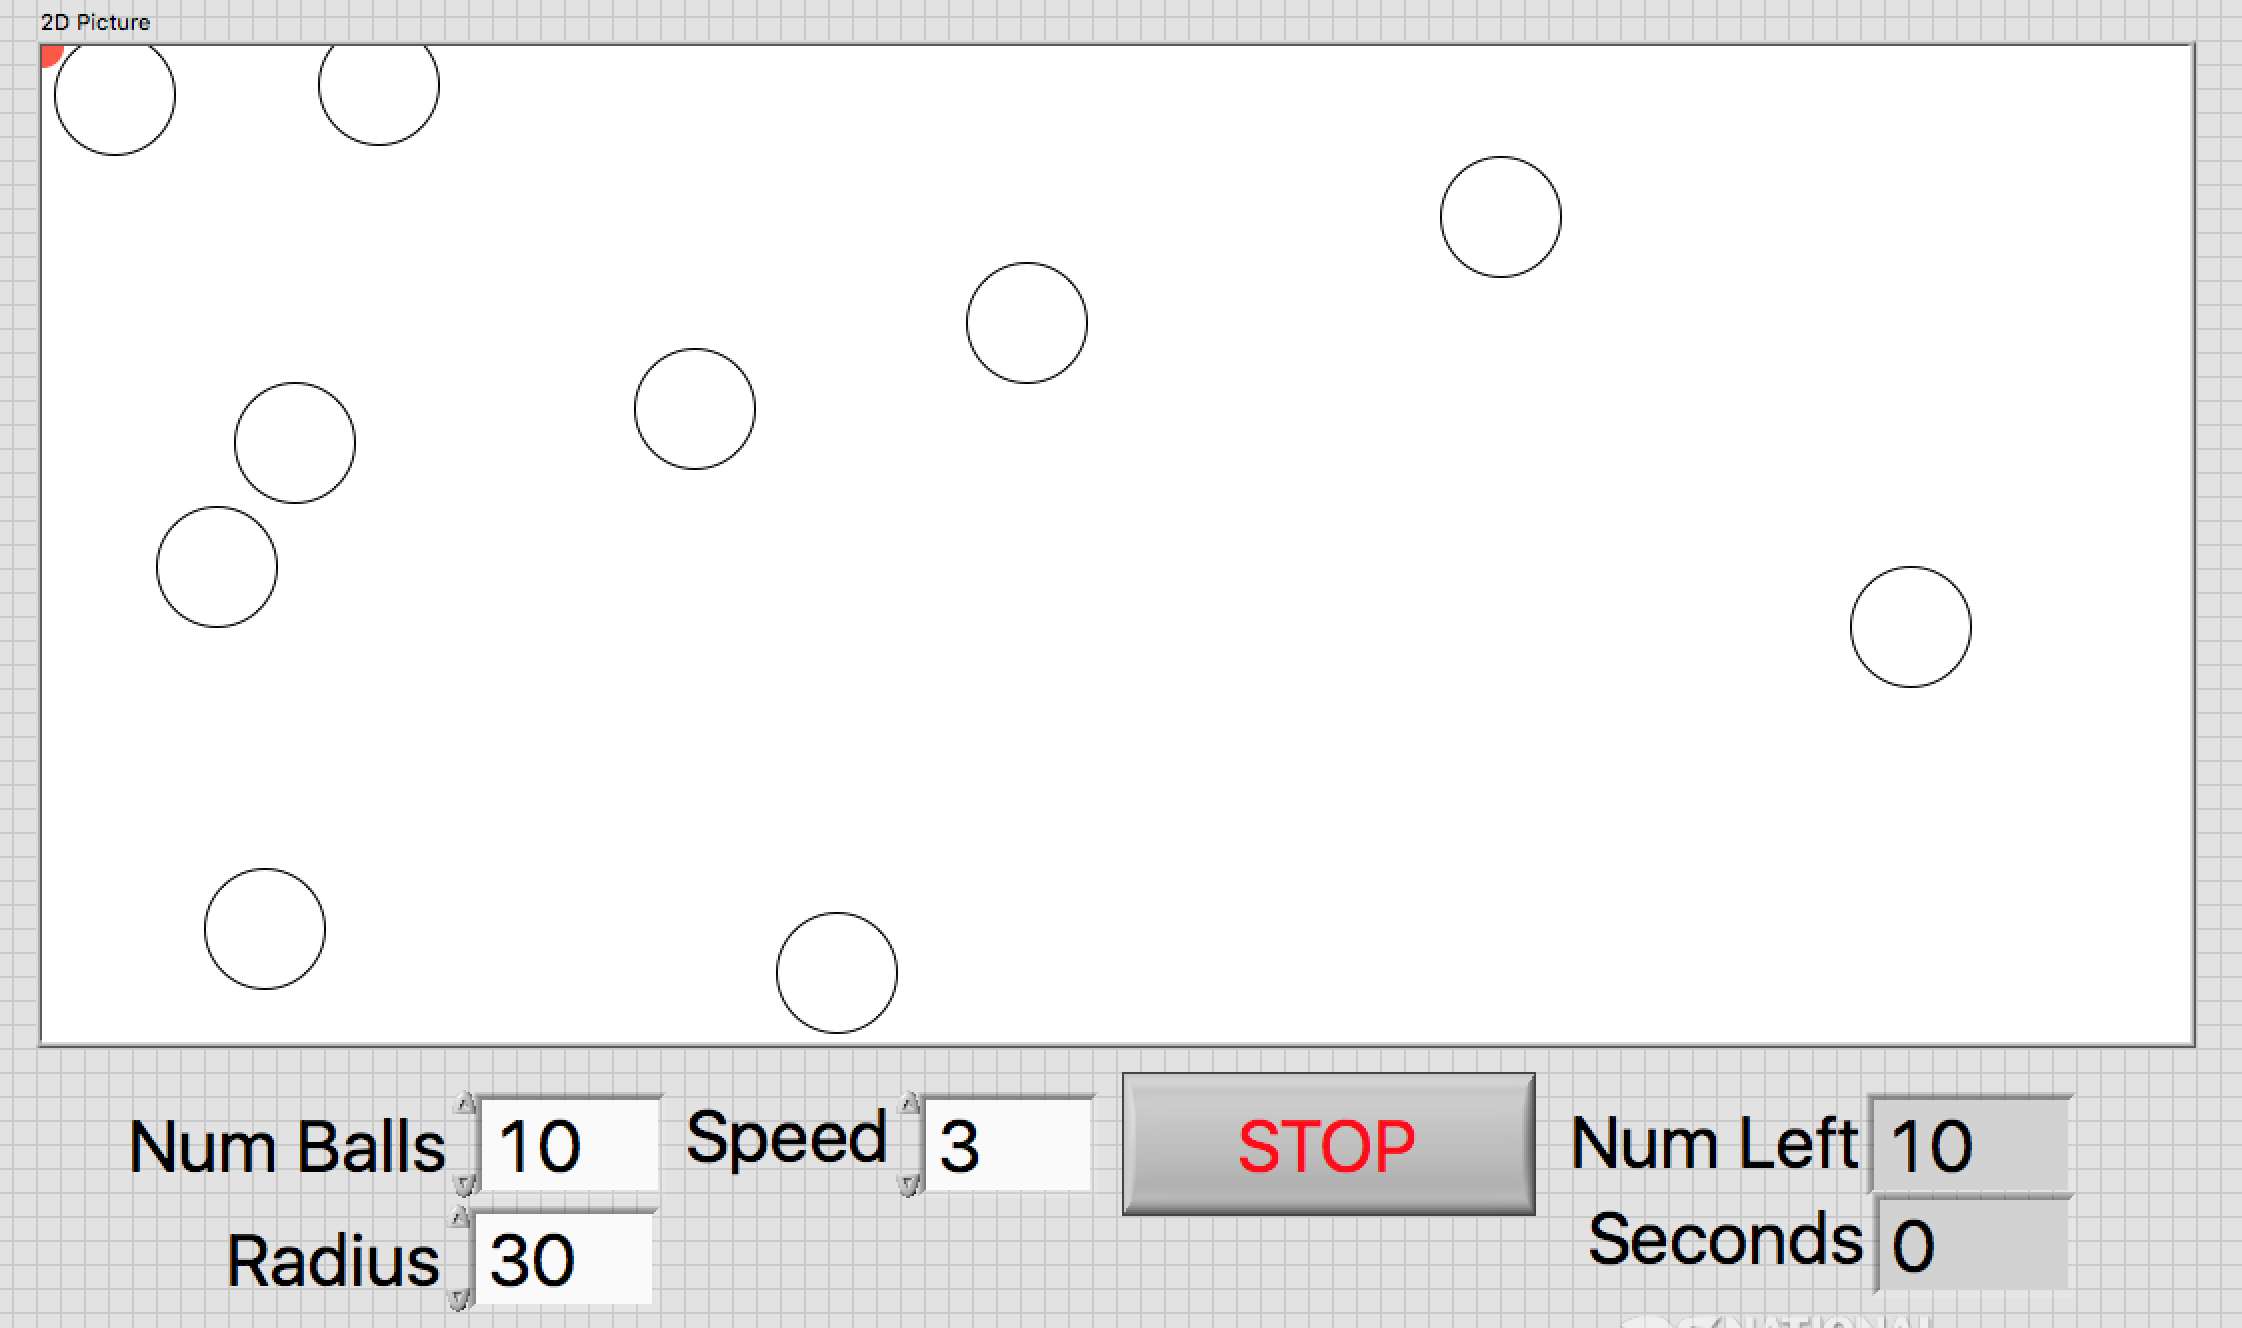
Front Panel Picture Control (v3)
This takes a Front Panel Picture Control and adds random balls (determined by the user before beginning) and moves them around the screen. The position and direction they are heading (x-pos, y-pos, x-dir, y-dir) is determined by the cluster values stored in an array (one cluster per ball). The direction, for both x and y, is either +1 (positive) or -1 (negative). This value is then multiplied by the "Speed" in order to allow the user to "speed up" how the balls move in real time. Also, the size of the Picture Display is used as a variable (width, height) so that it can be resized and the bouncing still works.
This is what the Front Panel Picture Control looks like.
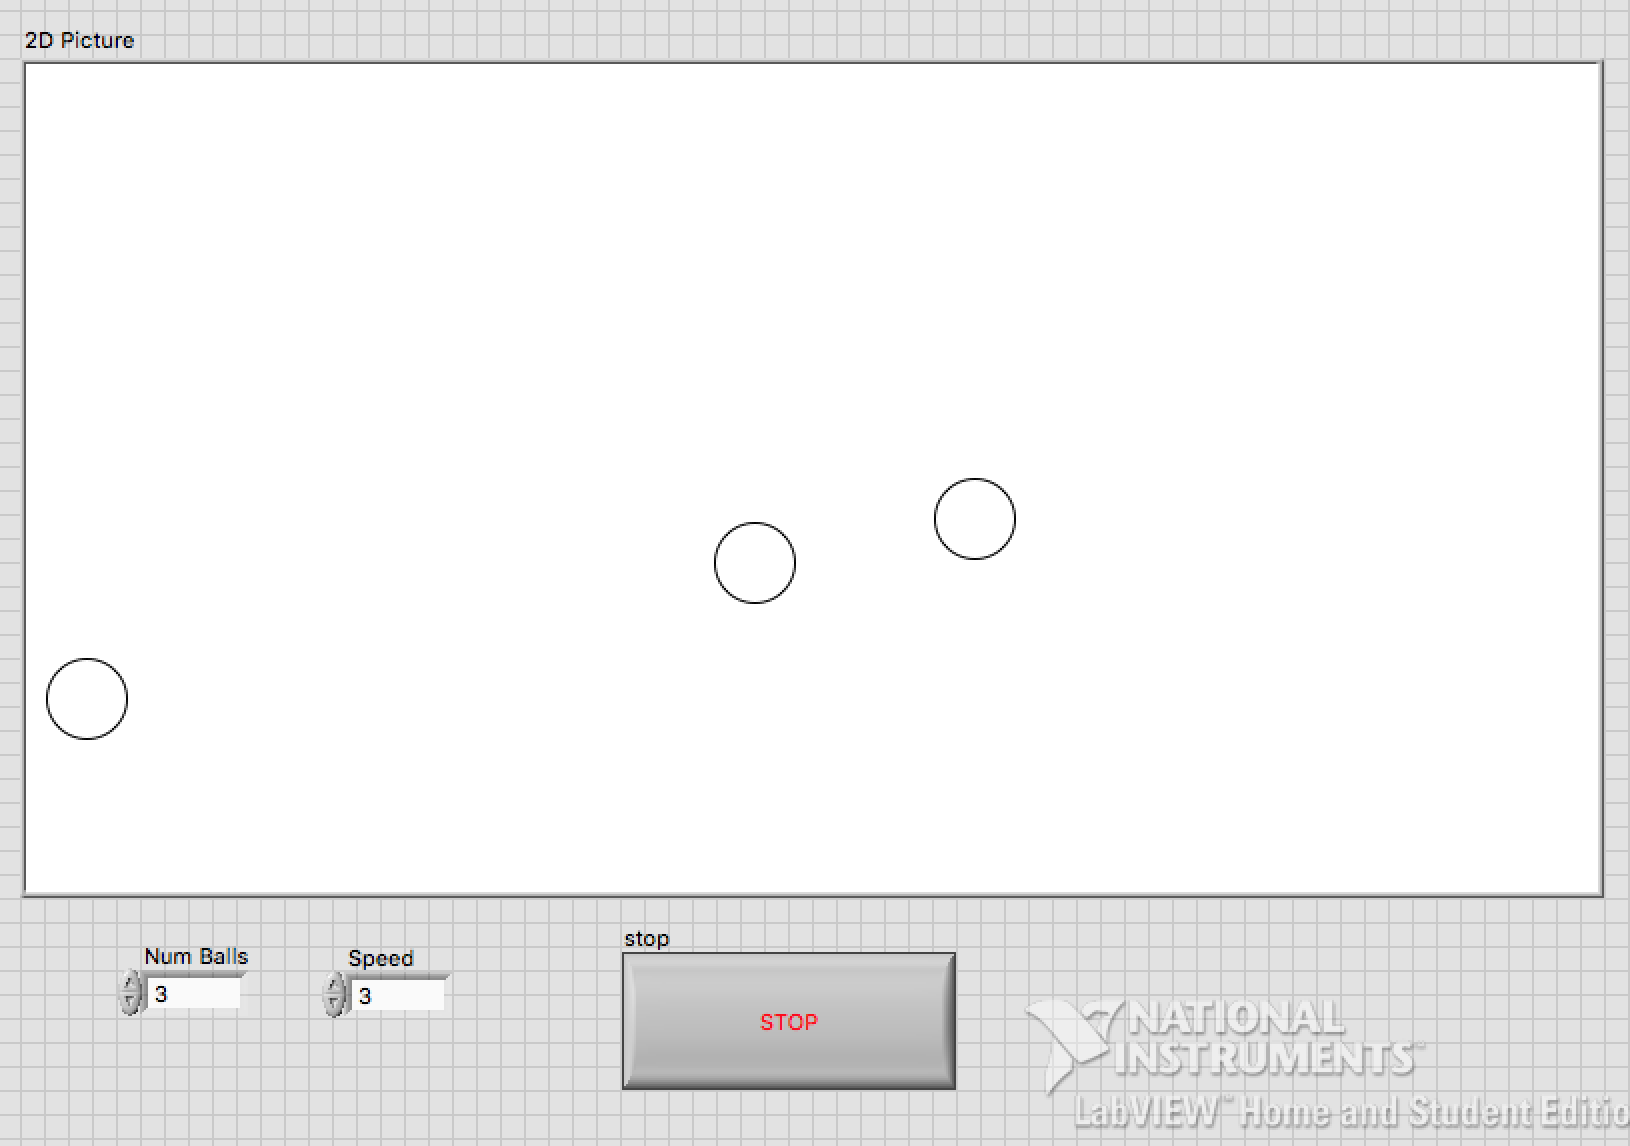
Here is the code that runs this animation in the background.
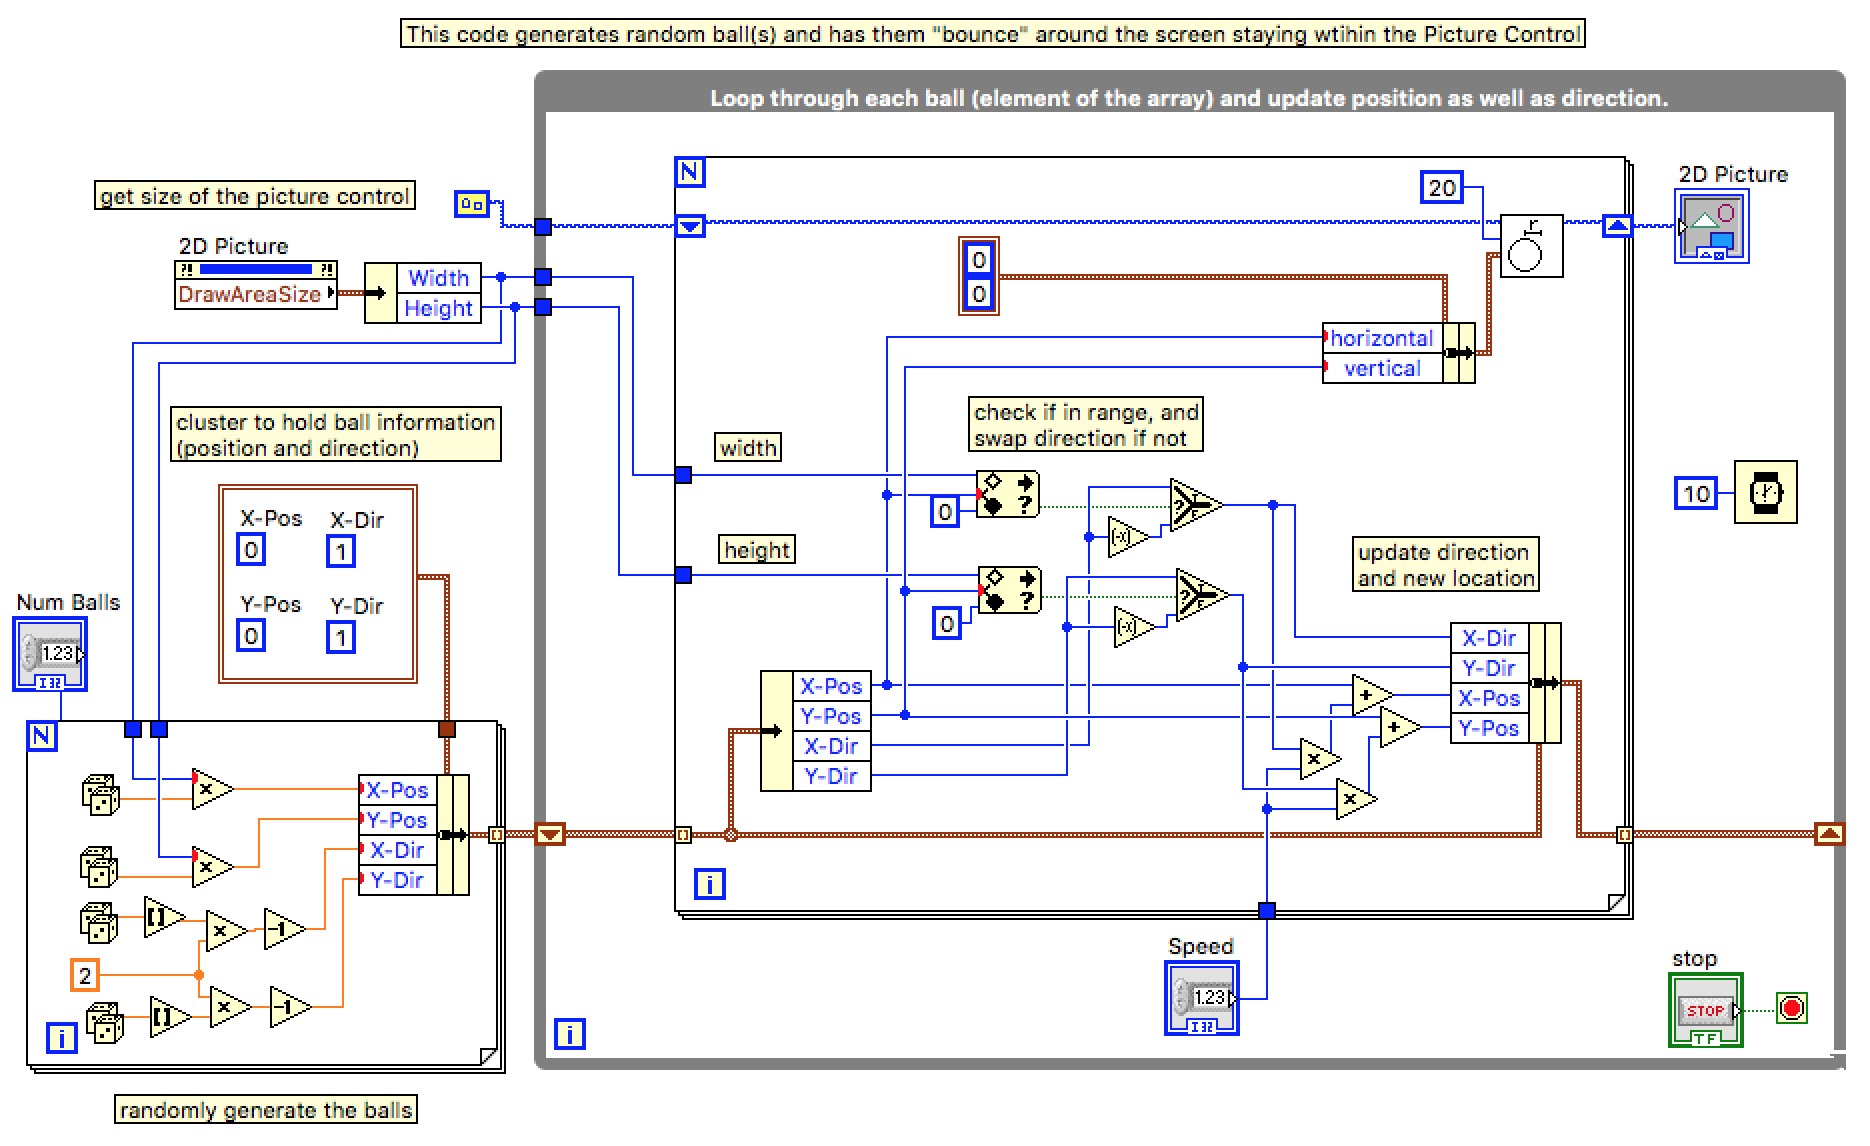
Front Panel Picture Control Bouncing Balls.vi
Here is "Version 2". This combines the code from pt 2 above (version 3, where the balls disappear) and the "bouncing balls" code above. It also adds: second motor control, for controlling the y-position of the red-dot, controls over the size of the balls (and better "overlap detection" that uses the radius distance instead of a bounding box), a timer to indicate how long to eliminate the balls, and actually deletes the balls from the array (instead of just moving off screen). View the code (v2 below) to see the changes and how this all works.
Front Panel Picture Control Bouncing Balls v2.vi
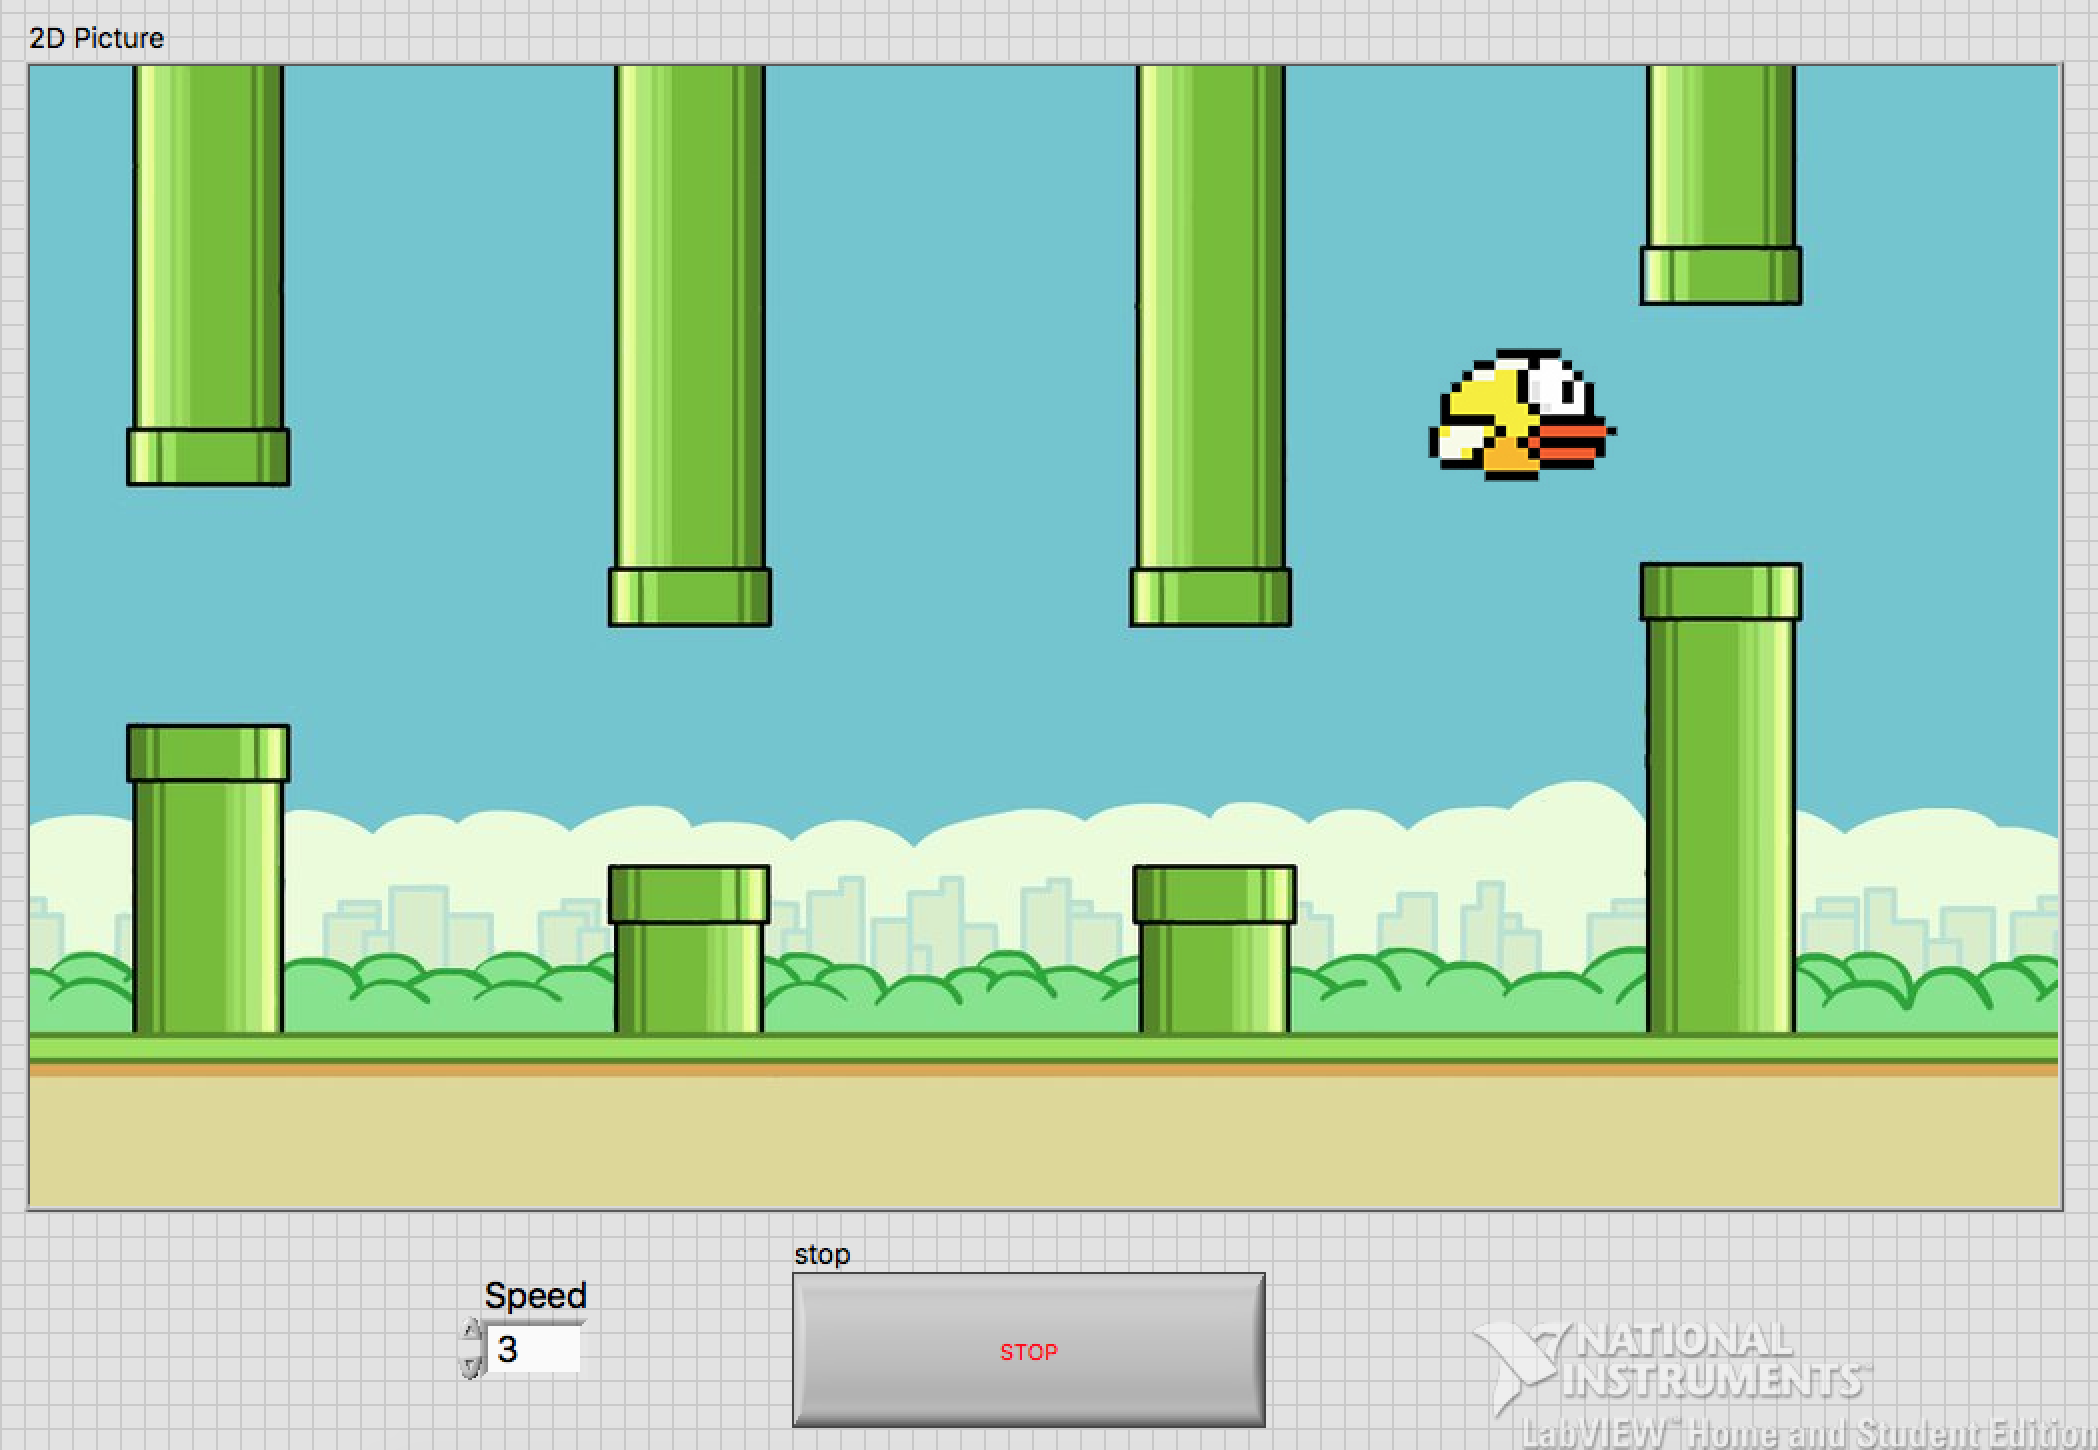
Front Panel Control (v4)
These tutorials explore further the options of loading in images into a Front Panel Control (background) and loading images on top of that (e.g. moving images in front of the background).
Here is a background loaded, and then a masked image moving in front.
Here is the code to make the masked image move across the screen. Look for "Image Manipulation.vi" in the attached zip file.

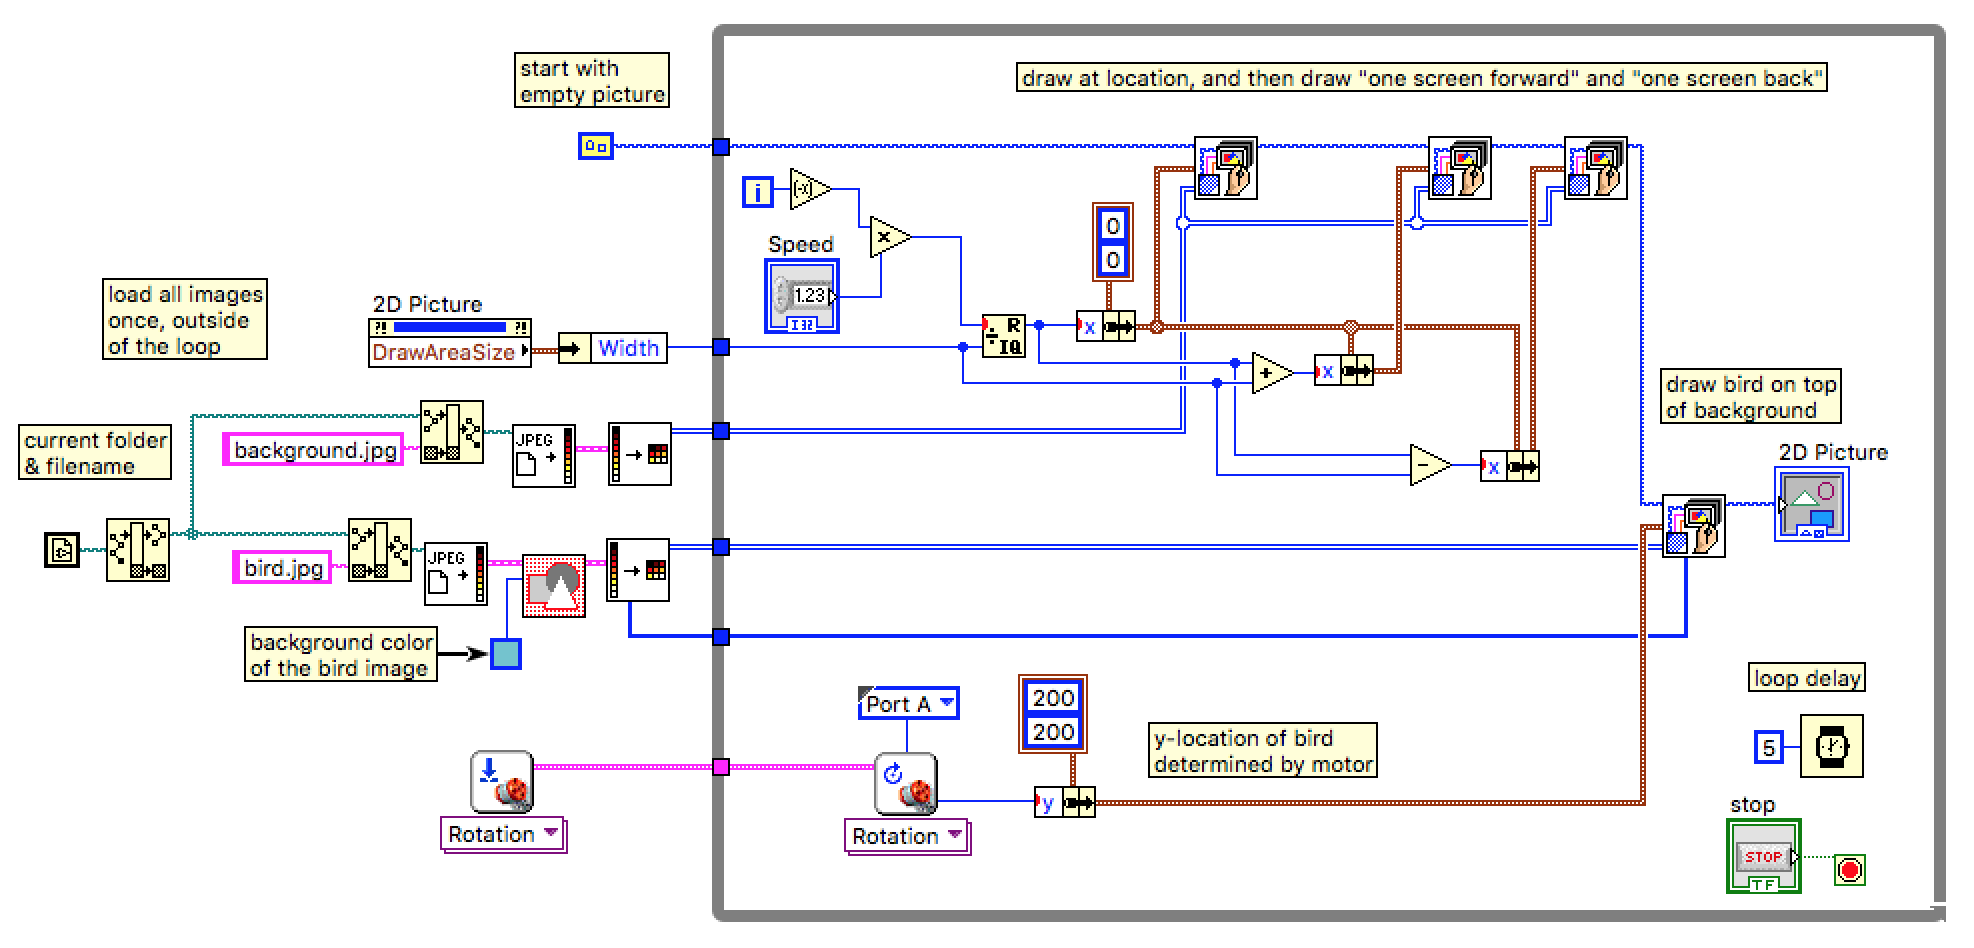
Instead of moving the masked image, you may want to move the background (side scrolling). Here the background moves right-to-left (and the character moves up-and-down).
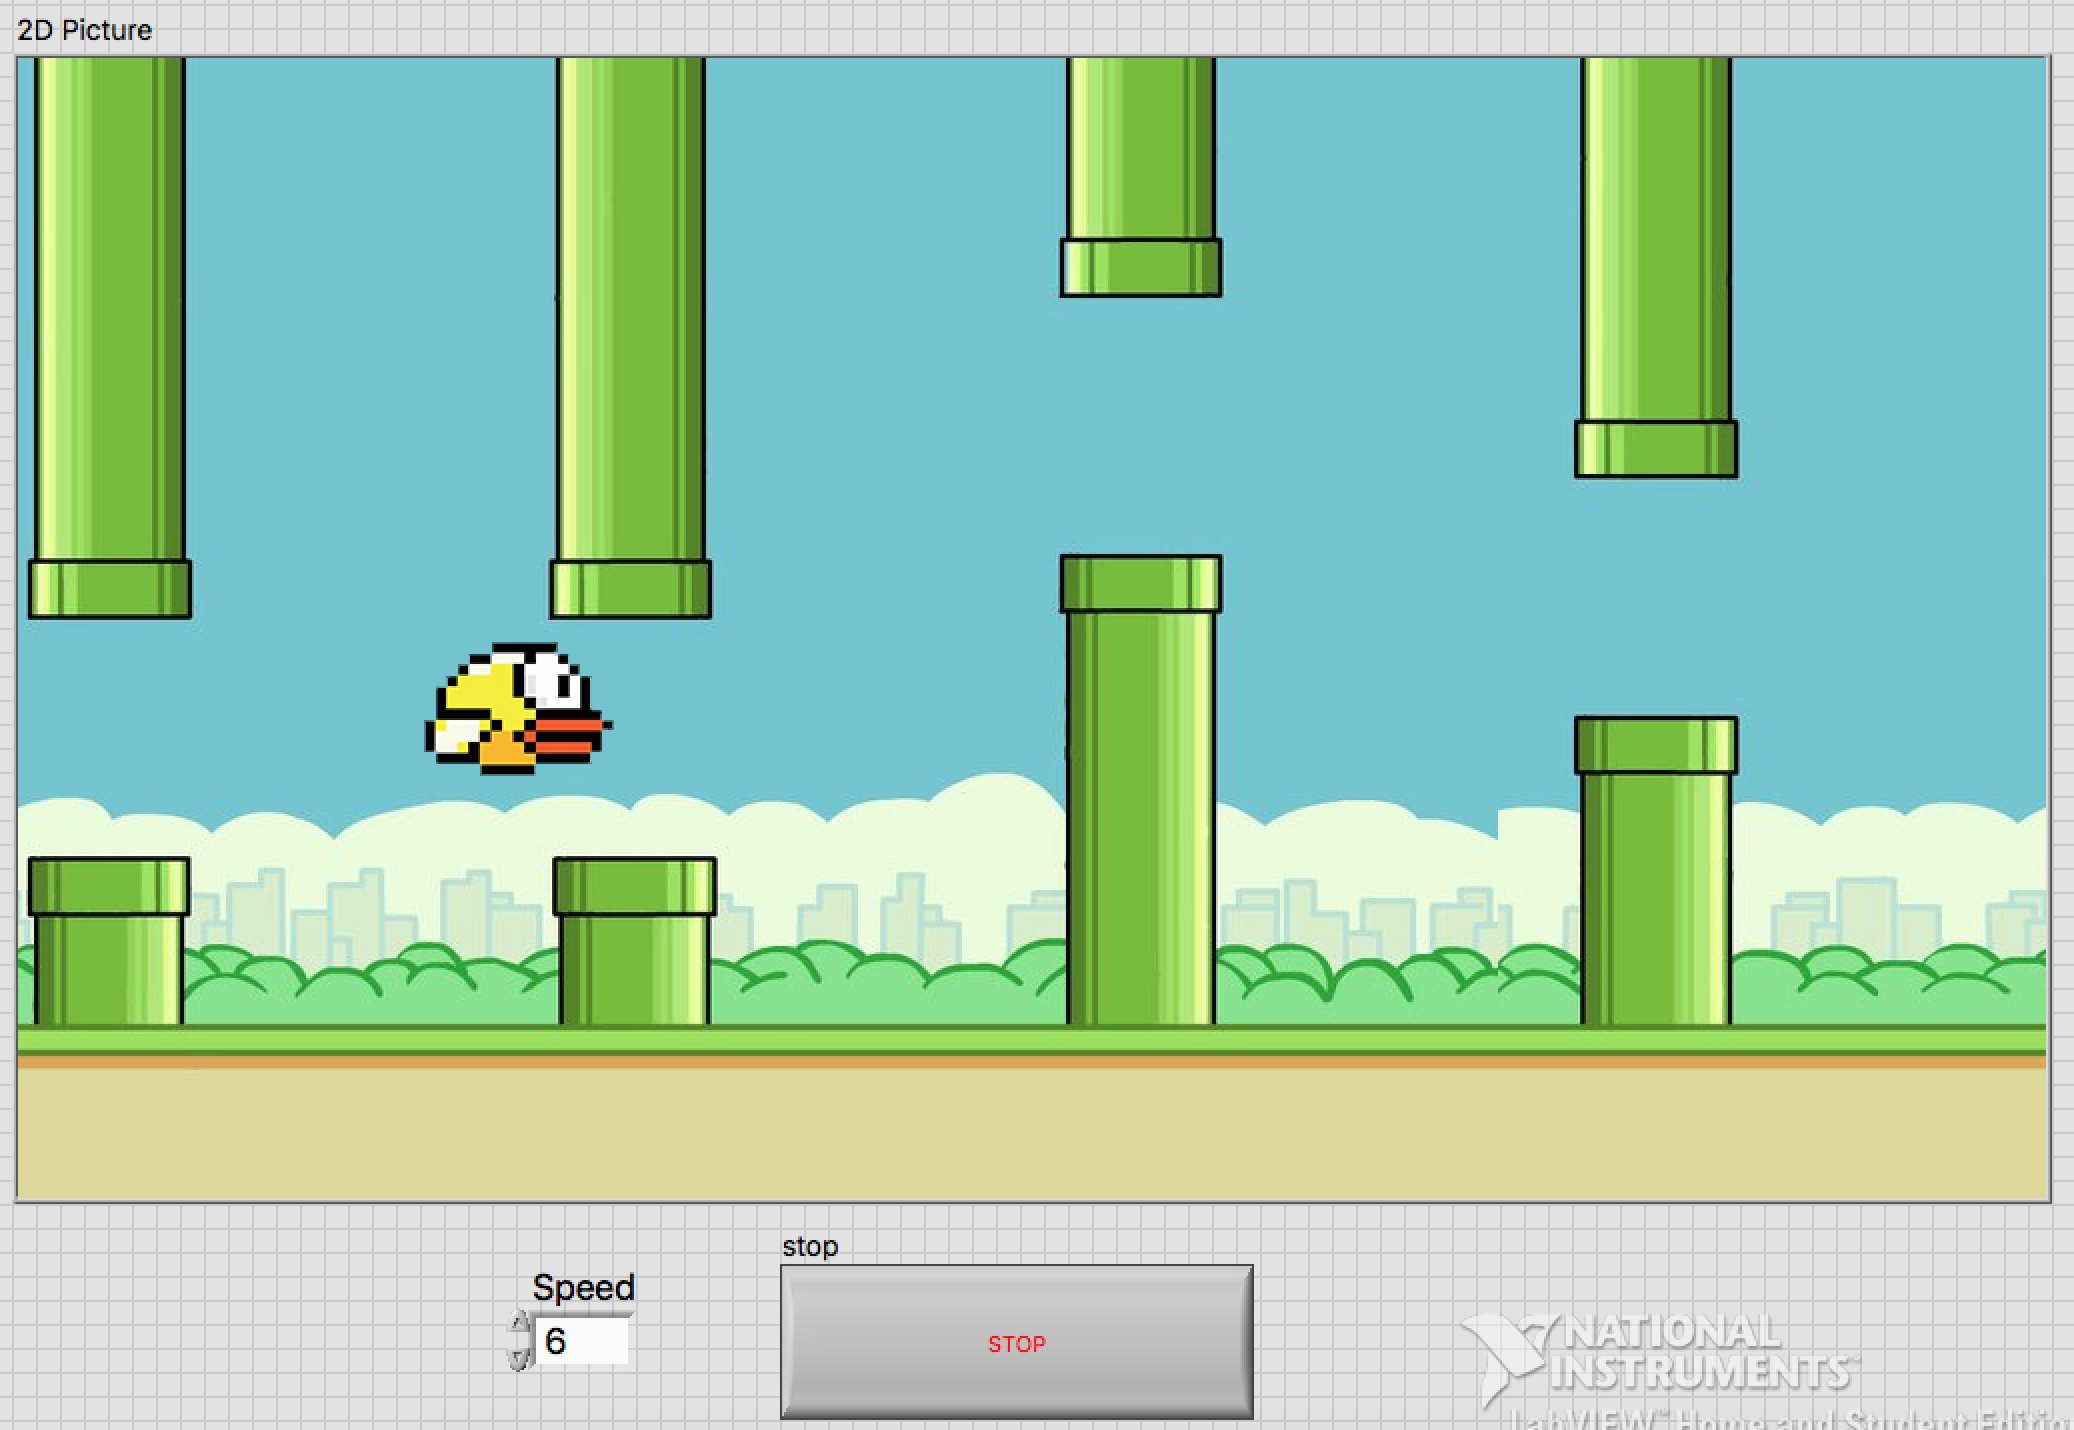
Here is the code for doing the Side Scrolling. Look for "Side Scrolling.vi" in the attached zip file.
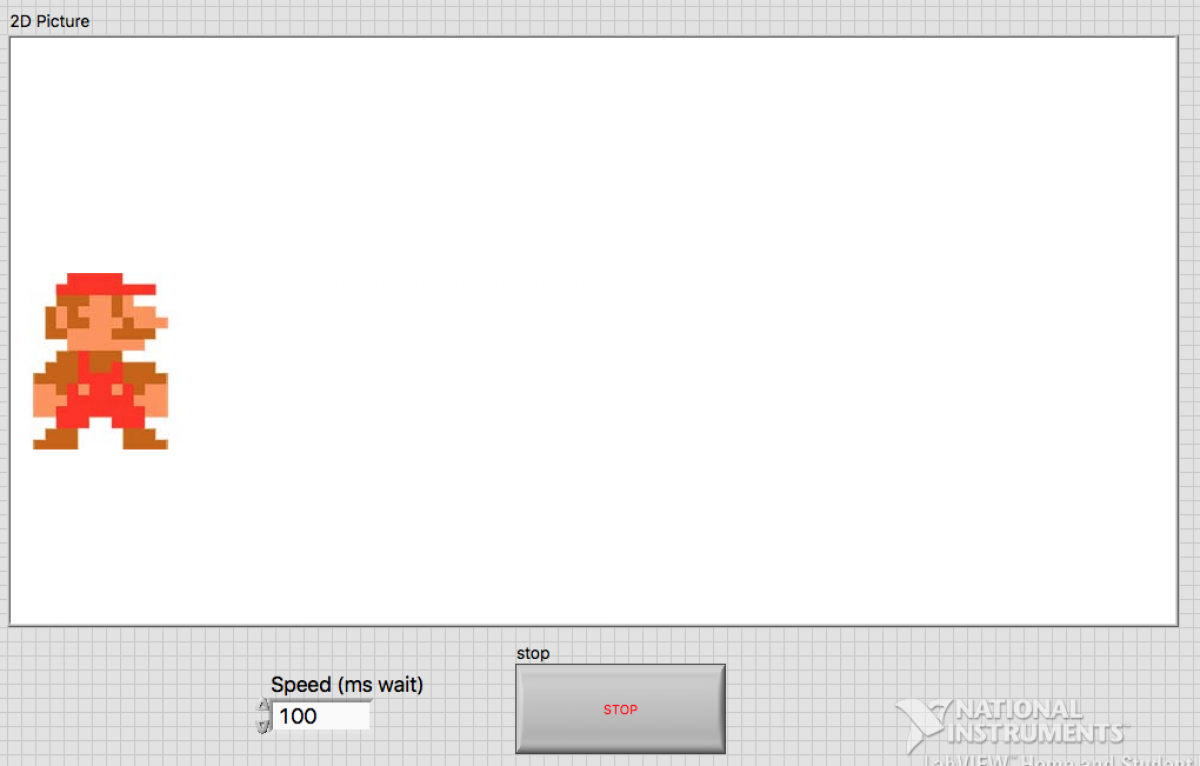
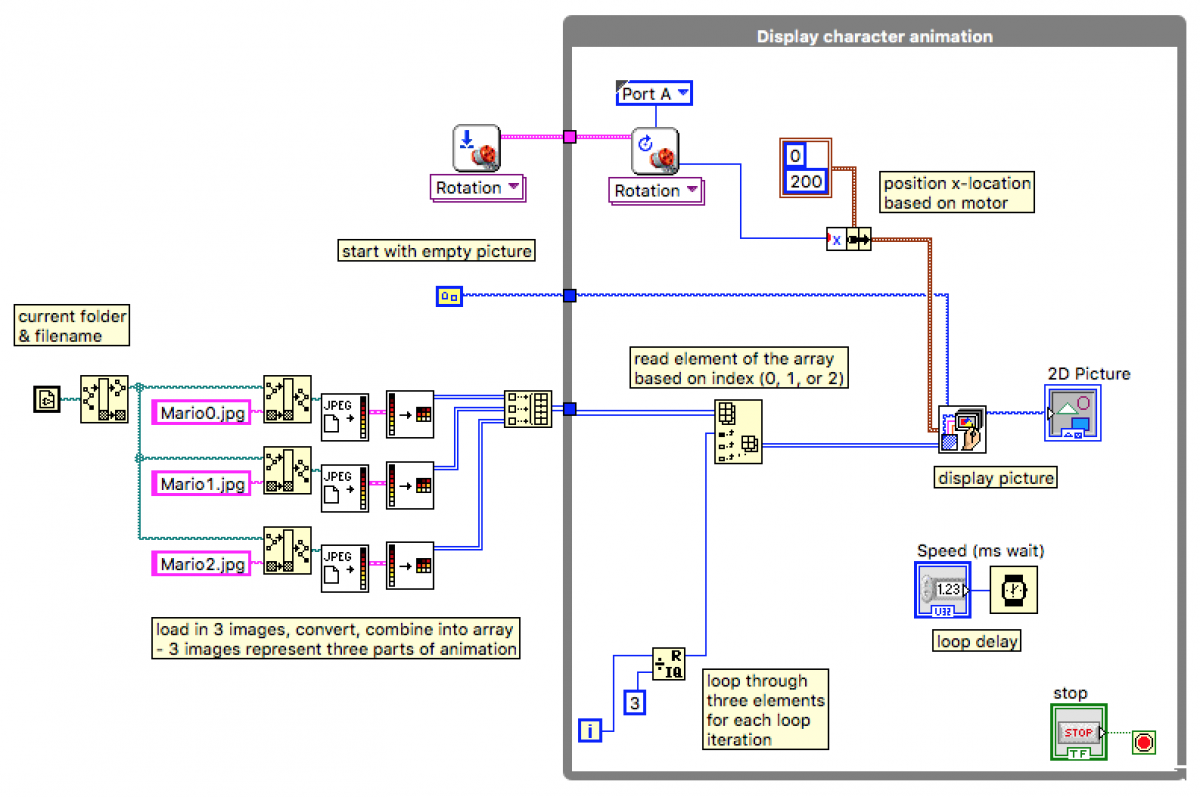
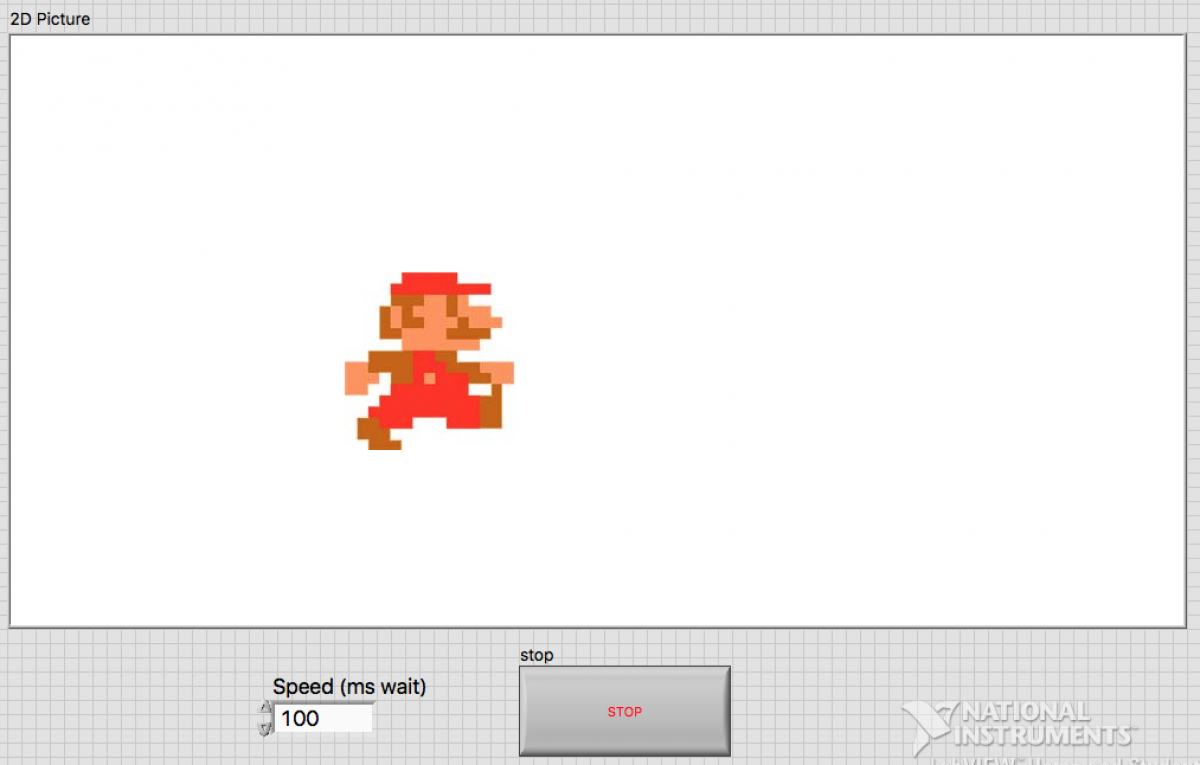
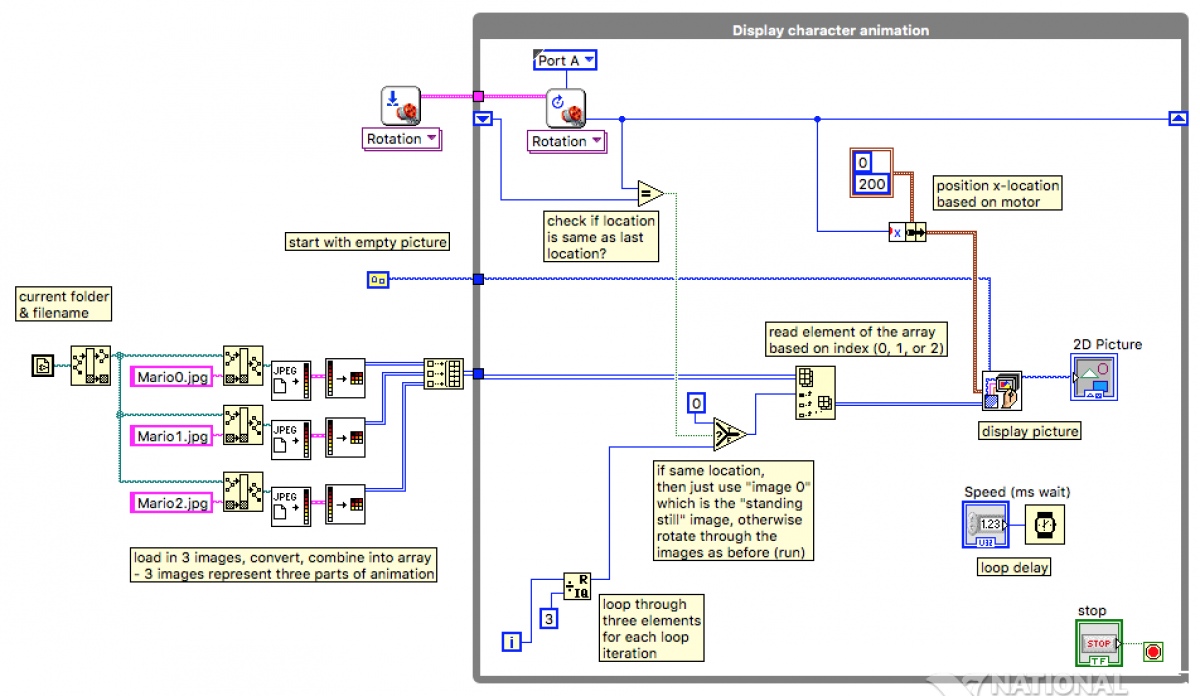
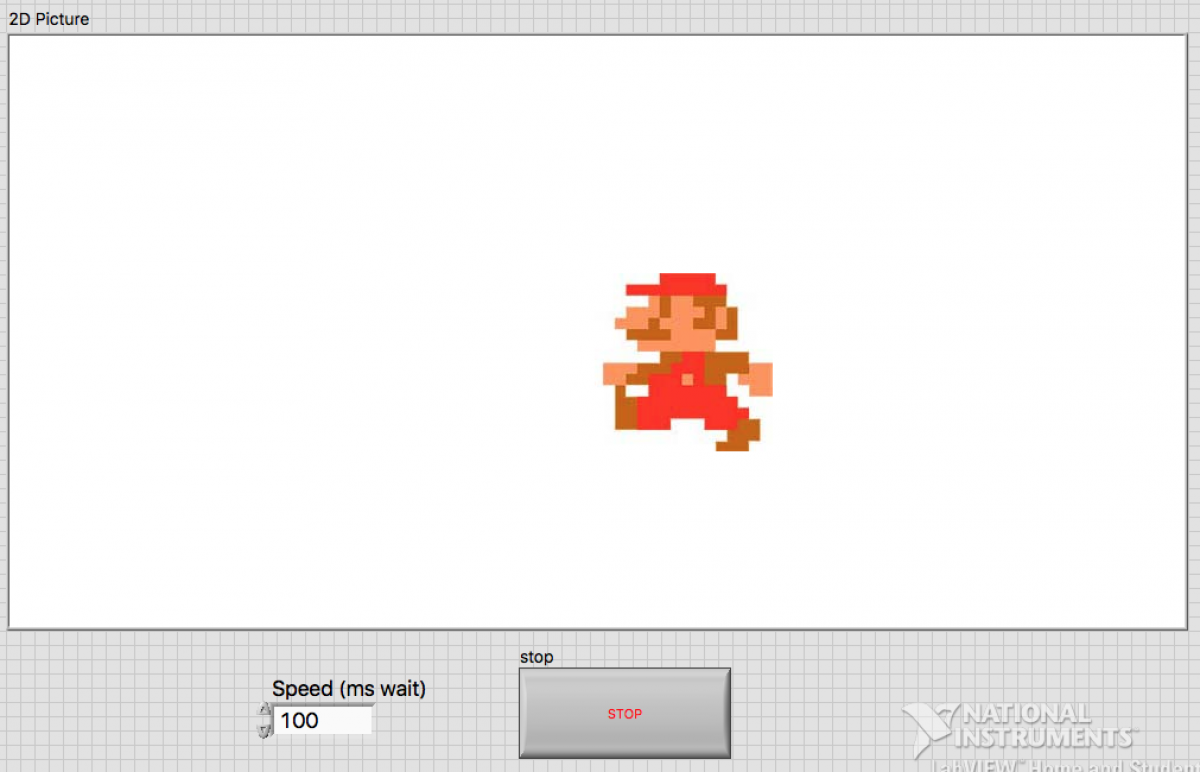
Instead of a static image in the foreground, perhaps you want an "animated character." This is achieved by loading in several static images and then each "frame" of the animation (e.g. each loop iteration, for example) showing a different image (a frame in the sequence). This code loads in the three steps in the sequence and then plays them over and over. (Look for "Animation v1.vi" in the attached zip file.)
In the prior example, however, even if the character isn't moving, it still "animates" the sequence of steps. In this code, it checks the location of the character from loop-to-loop, and if still in the same place (e.g. motor rotations are equal), then displays the "standing still" image. Otherwise, if moving, then cycles through the animation. (Look for "Animation v2.vi" in the attached zip file.)
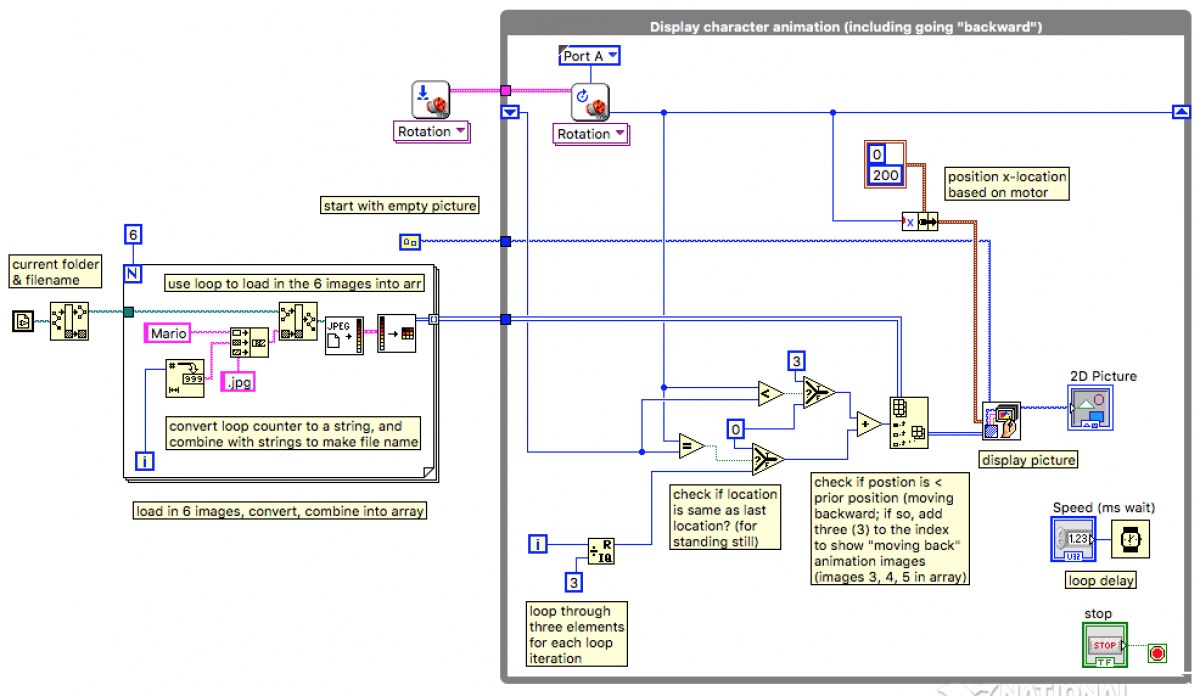
In the prior example, the character is "always running to the right" even if the character is moving left. Thus, we load in three additional images (the "facing left images", which are just the ones facing right flipped), and display those if the character is going left (e.g. if the current position is LESS than the prior position). Note to load in all six images we used a for loop and converted the loop number (0 to 5) into a string to help us load the right image into the array. (Look for "Animation v3.vi" in the attached zip file.)
Here is all the code in one zip file. Download, unzip, and look for the VI files (and images) within the folder.
Picture Control Image Manipulation.zip
Front Panel Picture Control (v5)
Midterm Exam Review Questions
Here is a practice exam. And the answers.
EN1-06 Fall 2016 - Midterm Practice.pdf
EN1-06 Fall 2016 - Midterm Practice Answers.pdf
Here are solutions to the midterm exam review questions.
Exam Question: Calculating Gear Ratios (related video)
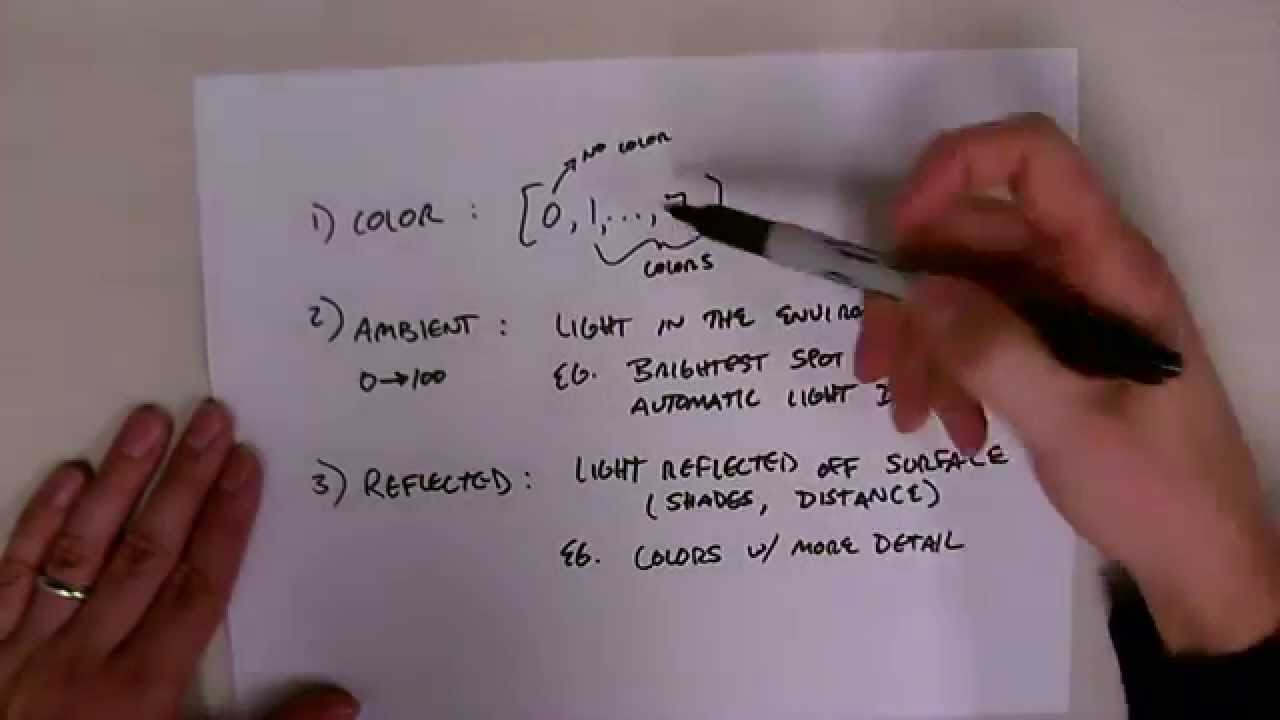
Exam Question: Color Modes (related video)
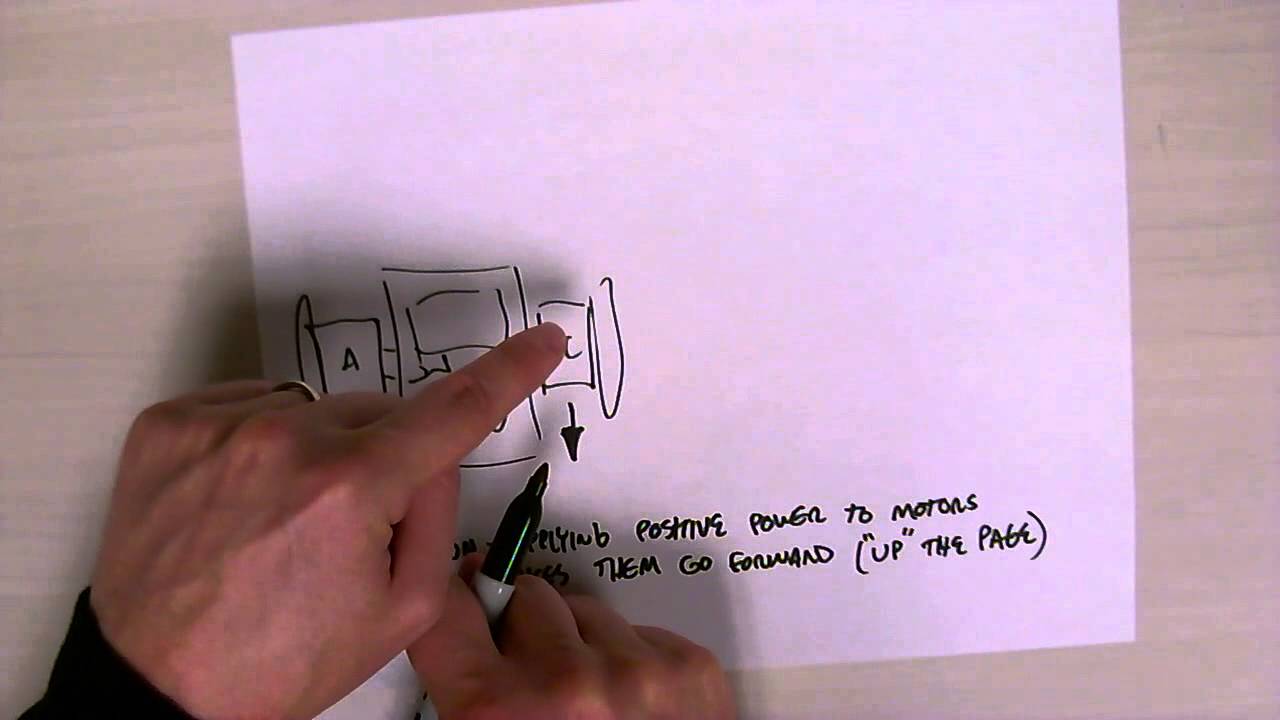
Exam Question: Motor Powers (related video)
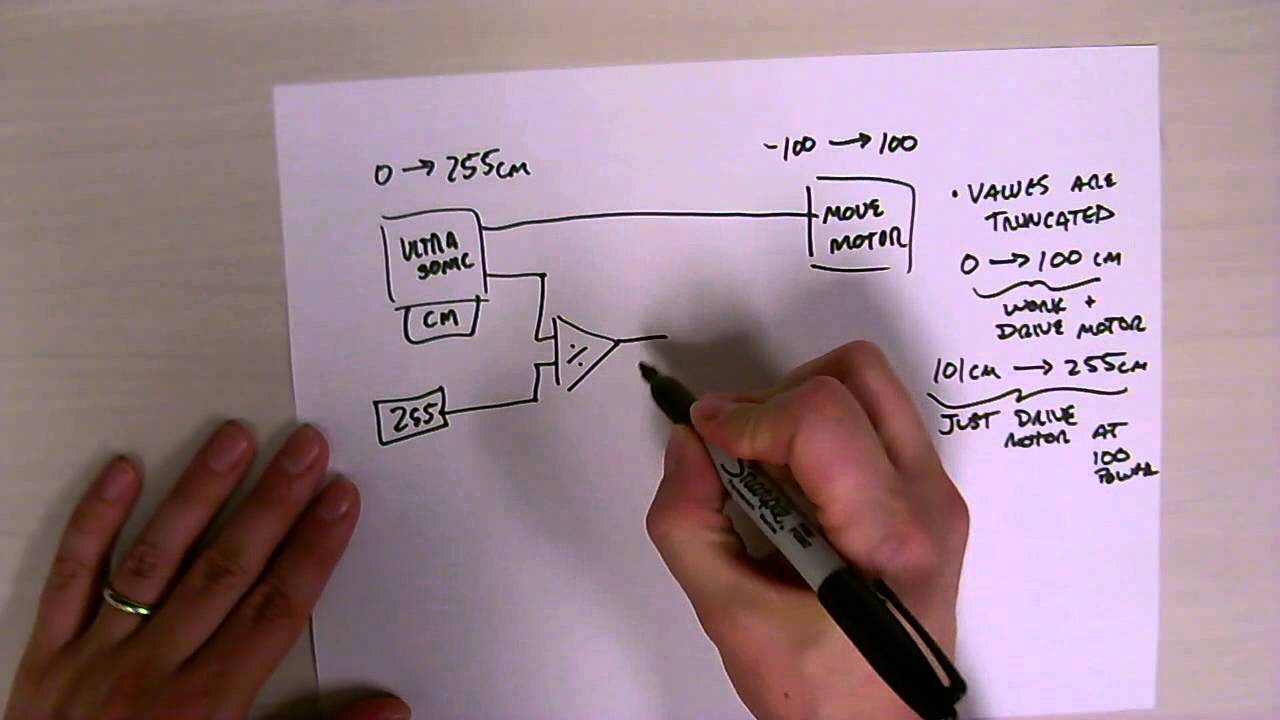
Exam Question: Adjusting sensor values to drive a motor in LabVIEW
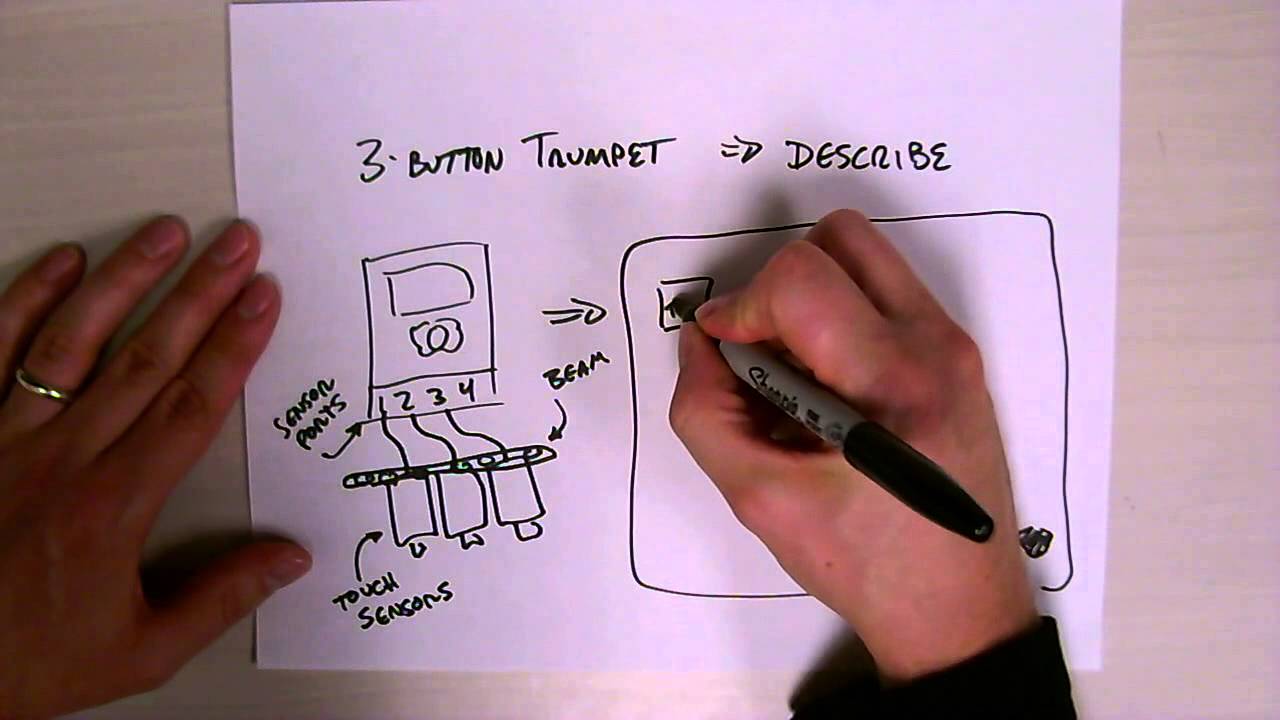
Exam Question: Open Ended Design Challenge: Build a Musical Instrument
This video-based handbook will introduce and explore each component of the LEGO EV3 MINDSTORMS kit, and provide some strategies/techniques that should help you create EV3 robots more effectively.
Core Set box
Simple Move
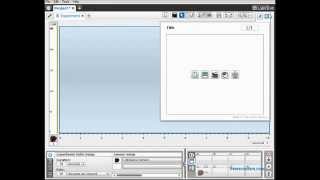
Datalogging
Motor Control
Light Sensor and Programming with Motors
Ultrasonic Sensor
Switch Function
Intro to Gears
Example Car

Software Overview
Building Sturdy Structures
Attaching Motors

Light Sensor
Touch Sensor
Gyro Sensor
Ultrasonic Sensor
Color Sensor
Touch Sensor
Programmable Brick
On-brick Programming
Tracks