Arduino Arcade
Have students build a simple arcade-style game using Arduino, breadboard, resistors, LEDs, buttons, sensors, and any other electronics materials available. Students should code some program to help keep score or determine the game's winner. Students can build games such as Whack-a-Mole, copy cat memory games, rapid button push race games, and others.
Authors: Rose Solow and Orian Sneor
Whack-a-Mole and Copy Cat
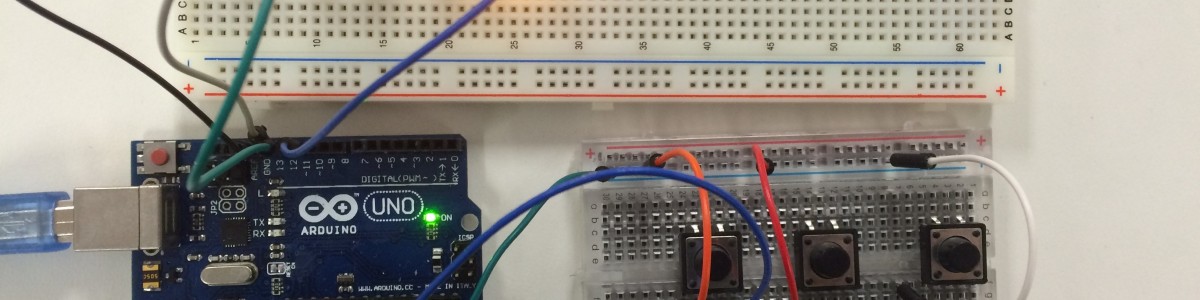
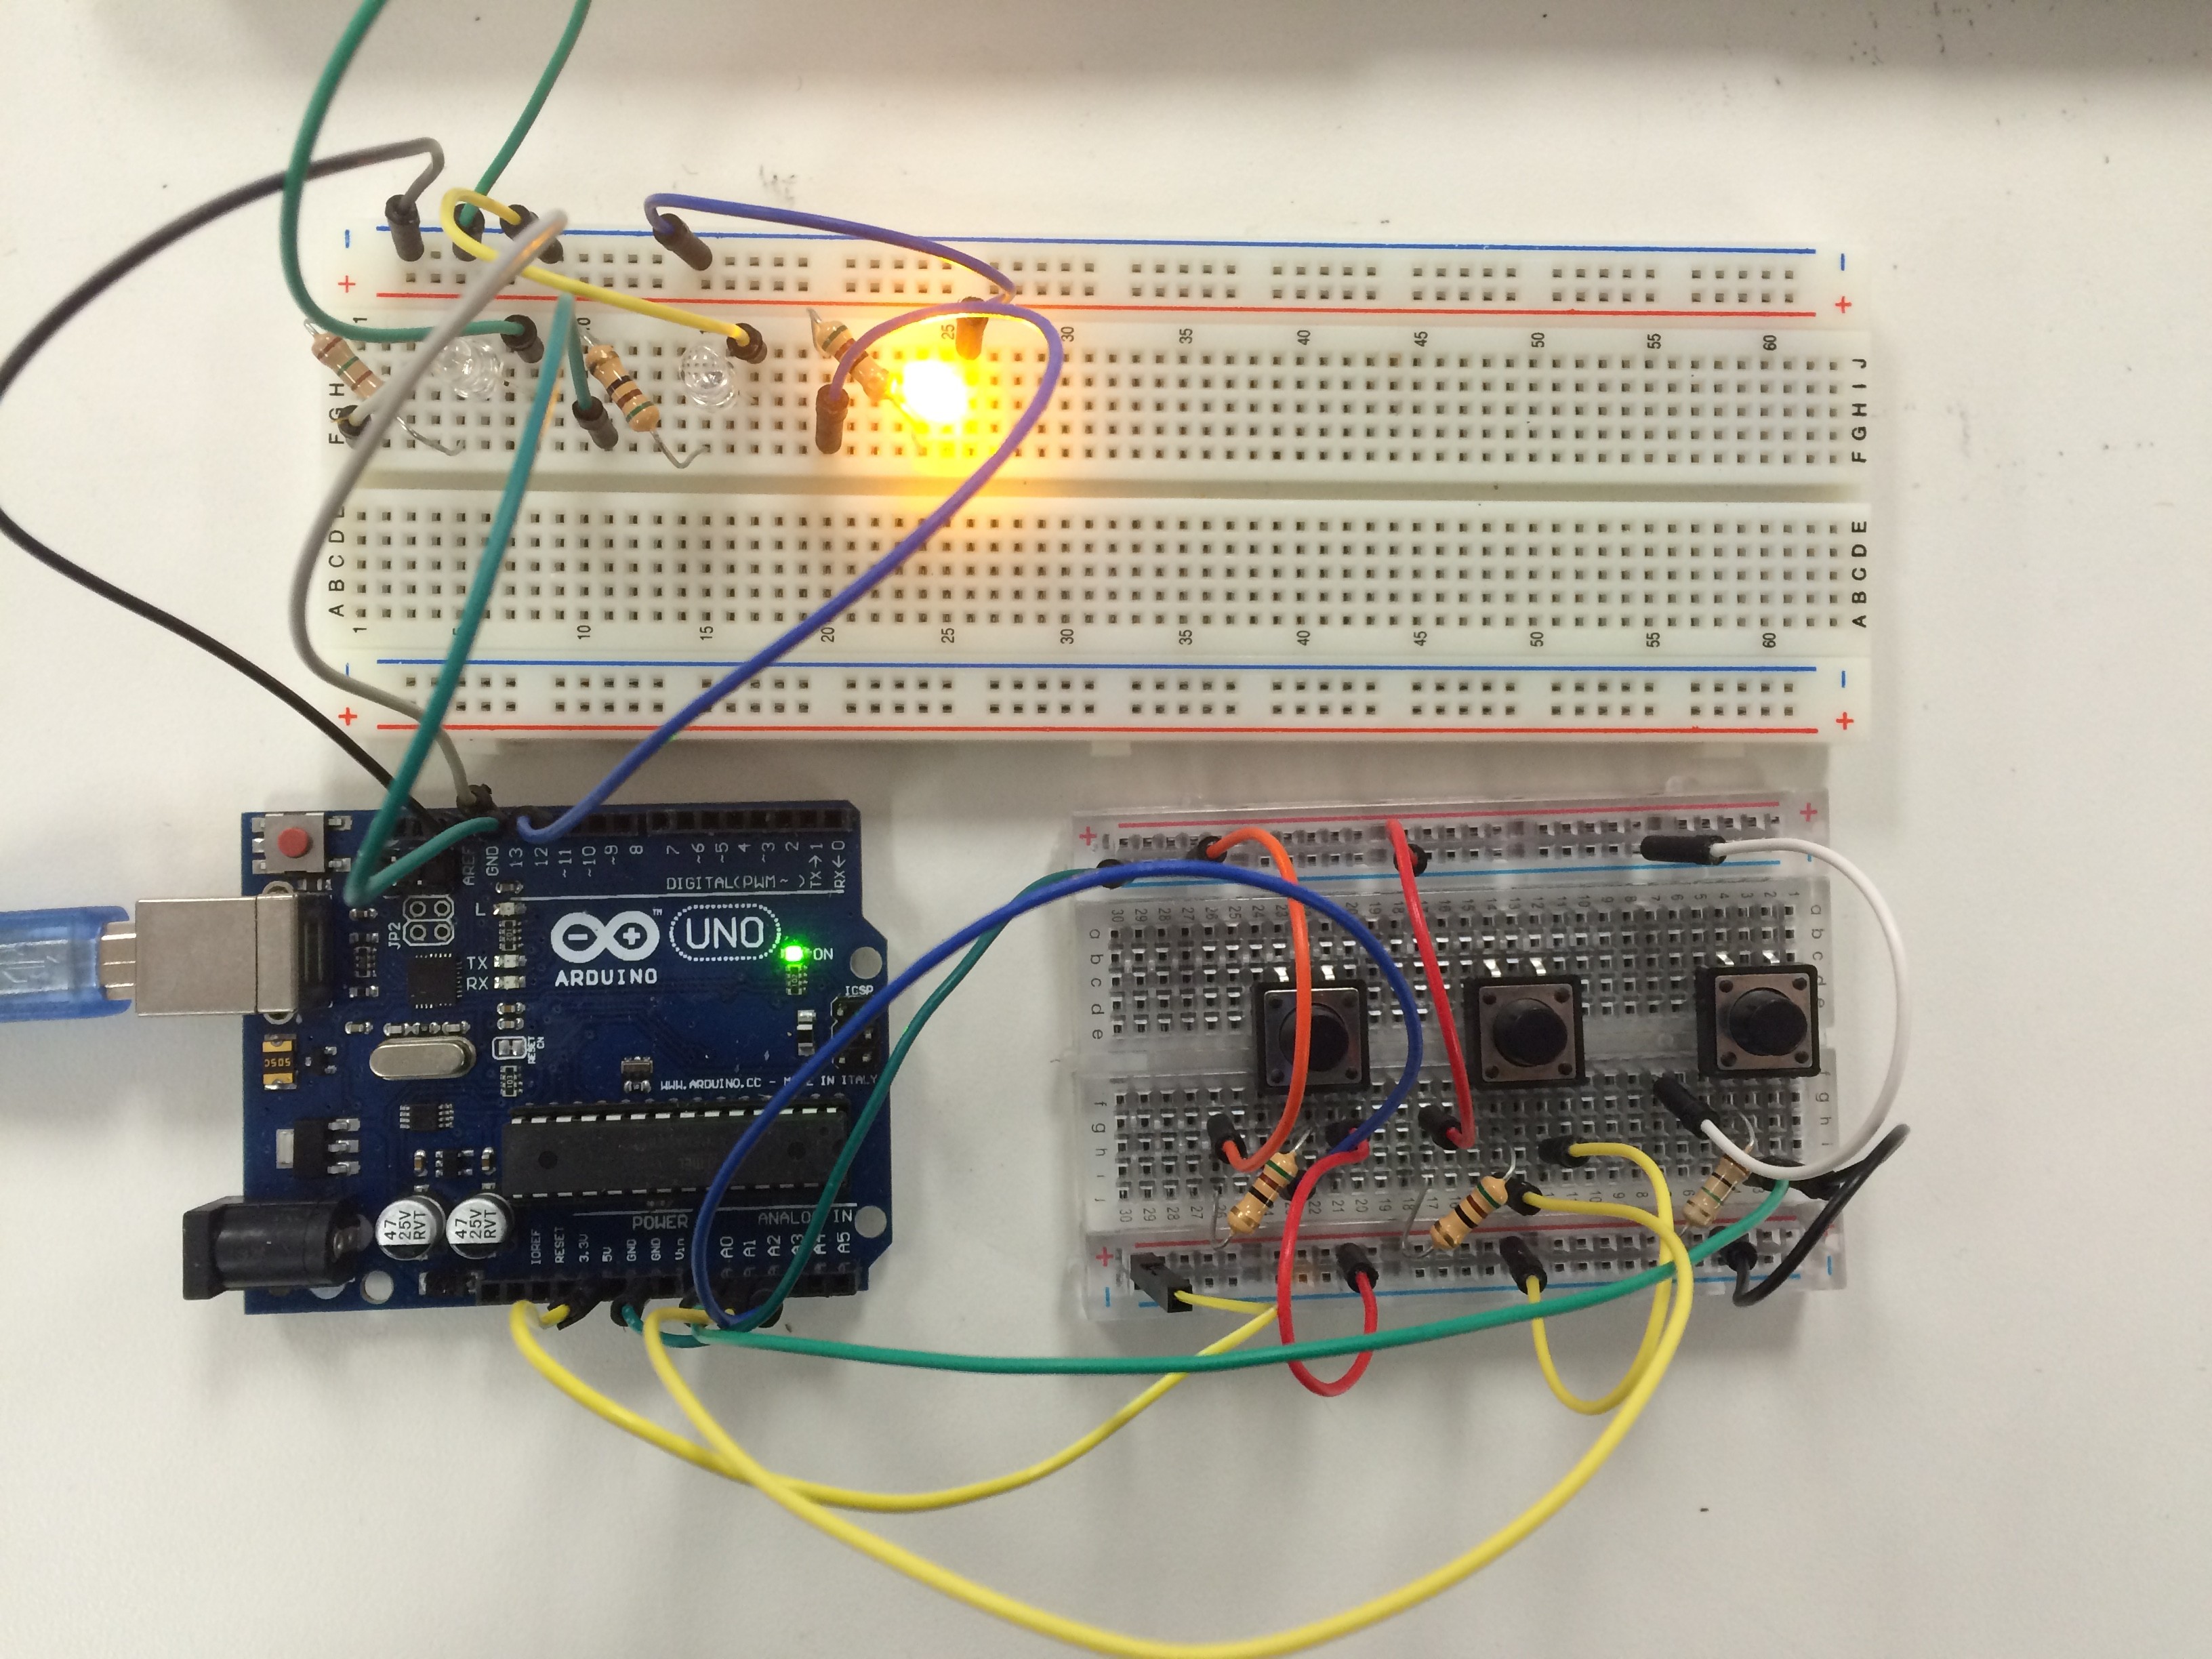
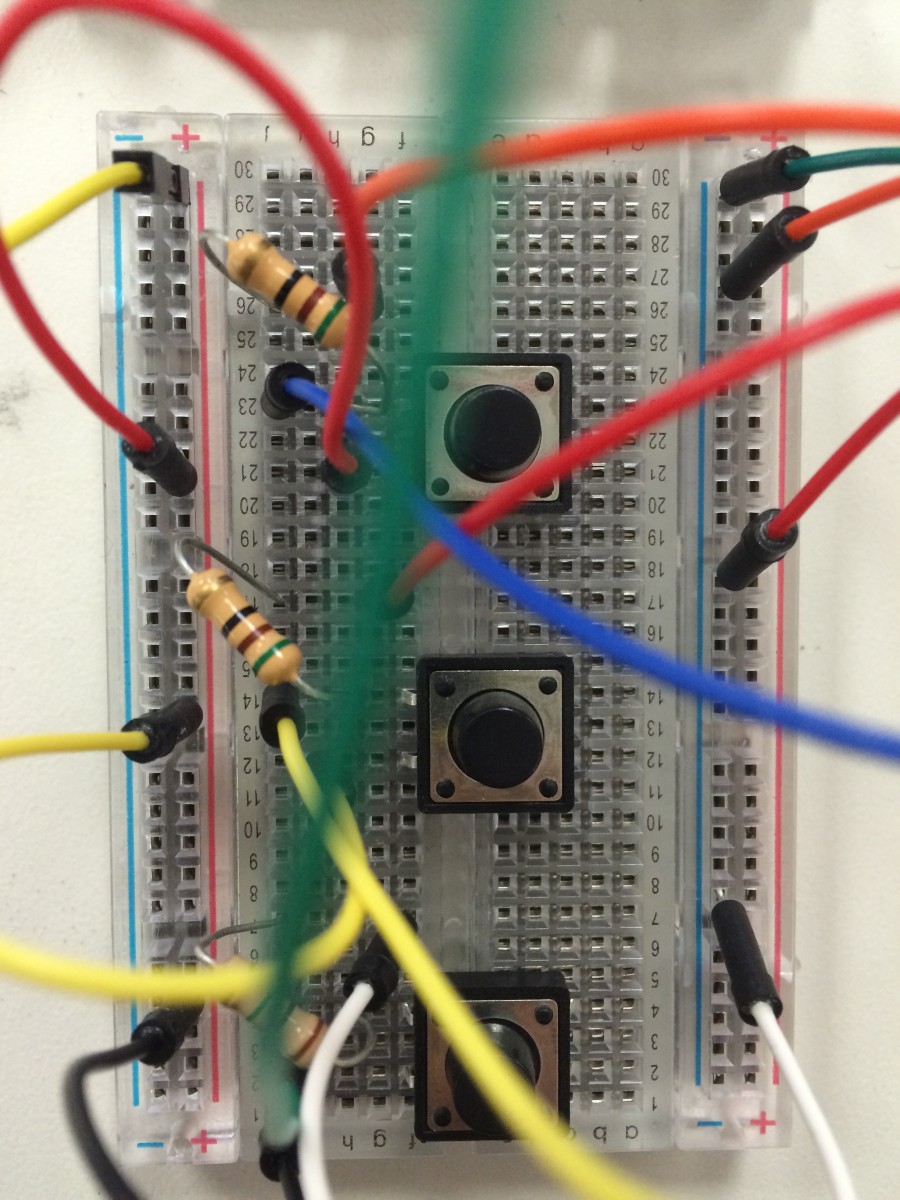
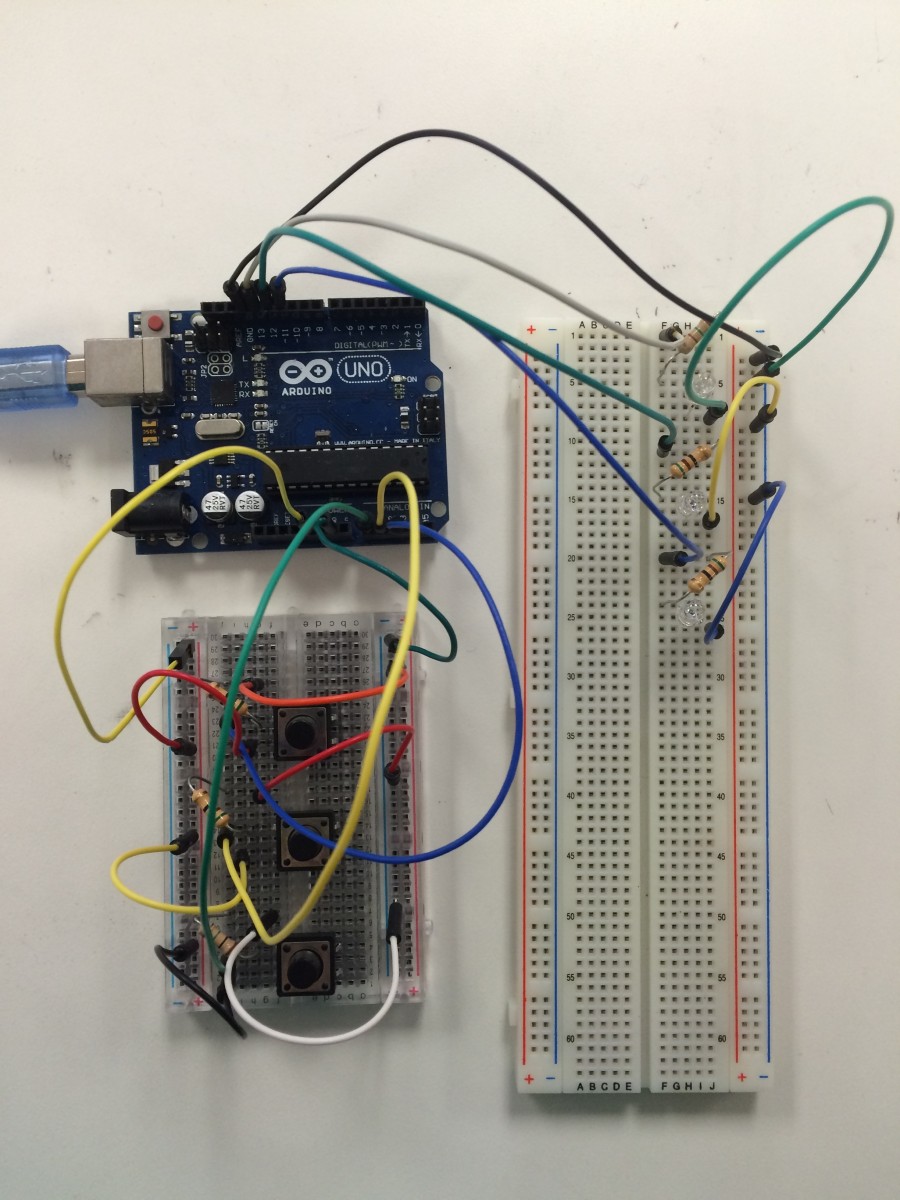
We built Arduino Whack-a-Mole using LED lights as "moles" that turn on and off. The player needs to hit the correct button depending on which LED is on to score points. Two circuit designs were built on the breadboard, one for the LED circuit and one for the button circuit. The Arduino was coded to randomly turn on the LEDs and to add a point to the score every time the correct corresponding button was pushed.
We also build Copy Cat using the same circuit design as Whack-a-Mole. Copy Cat was a memory game where the three LEDs would light up in a random pattern and the player would have to push the corresponding buttons in the correct pattern to gain points. Whenever the player got the pattern correct the next light up pattern would include another character (for example if you got a pattern with three digits correct the next time the LEDs would light up the pattern would have four digits.)
Big Idea
Through this project students will learn:
- Basic coding skills
- How to set up simple circuits
- Knowledge of electronics components
- Boolean logic
Ask
We wanted to incorporate coding with Arduino into the high school students knowledge base. Basic coding is easy to learn and is a very powerful tool. Coding teaches students math skills, reasoning, and logic. We also wanted students to build their own circuits and learn how to use electronics components. We wanted to give the students the opportunity to build something themselves rather than rebuilding a set design. Having the students build an arcade game adds an element of fun and pushes students to be creative.
Key questions:
- What arcade game should I design?
- How am I going to code it?
- How am I going to build the circuitry?
- What electronics will I need?
Brainstorm
We tried to think of simple arcade games or toys we had played with as children and one specific game came to mind, Whack-a-Mole. Traditional Whack-a-Mole is an arcade game where a toy mole pops up from a random hole and the player needs to hit the mole with a toy mallet to gain points. We thought we could recreate this game using Arduino with the "moles" as LED lights and the player would have to push the corresponding button to "whack" the mole.

Plan
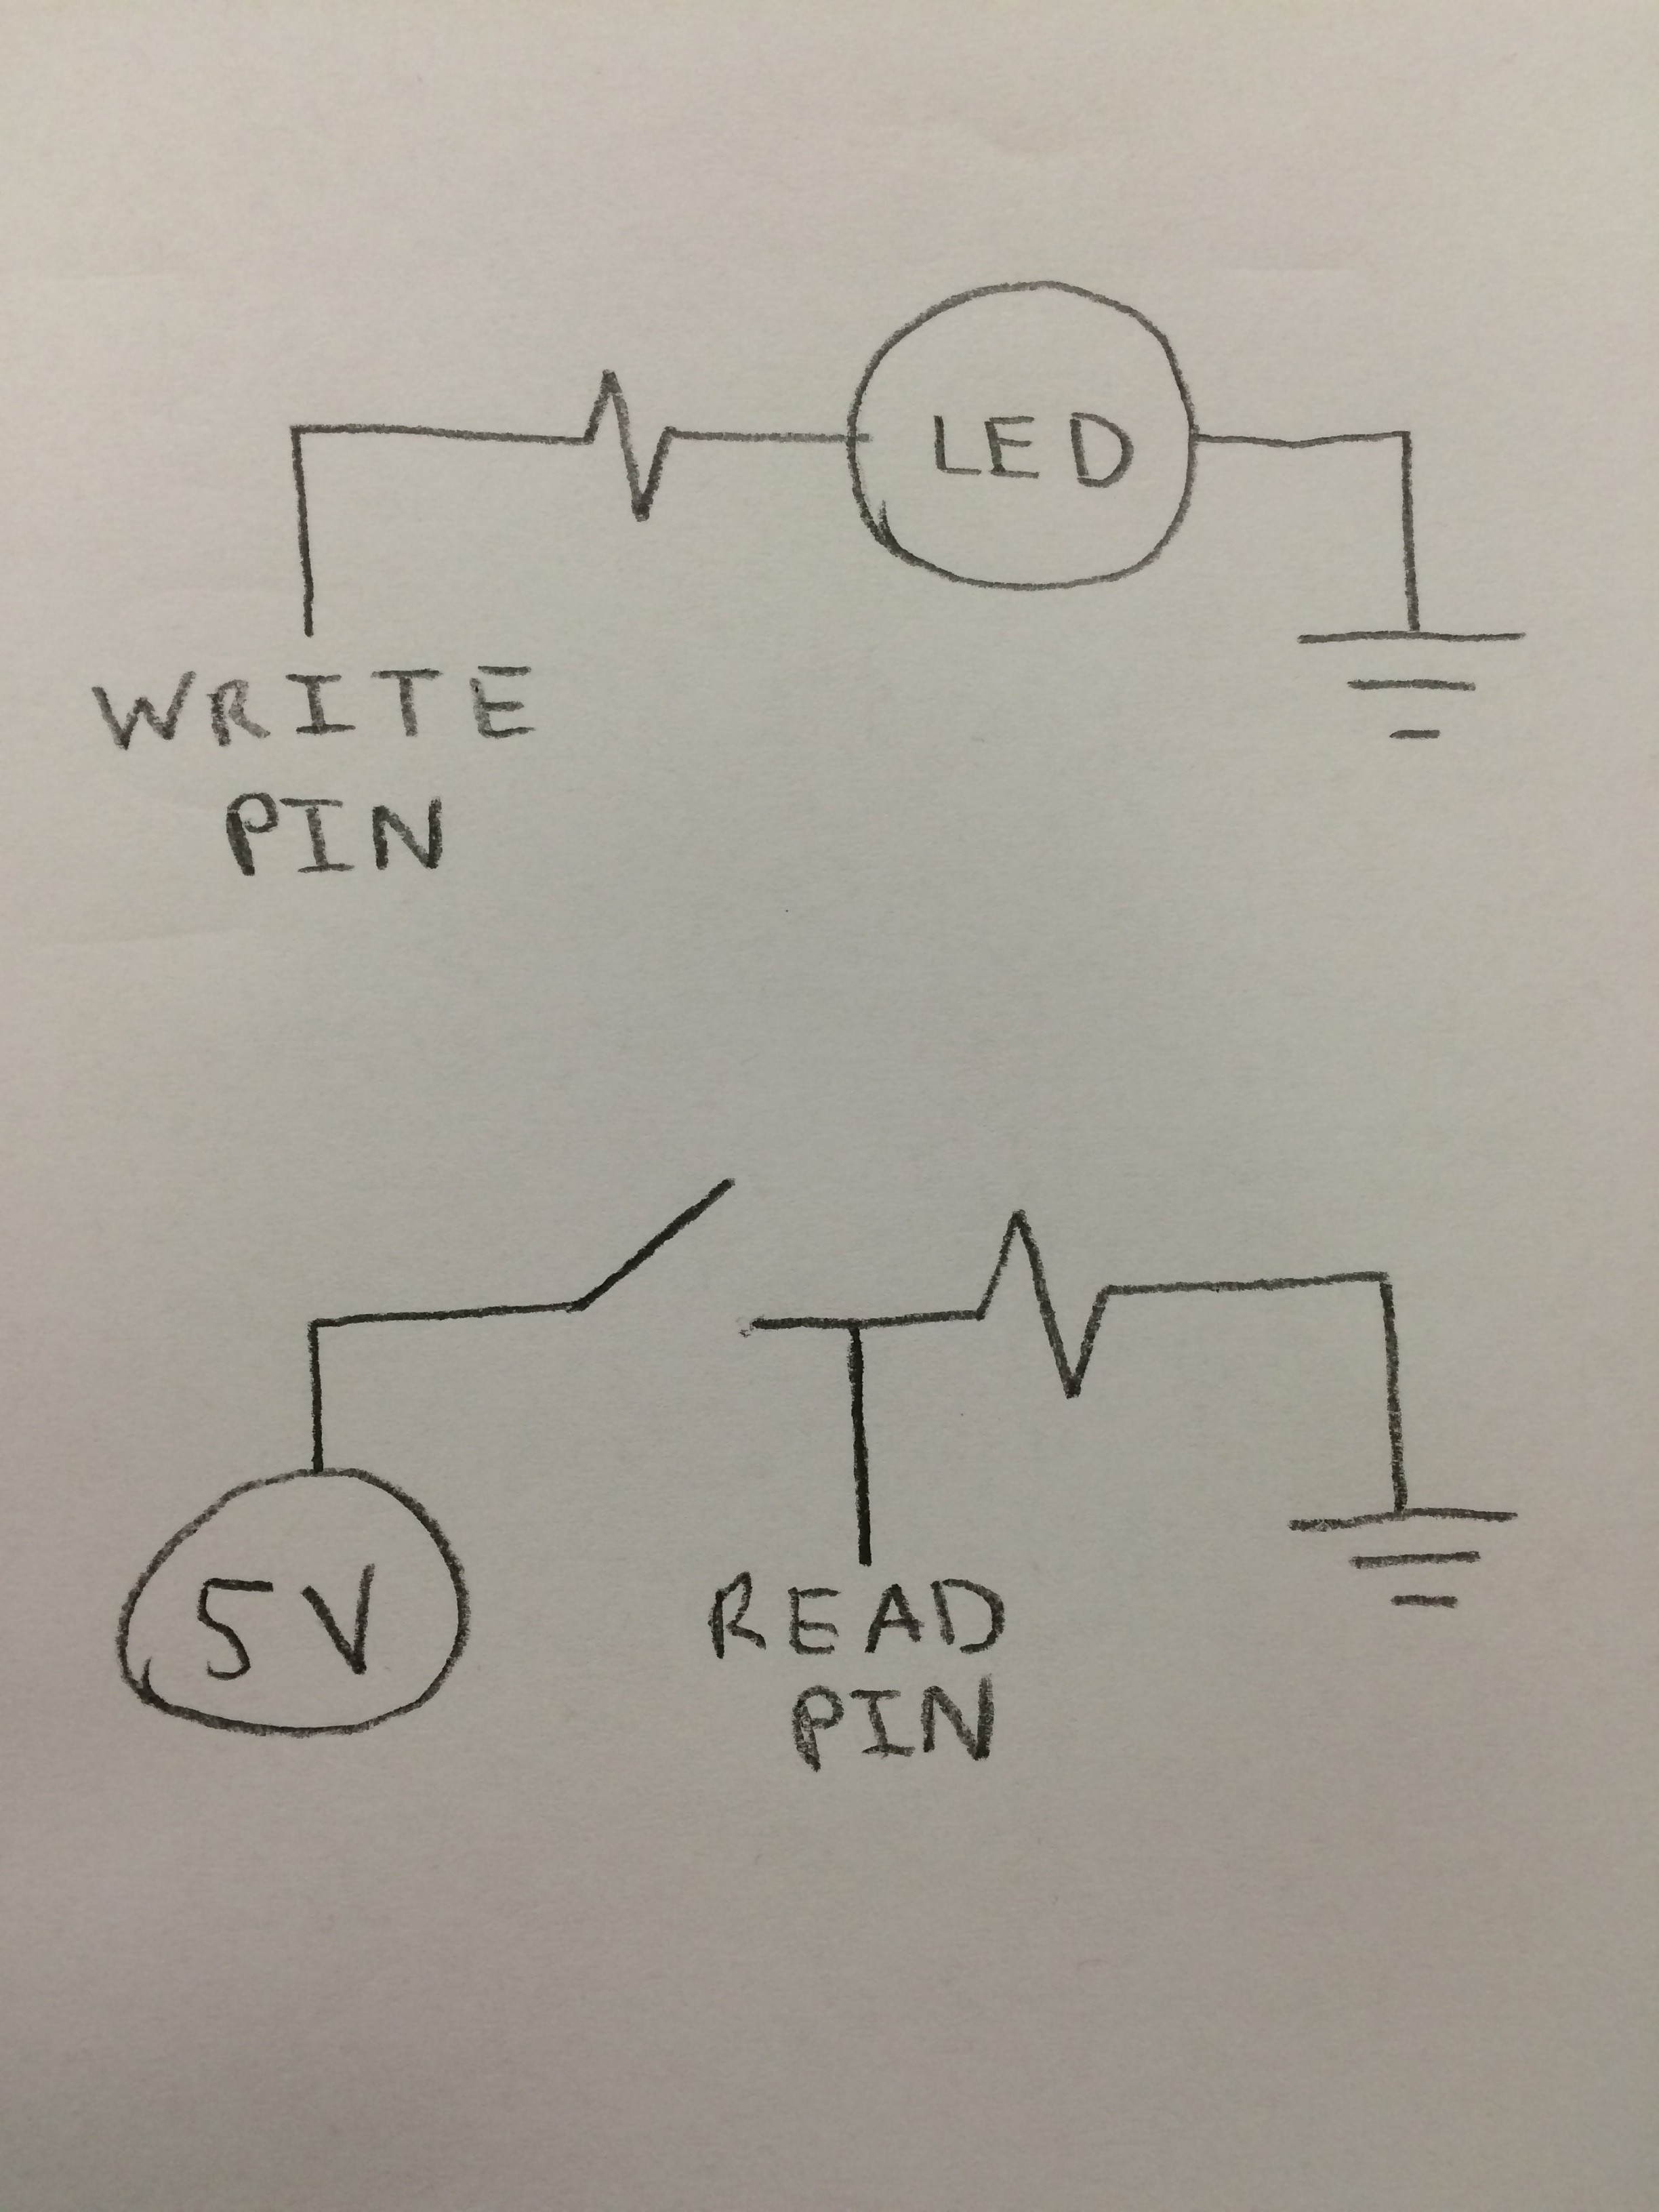
We first planned out what the circuit would look like for the game. We decided we would have three LEDs and three buttons with each button aligning with a specific LED. We had each LED gain power from a specific pin on the Arduino and each button be read by a specific analog in pin. The code would randomly assign what LED would turn on between random time intervals by setting certain pins to HIGH. We would check if the correct button was pressed by checking the values read from the corresponding analog in pins.
Materials: Arduino, breadboards, push buttons, resistors, wires, LEDs
Create
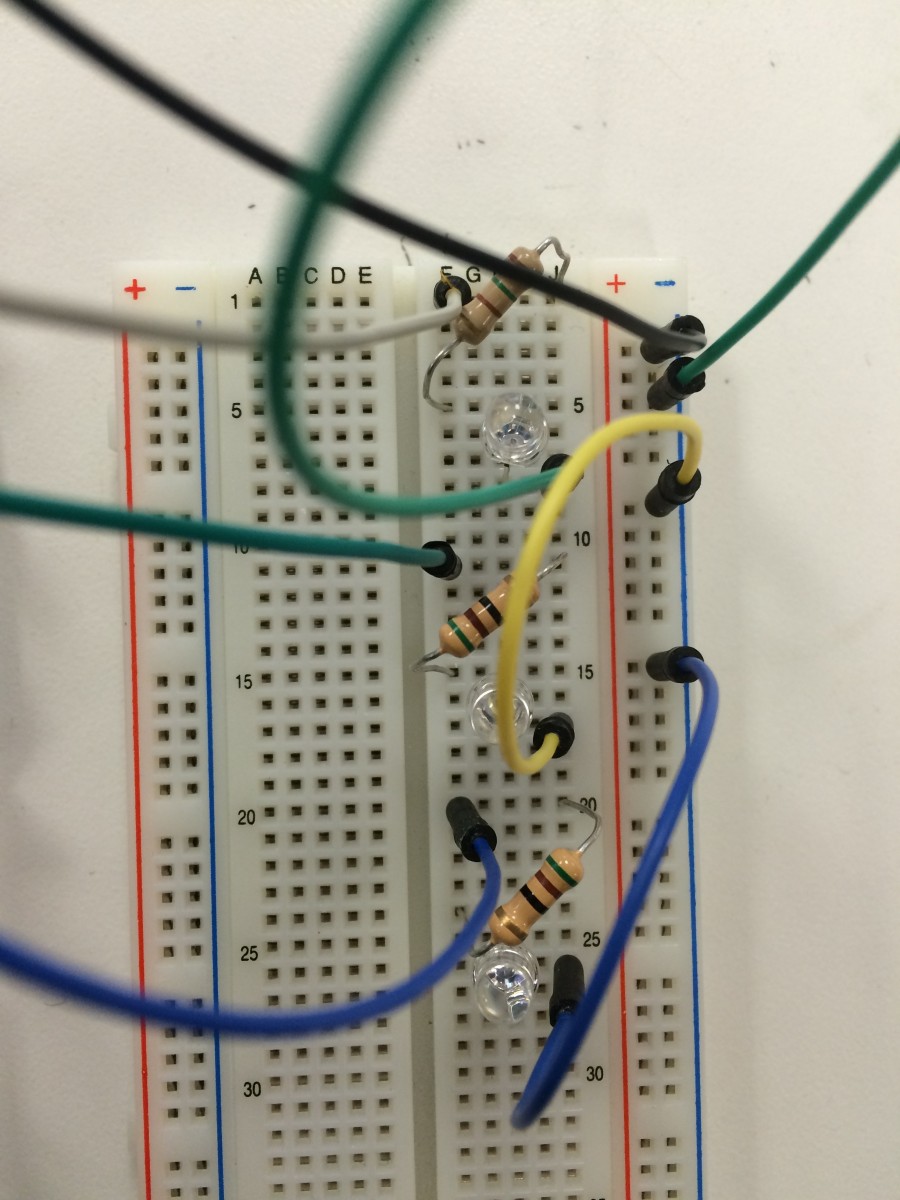
We started by building one LED circuit and checking if we could turn it on and off at random. Next we built one button circuit and checked if we could successfully read in from the analog in pin. The following step was to see if we could correlate one button being pushed with one LED turning on and off to generate a score. The final step was to incorporate three LEDs with three write pins and three buttons with three read pins.
After creating Whack-a-Mole we realized that the same circuit design could be used to create a memory game where the LEDs lit up in a specific order and the player would have to copy that order by pushing the corresponding buttons. We decided to code the program and call the game Copy Cat. We first had the code light up the LEDs in random order and saved that order to a variable. We then took in the readings from the analog in pins to determine what buttons were pushed in what order. We then compared the button pattern and the light pattern to see if they were the same and if so the player would gain a point.

The Code
Whack-a-Mole
Copy Cat
Debugging
While coding the two programs bugs inevitably appeared. The number one way I dealt with figuring out what and where a problem was was printing certain variables to the serial monitor to observe their values and how they changed at each iteration. If I couldn't figure something out I would generally just Google the problem. The official Arduino site is very helpful at providing definitions and examples. In addition, Arduino is a very common platform and if you can't find the solution to the problem on the Arduino site I can assure you there is a forum elsewhere on the internet that will answer your question.
Some common bugs I ran into during my programming:
The Arduino delay() function is extremely useful for slowing down your code, giving a user time to put in inputs, and having certain sections run for set times. If you put in delay(x) at any point in your code the program with pause for x milliseconds before moving on to the next line. Another function that can be used for similar purposes is millis(). I didn't use millis() in my code, but millis() returns the number of milliseconds since your program began running.
Arduino has a built in function to generate random numbers, random(). The function outputs long though and I needed integers. The way I handled this problem was using Arduino's round() function wich rounds the number passed to it to the closest integer value.
When pushing a button the analog in pins can often misread a single push as multiple pushes. This is a common issue when using buttons as inputs and the solution to the problem is known as debouncing. The way I dealt with the issue is I simply put in a delay after the analog pin read in a value greater then 900. Arduino has a good example of debouncing here. (Arduino's debouncing tutorial is much more complex than my solution to the problem.)
Something that tripped me up on both programs was remembering to turn the LEDs off after I had them turn on. For both programs there were times while I was testing the code that multiple LEDs would be turned on at a time. If you want an LED to be on for a set time set its pin to high, delay, and then set its pin to low.
Improve
This project is starter level for Arduino coders, but is by no means an introduction to coding. Students should already be able to know how to create if statements, loops, use analog input, and send outputs to pins. The wires used for this project were too long and stiffer breadboard wires should be used in stead. The long wires make the project a mess and can make the system look too intimidating for builders. This project does not necessarily fit into the set curriculum for high school, but through the process of building their games students will use math skills, apply knowledge of circuitry, and learn how to code their own program. More creativity for game ideas would be encouraged by the addition of LED matrices or digital displays to the circuitry.