EV3 Quickstart
The Problem
Robotics kits such as the LEGO EV3 system often have a high barrier to entry. If you are new to robotics you have to experiment and learn how the motors and sensors work and the capabilities of each component. However, in order to do that you must also know how to program your robot. Even with existing examples online or provided through the LEGO programing software you must at the very least go to your computer and find the program that does what you want (if you even know what you want!). While learning the programing is an important part of robotics, the necessity to learn it right away can mean that users are flooded with too much new information at once.
Our Solution
The EV3 Quickstart System is a program that adapts to the configuration of motors and sensors that the user plugs into the robot. This software could be built into the default programing of the EV3. This will allow users to have out of the box "plug-and-play" capabilities, being able to plug in whatever sensors and motors they wish and have the EV3 Quickstart system automatically run an appropriate program. There would be no need for programing or even connecting to a computer to get started. Once users are comfortable with using the sensors, motors and building components of the kit, they can then turn to coding to expand their possibilities with custom programming.
Set of files for the EV3 Quickstart Program - Level 1
Set of files for the EV3 Quickstart Program - Level 2
This Github repository contains all the files related to the EV3 Quickstart System. It is being updated as changes are made, but gold copy snapshots of the software from different milestones can be found in the ARCHIVE folder.
Set of files for the State_Machine version fo the code, dated 8/9/2016
Current Builds and Progress
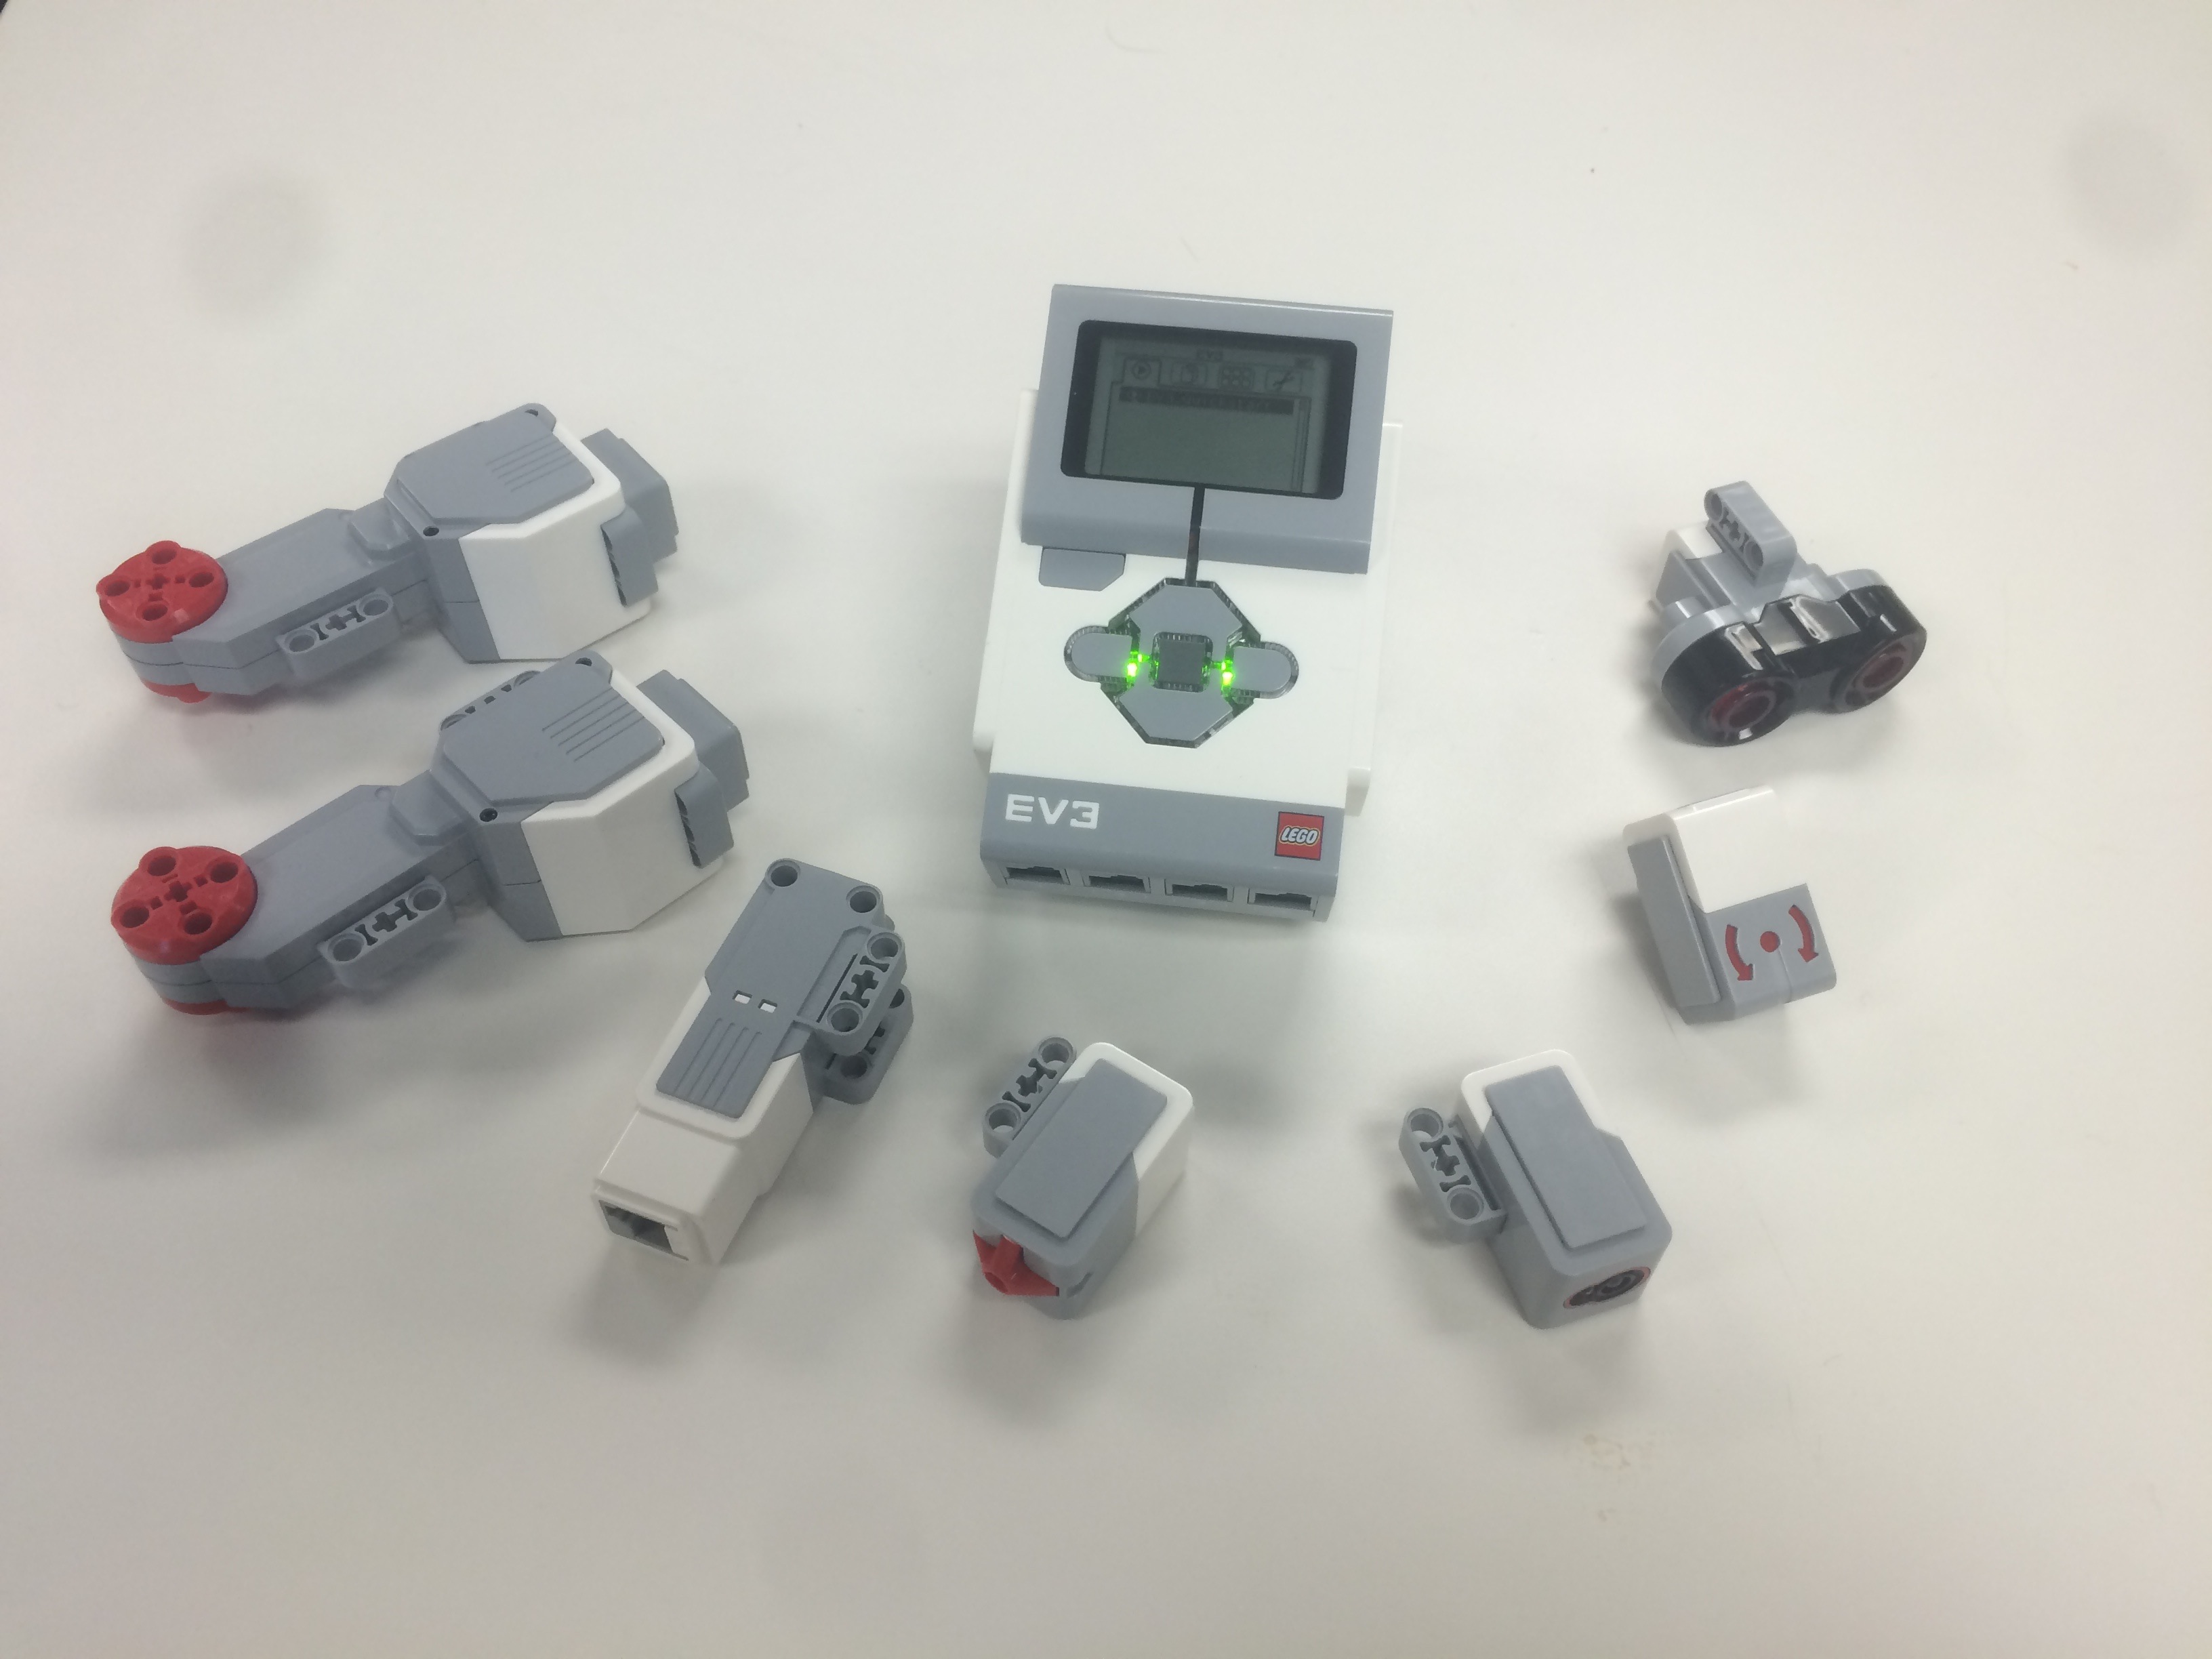
A team at the Tufts University Center for Engineering Education and Outreach (CEEO) has successfully created several working prototype of the EV3 Quickstart System using the LEGO EV3 add on modules in National Instrument's LabVIEW software. Currently, the program is capable of detecting what sensors and motors are plugged into it and running one of many pre-programmed behaviors which reflect the capabilities of the configuration currently plugged in. With this build there is no need to even connect to a computer to start using the system. Additionally, because the EV3 detects where every component is plugged in, users don't even need to worry about which port components are plugged into.
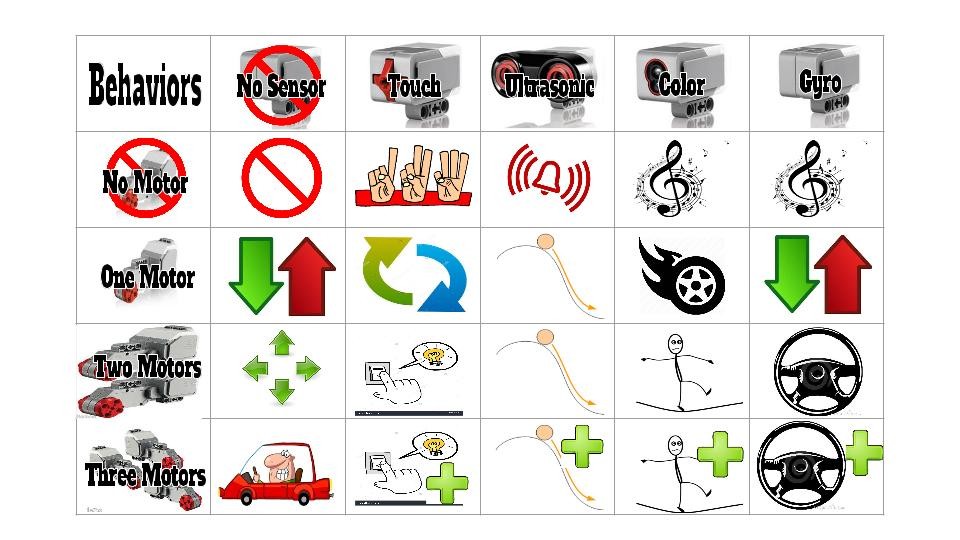
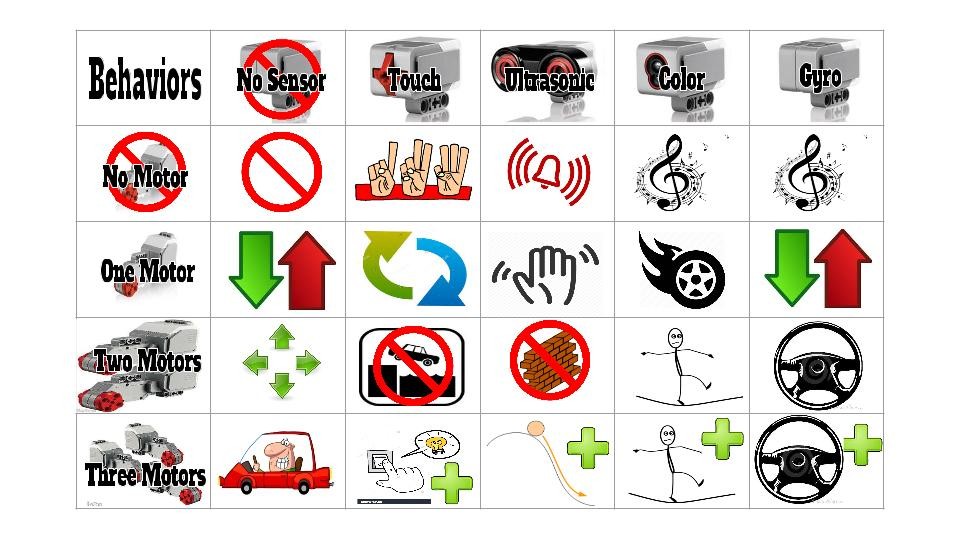
Several different builds are currently operational. These builds break down into different "levels" or difficulties. The level 1 build incorporates simple, easy to understand behaviors, such as turning motors on and off, or controlling speed. The level 2 build incorporates more complex behaviors such as following a line, staying on the table or avoiding obstacles. This give the user a little more flexibility to create more intricate robots. These levels allows users to begin with simpler robots, using the level 1 programing to learn and understand the uses of the various sensors. From there they can build more and more complex robots with the abilities of the level 2 programing, before finally graduating from the Quickstart program entirely and turning to their own code with a strong foundation regarding how the motors and sensors can be used.
Level 1 and Level 2
A major limitation of earlier versions of the software was the lack of real-time response to new components. The level 1 and level 2 builds suffer from this problem as well. As a result, the team has worked to develop a version of the program that runs in real-time by using a state machine. This version runs more efficiently and will react immediately when a new configuration is detected after a component is added or removed. This allows for a more seamless learning environment, allowing kids and students to immediately see the impact that adding a new sensor or motor has on their robot. Currently this state machine runs the equivalent of the level one behaviors, but we hope to implement more complex behaviors of level two in future versions.
Current Limitations and Future Development
The system currently only recognizes the 4 sensors that are included in the educational version of the EV3 kit, but, this could be expanded to cover the whole spectrum of sensors that are available for the EV3. An additional function we would like to add to this program is the ability for the user to "get under the hood" and inspect the code that causes the behaviors run in the Quickstart program. Ideally the user could plug the EV3 into a computer and have the option to open the code that reflects the behavior that was last run on the EV3. Our hope is that this would provide an easier transition to coding by allowing kids to start by looking at code for which they already know what real-world behavior it will cause. Furthermore, we would like to add additional functionality to the State Machine version of the program, creating a similar level 1 and level 2 that will allow kids to explore simpler and more complex behaviors as their abilities progress.
Testing
The system has been tested extensively for both functionality and flexibility. The programing has repeatedly succeeded in recognizing the configuration of the robot when the program is run. Testing also proved the versatility of the system. Using the LEGO EV3 kits and no additional programing, we successfully were able to create a number of different robots which behaved in different manors. Many of these builds were based of the Dr. E's MINDSTORMS Challenges, and more information about these test robots can be found under the projects page.

Design Challenges
Auto Detection of Components
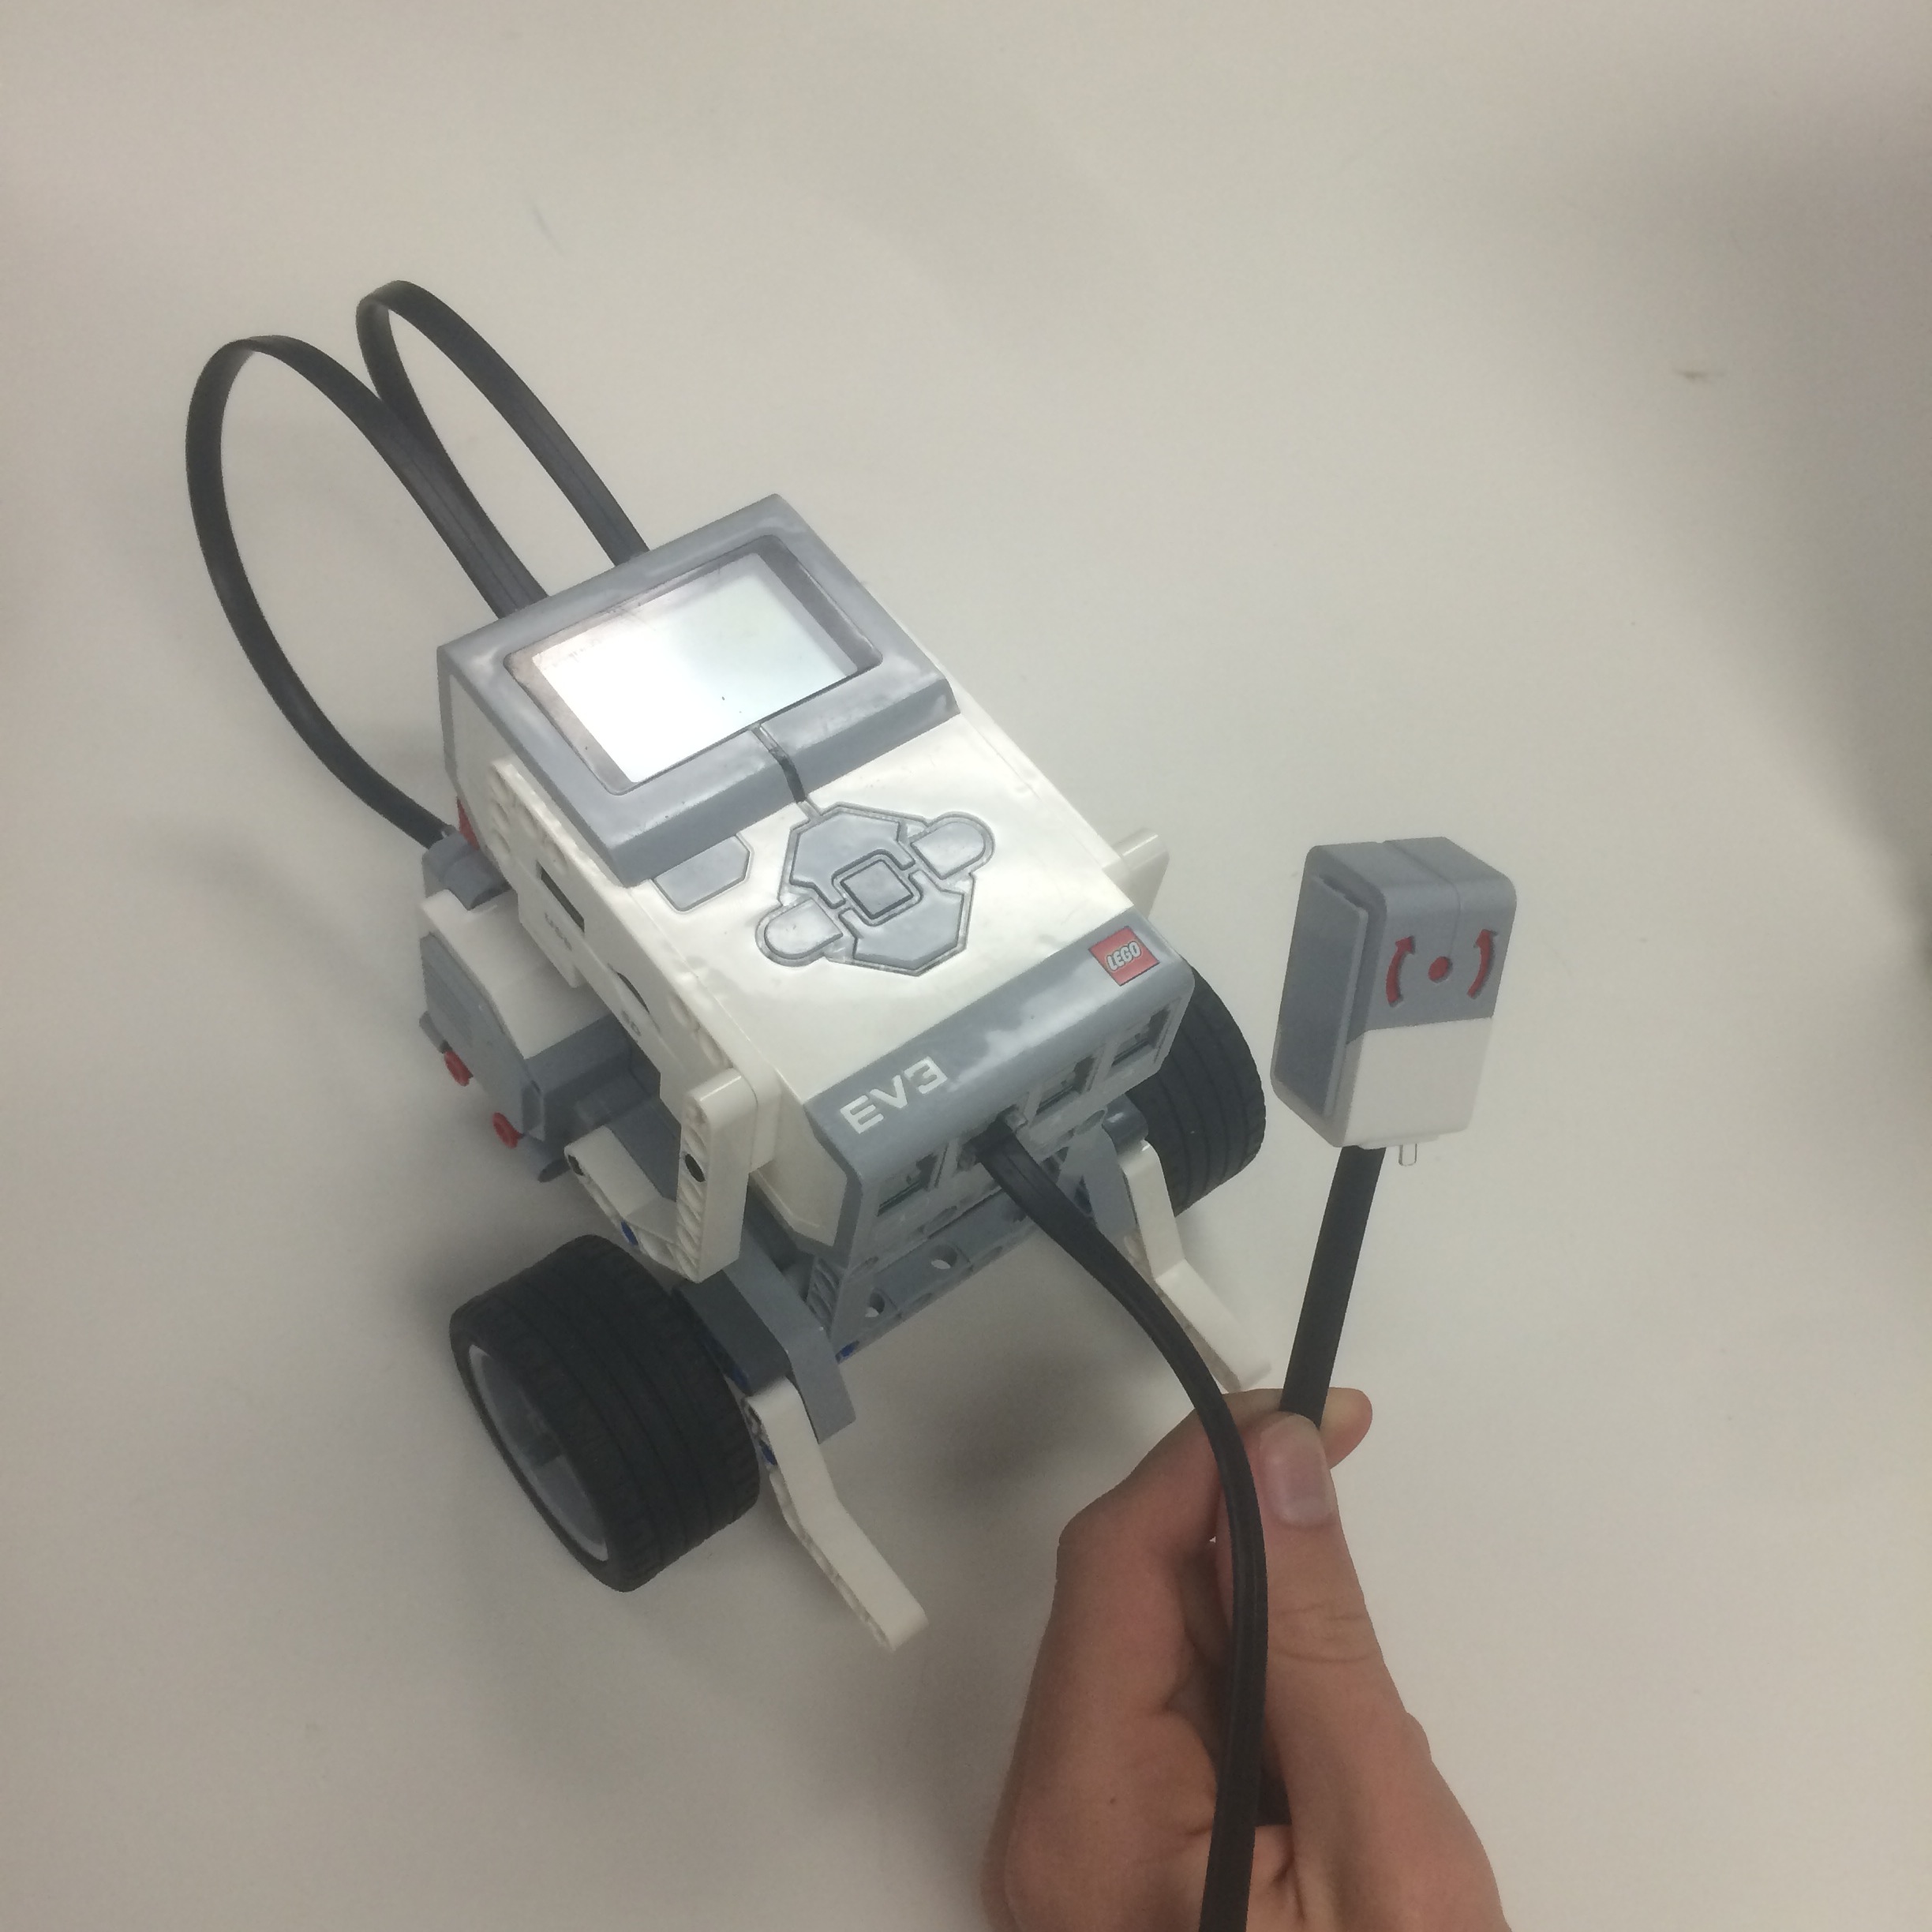
Setting up the system to automatically detect the components plugged into the EV3 proved to be more difficult than we initially thought. We new the EV3 had the capability to do what we wanted to because it does exactly that in the Port View app that comes built into the EV3 by default. After some looking, we found that by using an invoke node under the class EV3InputPrimitive, we could use the InputGetTypeMode method to return the sensor code of a sensor in a given port. The same method can be used to detect the motors by calling the same invoke node using port no 16,17,18 and 19 for A,B,C,D respectively.
Running Multiple Instances of the Same VI
An issue arose when trying to run multiple instances of the same VI. This became an issue when handling cases with multiple motors and sensors. If two of the same sensor were plugged in, the program would confuse the two and cause unexpected behavior in the robot. This was because, by default, the EV3 does not create re-entrant VI's. Once the subVI's in the program were set to be shared clone re-entrant VI's the issue was resolved.
State Machine - Automatically Switching as Components are Changed
Discovering how to detect motors the same way we detect sensors made it easy to create the state machine. Unfortunately, our original program architecture with subVI's for each behavior did not work well with a state machine. The original versions contained too many loops and cases forced us to start from the ground up. Ultimately, we got a streamlined stater machine system working.
Sensing Motor Disconnect
This issue has still not been fully solved. For some reason, the EV3 has difficulty detecting that a motor has been removed if it is removed while moving forward. Once the input switches to backwards or zero, the change is detected. To get around this, we made all inputs negative by default, forcing the EV3 to detect the loss of the component. This, however, still causes minor issues with the Gyro and buttons on the brick, as both of these allow for the motor to travel in both directions, causing the slight possibility that the EV3 will not detect the change in configuration.
Projects
The system was tested with a number of projects, many of which are based off of Dr. E's MINDSTORMS Challenges. These test project successfully proves the versatility of the program, since they are all running on the same programing.
Waving Alien
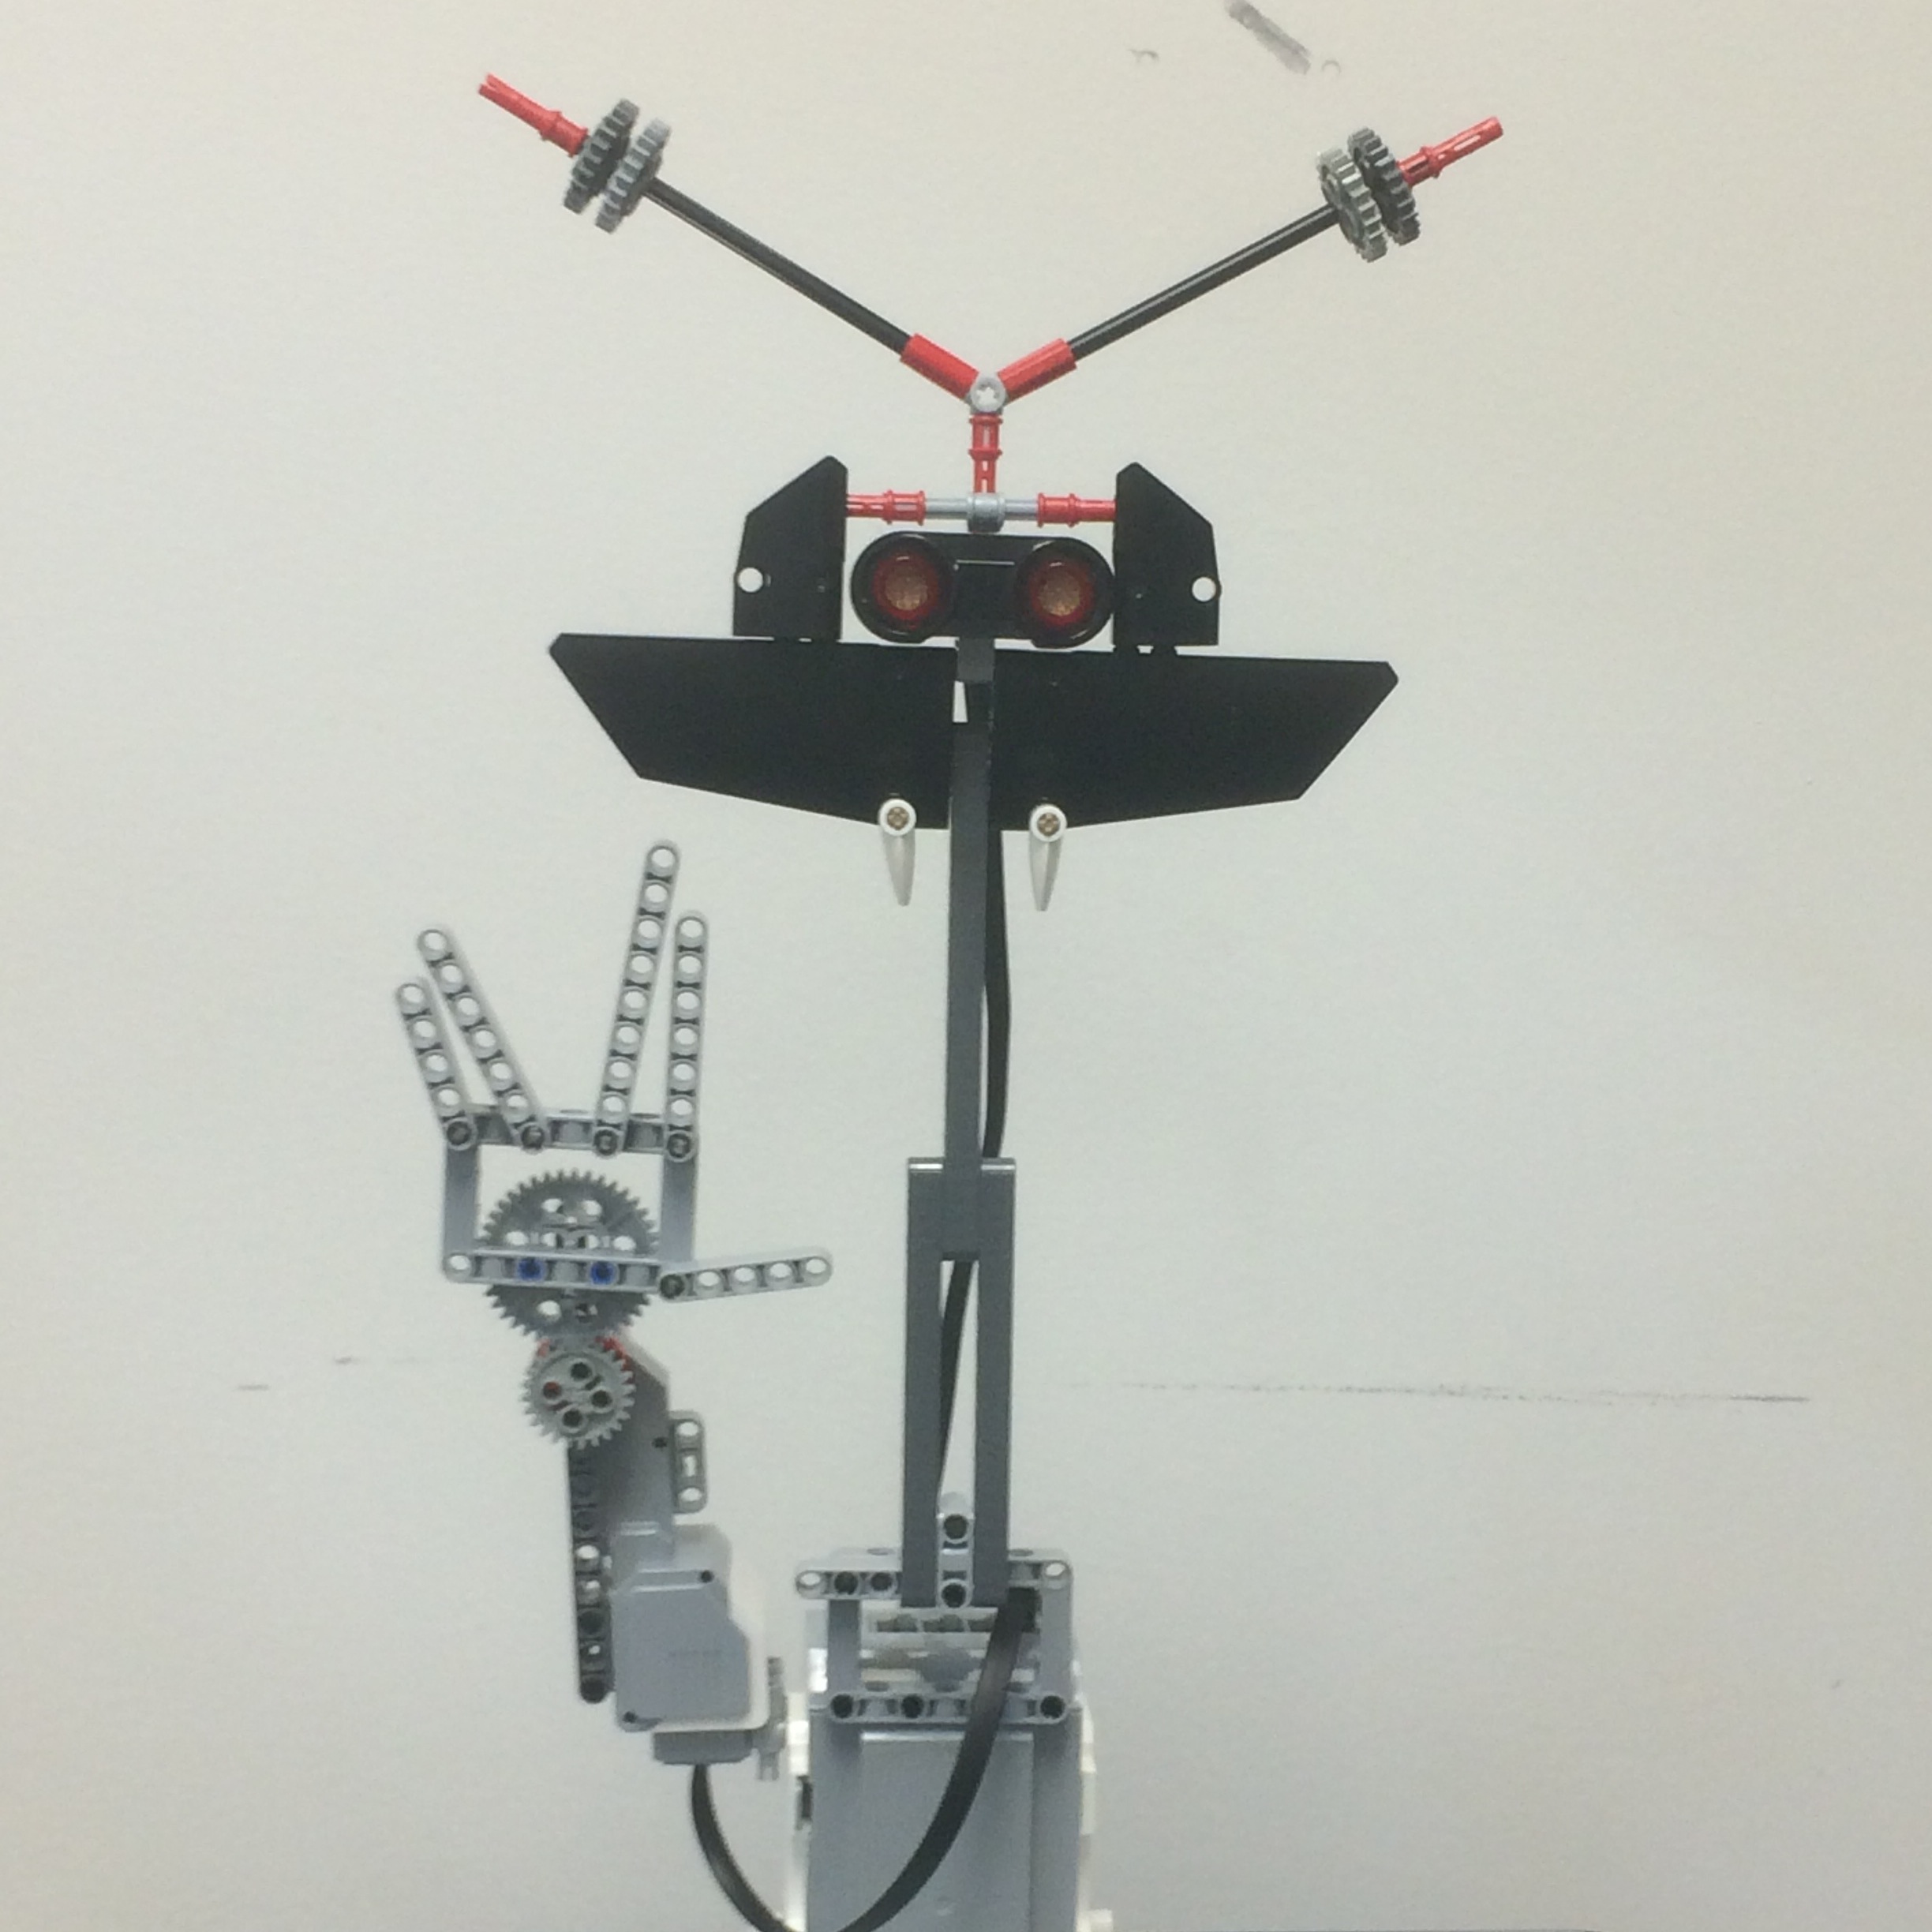
In this example, an ultrasonic sensor is used with a motor to create a robotic alien that greets people who come near it. This motion is created by executing the one_motor_ultrasonic_sensor.vi, causing the motor to activate when an object (person) is within a meter of the sensor.
Dr E's Challenge: Greetings Earthling (October 2014)
Burglar Alarm
In this example, we used an ultrasonic sensor to tell when an object came too close to the robot, creating a makeshift burglar alarm. This was created using the no_motor_ultrasonic_sensor.vi. This causes the EV3 to sound a tone as an alarm when an object (person) is within 1 meter of the ultrasonic sensor.
Dr. E's Challenge: Burglar Alarm (November 2015)
Line Follower
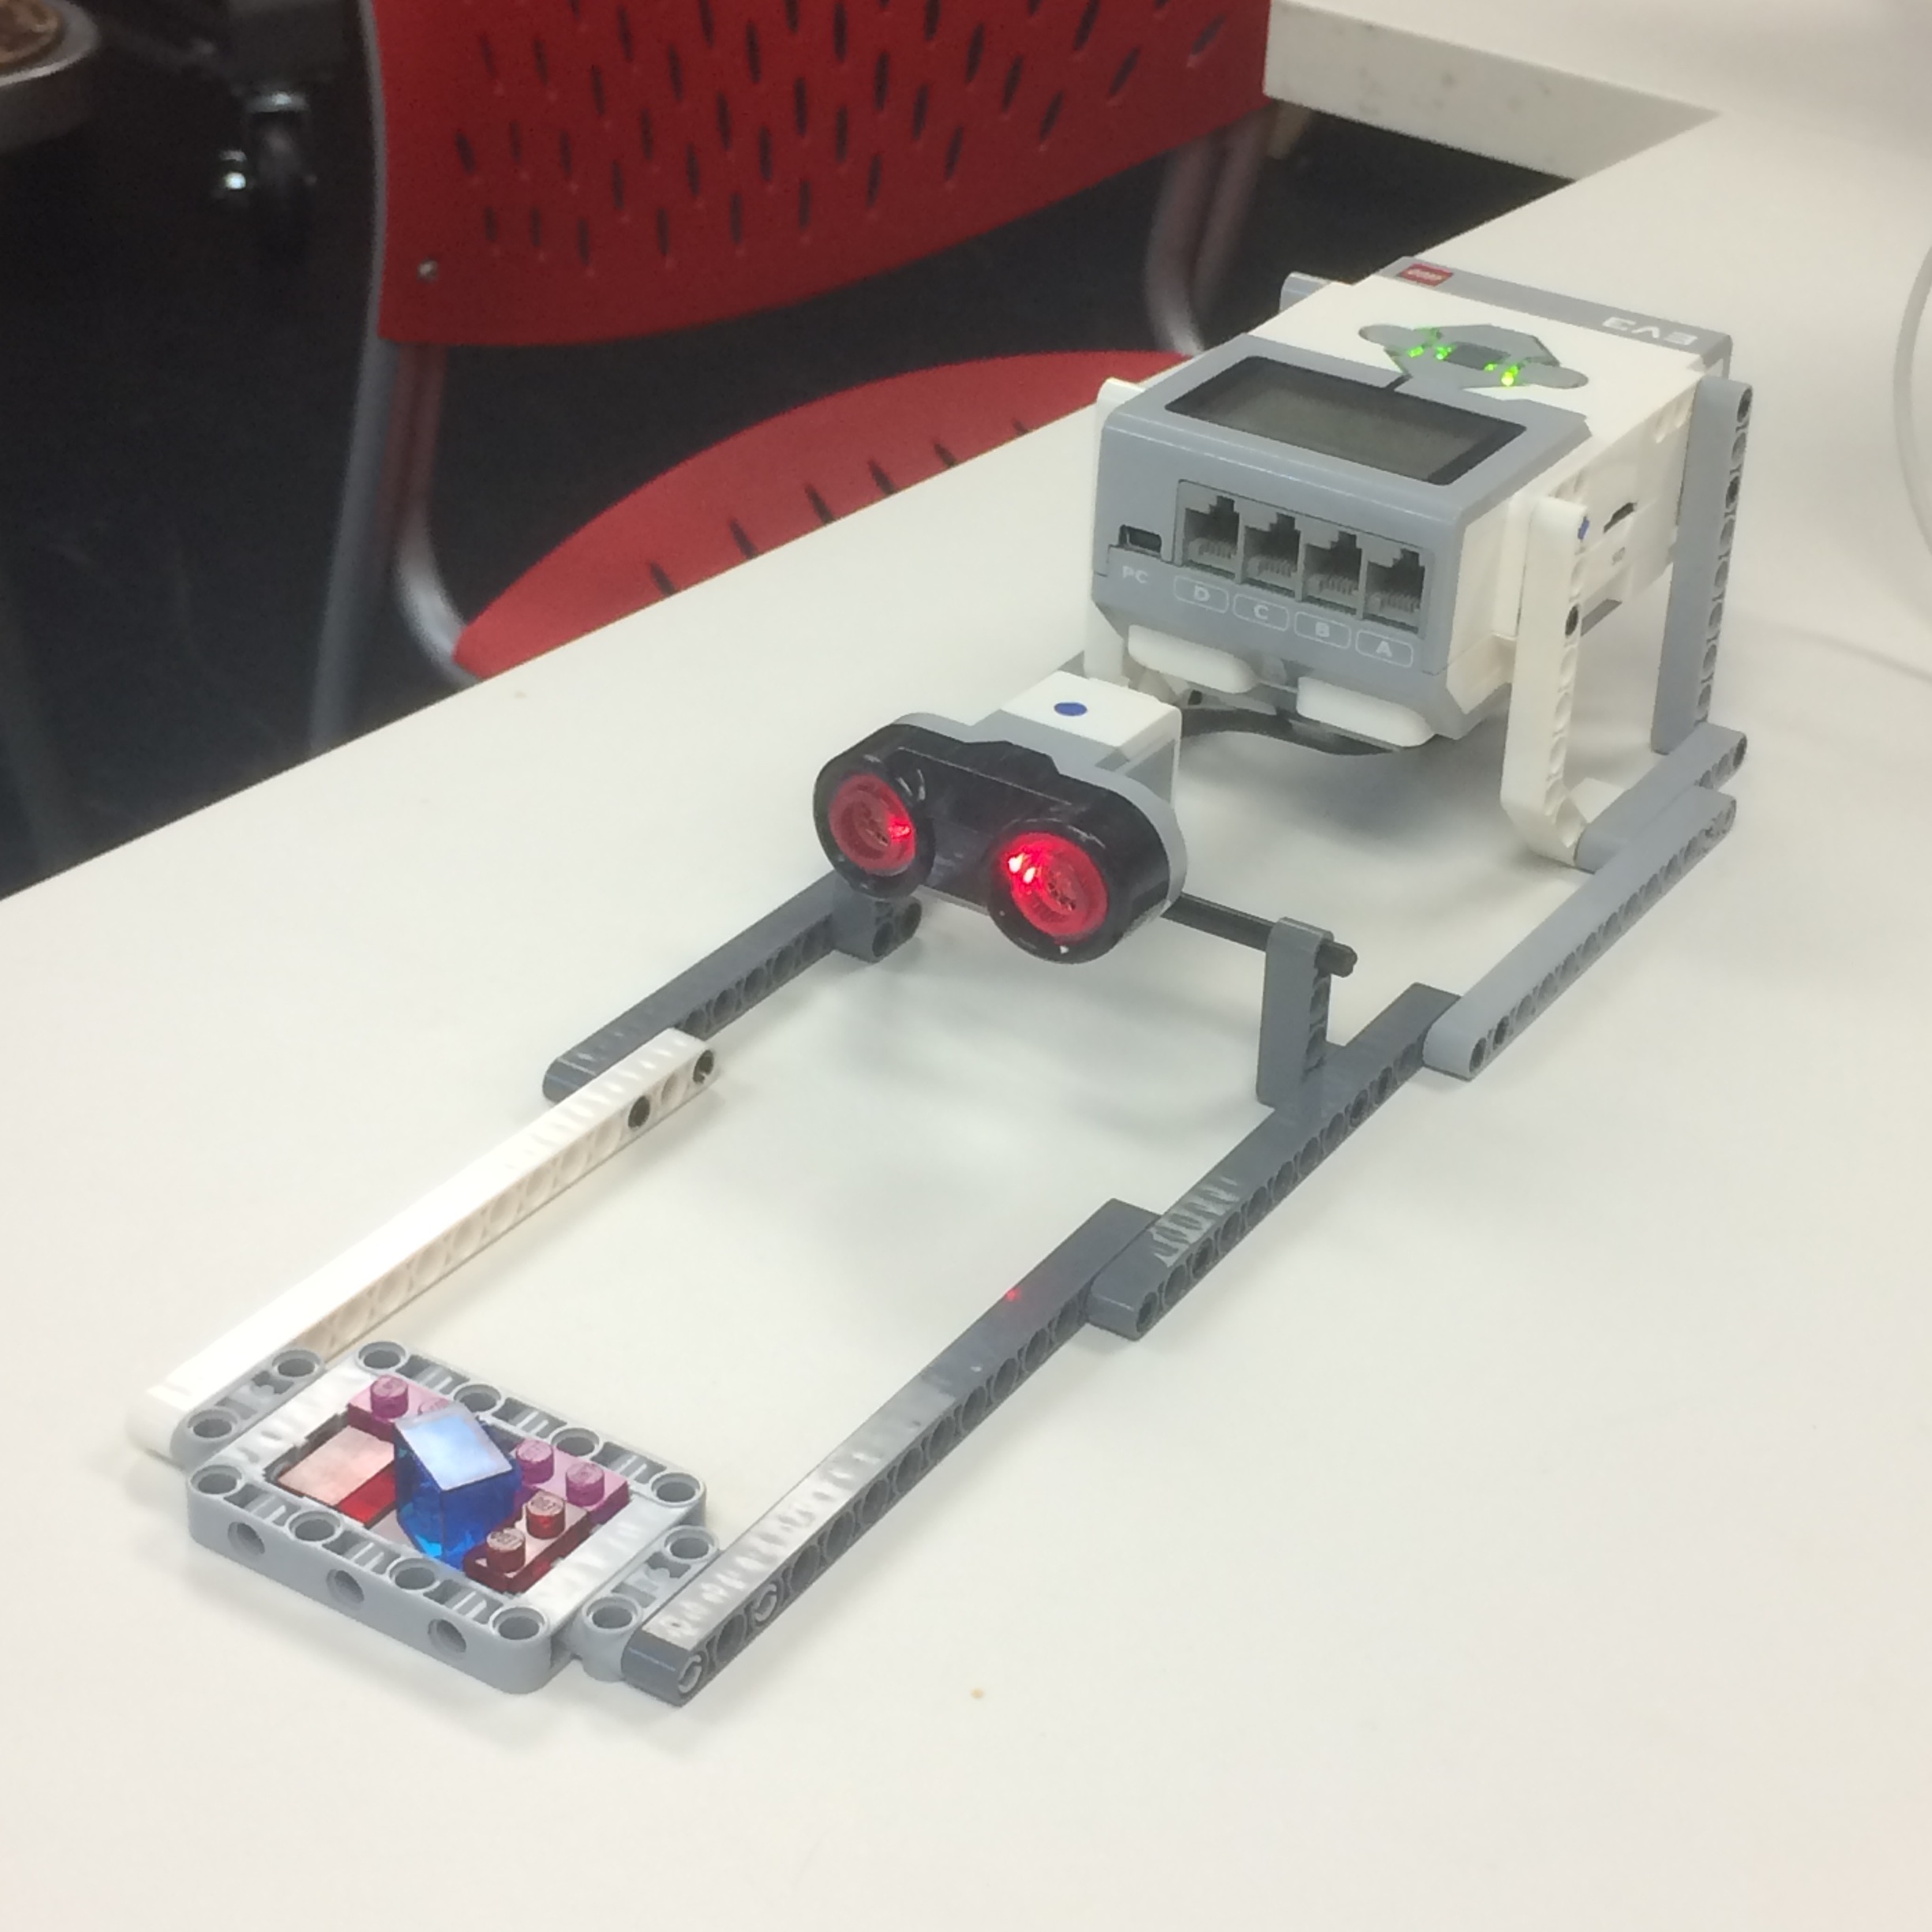
In this example, we attached a light sensor to a two-motor robot, creating a robot that can drive along a line on the ground. This motion was created using the two_motor_color_sensor.vi. Using this VI, the steering of the motors is controlled proportionally to the reflected light received by the color sensor. This allows the the robot to follow a line off a high contrast background (i.e. black line on white background).
Table Sniffing Dog
This dog was created using three motors, a touch sensor and an ultrasonic sensor. The dog walks around sniffing the table. When its nose touch sensor) is no longer pressed against the table, the dog backs up and turns. When you put your hand in front of the dog's face (ultrasonic sensor), the dog wags its tail. These motions are created by executing the two_motor_touch_sensor.vi and one_motor_ultrasonic_sensor.vi, respectively.
Dr. E's Challenges: Silly Walks (February 2015), Robo Pet (December 2015)
Gyro-Steering Car
In this example, we connected a gyro sensor to a mobile robot, giving the user the ability to steer the car using the gyro sensor as a "joystick." This behavior was created using the two_motor_gyro_sensor.vi, which inputs a steering value to the motors based on the angle at which the gyro sensor is held at.
Scorpion
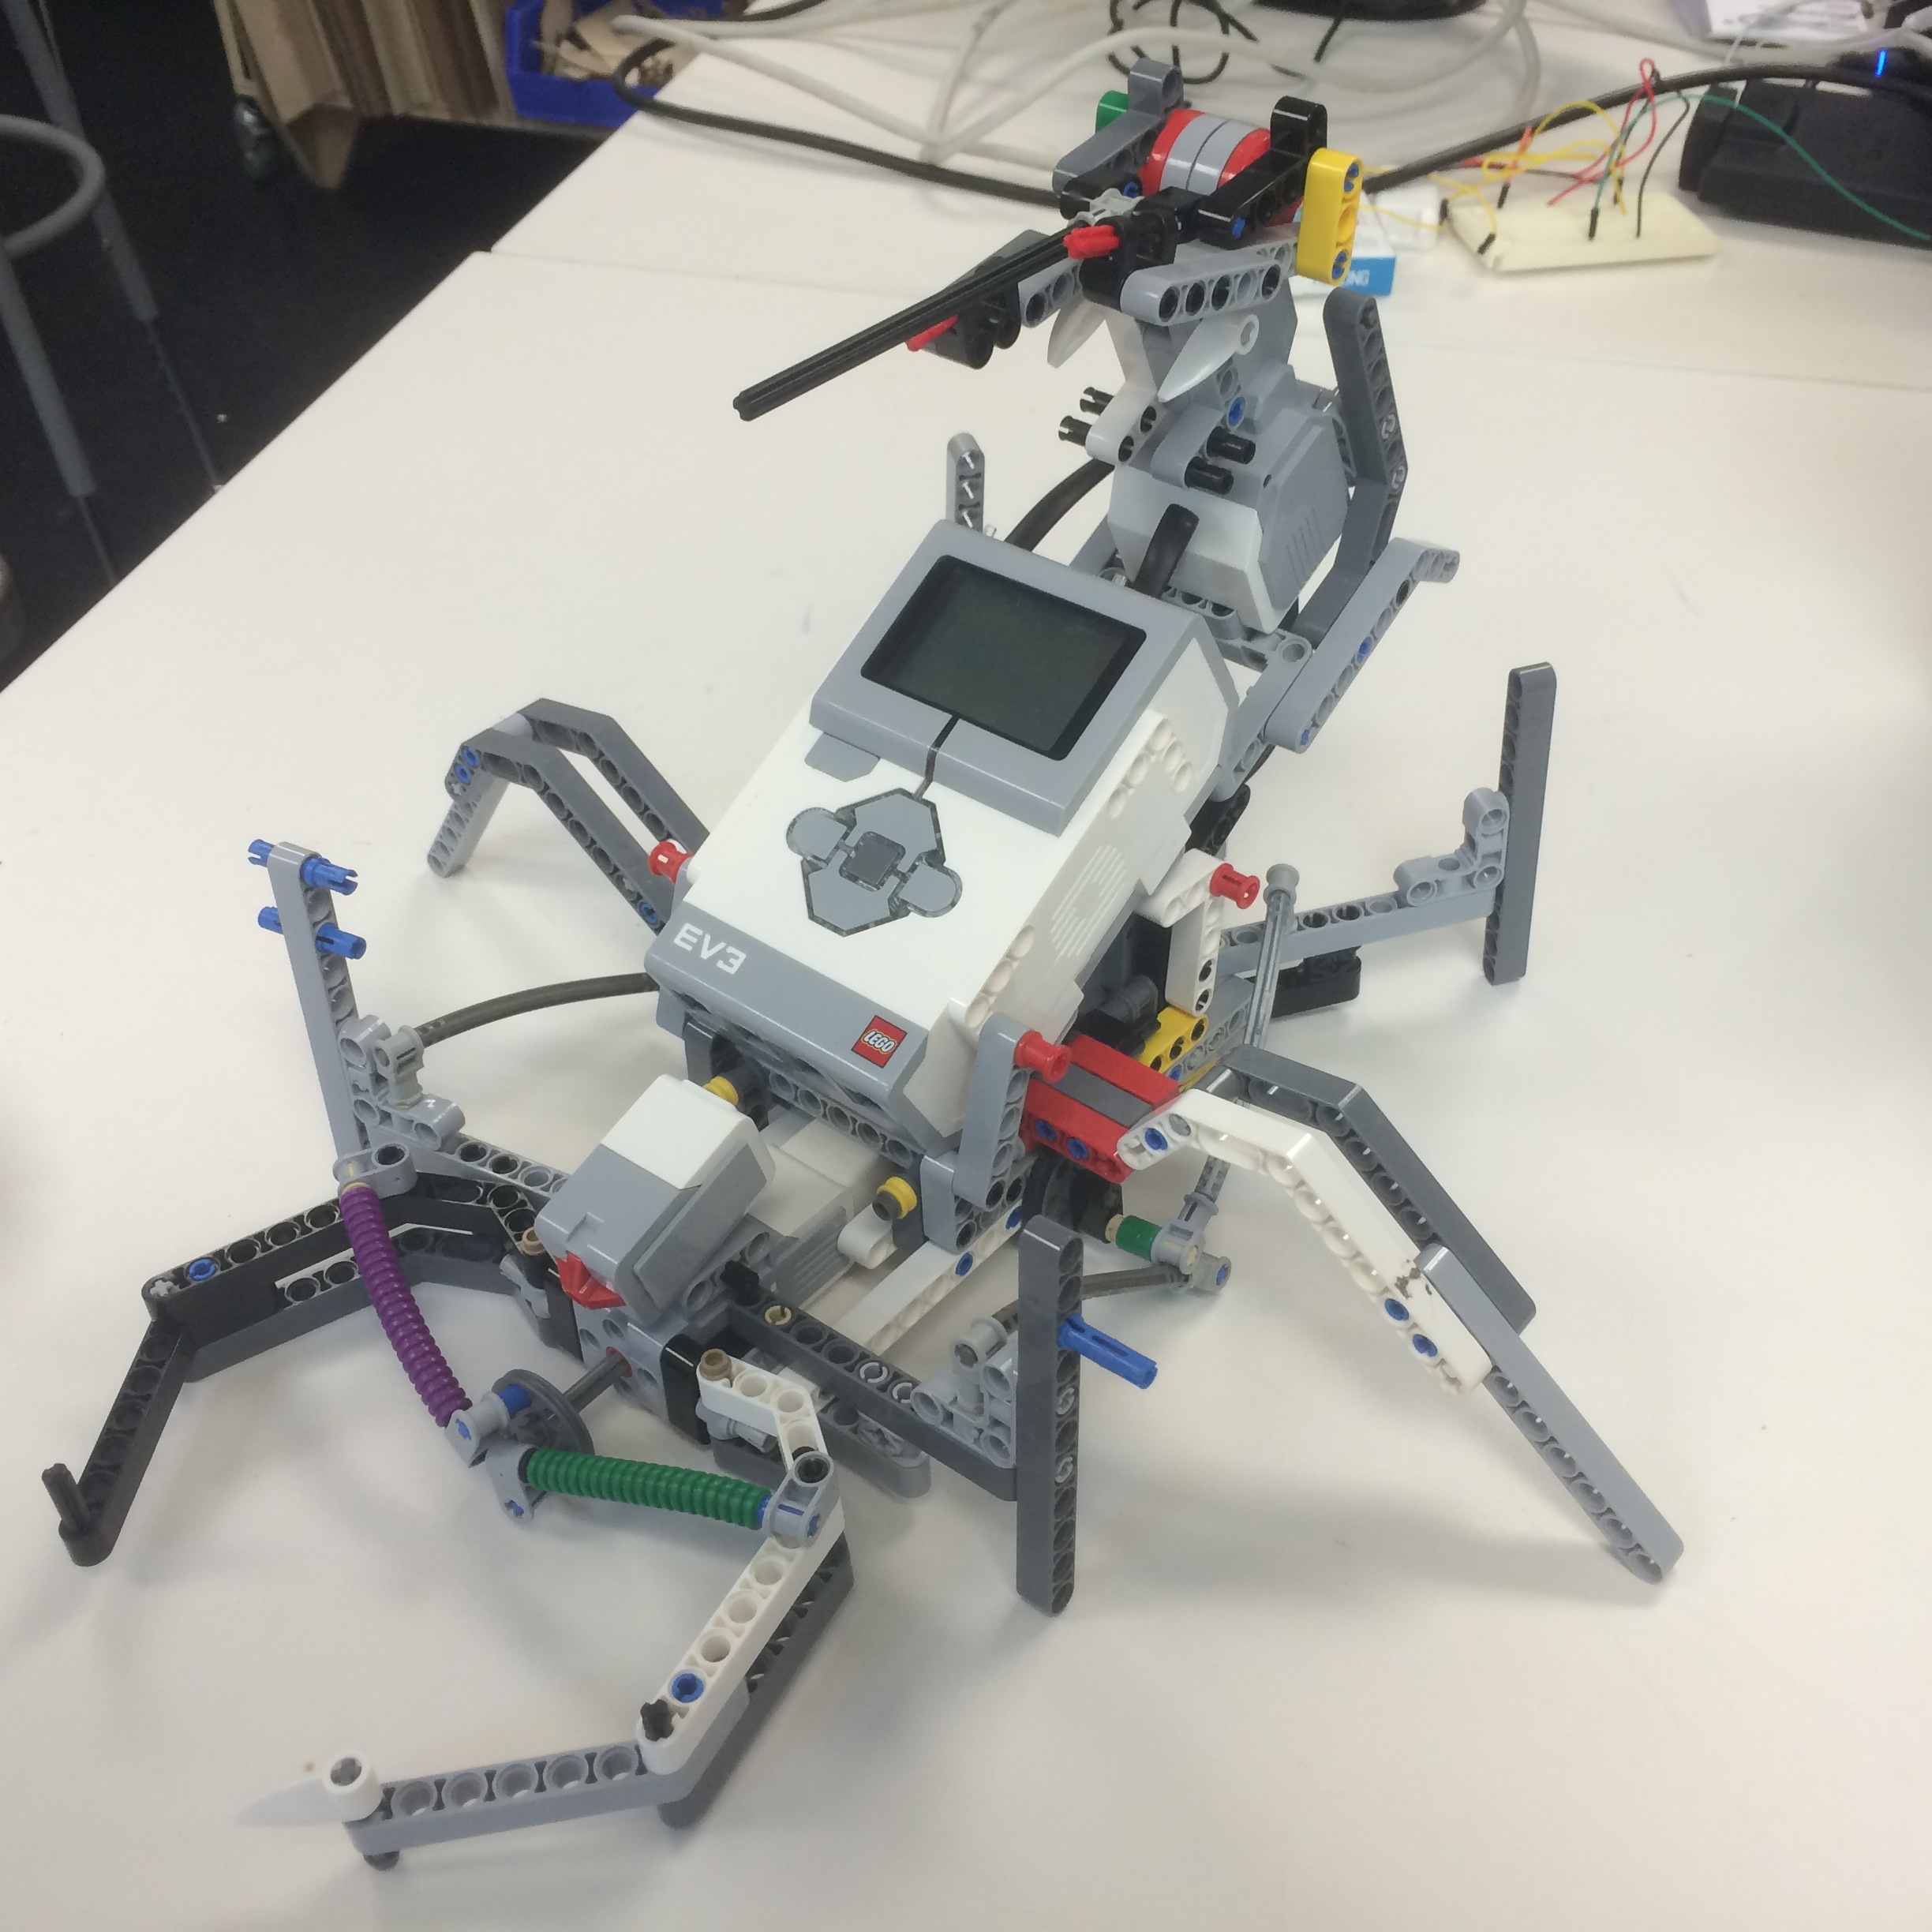
This scorpion was created using 3 sensor and 3 motors. Each of the sensors controls part of the scorpion’s behavior. Each sensor runs the corresponding one_motor_type_sensor.vi to allow the scorpion to move, sting and bite.
Dr. E's Challenges: Silly Walks (February 2015), Insectarium (February 2016)