Letter drawing using vision and image processing
As a follow up to the letter drawing bot, we were tasked with creating a bot capturing a drawing created by a user and replicating it. Our first attempt to solve this problem used continuous image capture and processing to track the user's motion as they drew their image. The interface consisted of a green dot on the page (drawn by the user) and a pen with some red tape at the end. The program would track the position of the pen using the red tape as a reference. The green dot was used to tell the program if the pen was meant to be up or down. When the dot was covered, the program would record the position and movement of the pen as being in a writing position. When the dot was uncovered, the program assumed that he pen was not writing. Below is a video showing how the interface was used:
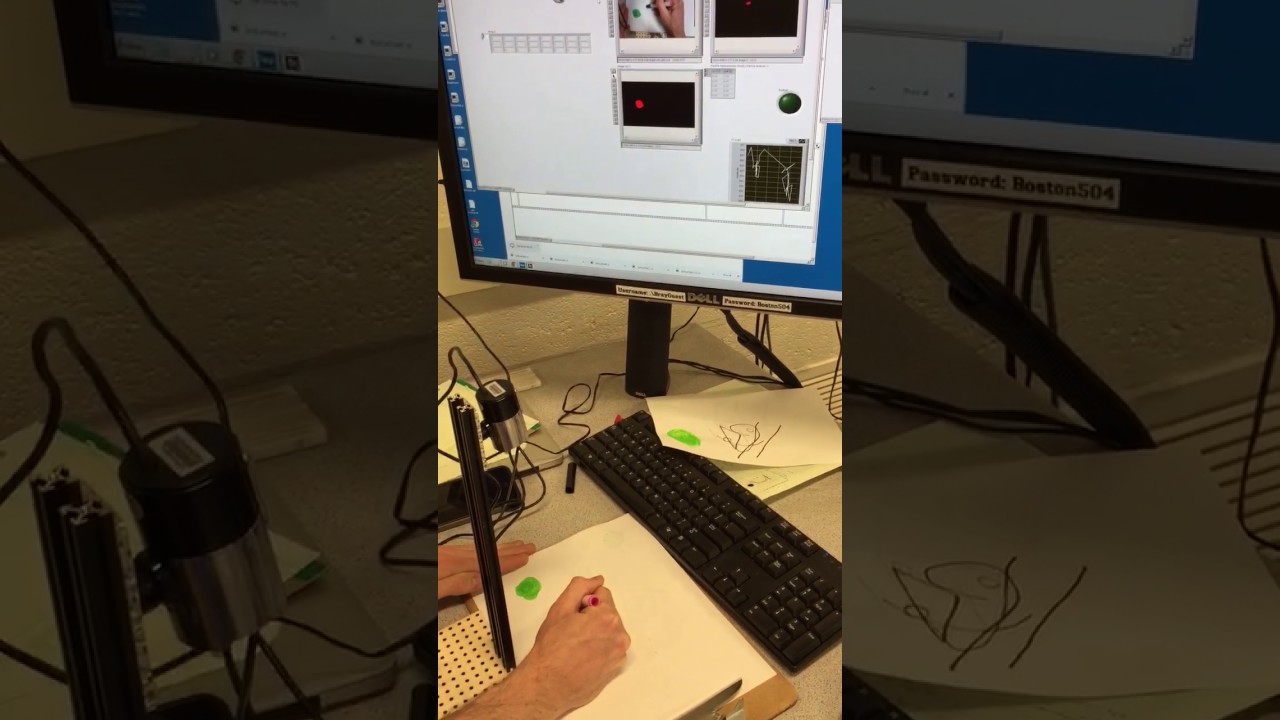
Although this method was a good example of an interface defined by the user themselves, it had several problems. To begin, the image capture and processing had to be done through the computer in order to achieve a high enough frame rate. In addition, due to moving shadows and changes in contrast, the location of the pen was not tracked in a smooth way. Instead, it came out as very jagged lines in the place of smooth curves.
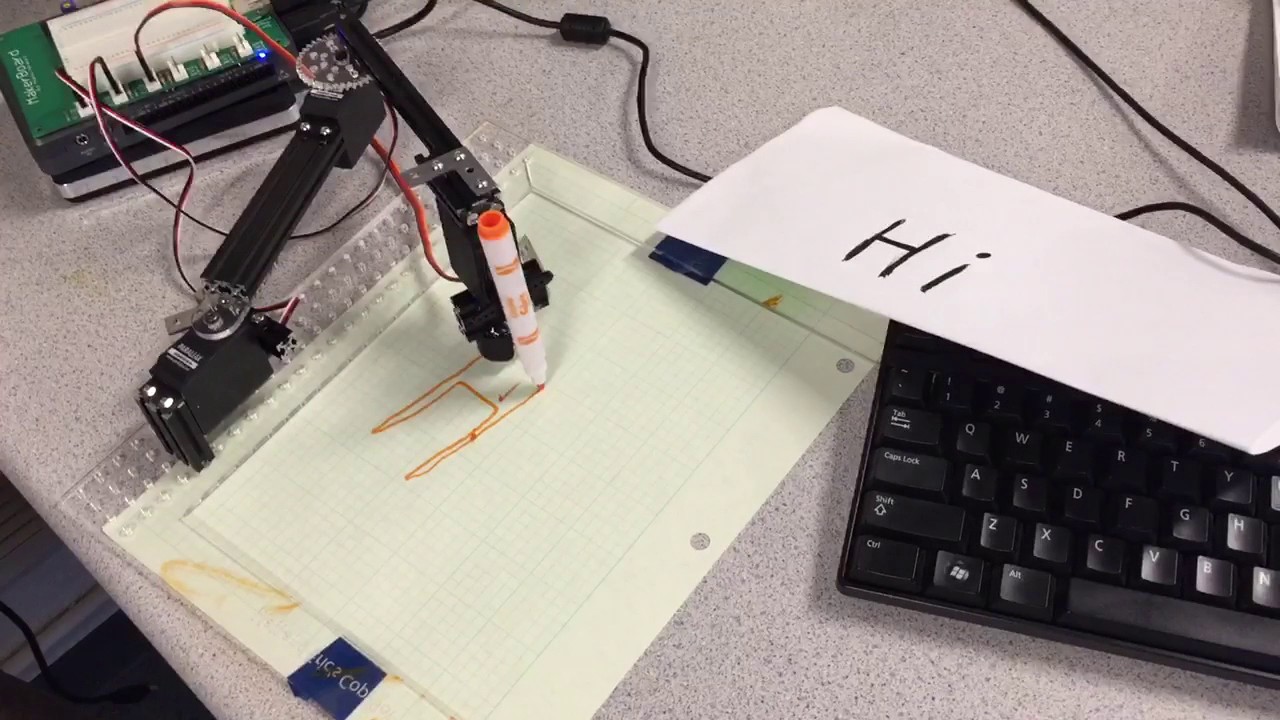
In order to get around this, the assignment was changed and we now had to grab a single image off a server, process it and draw the image with our robotic arm. The image was retrieved using a provided VI that queried a server and waited for an image. To process the image, the contour of each major feature in the image (only looking at the black pixels) was extracted and converted into points. In order to draw the points, we used the approach of inverse kinematics with some additional code to take into account the lifting and dropping of the pen.
With these changes, it was possible to have the entire project loaded onto the RIO. A real time application was created so that the program would run on start up. This drastically reduced the set up time and also meant that we no longer needed to be tethered to the computer. The process was initiated by pressing the button on the RIO.
Follow this LINK to find the code used for the two attempts
Below is a video of the second approach: