
myRIO Robotics Kit
Originally from here.
The goal of this project is to lower the "getting started" barrier required to create electronics and robotics projects with National Instruments' myRIO. The myRIO Robotics Kit provides an entry-level system for students who are new to robotics to easily build robots and diagnose issues using the myRIO Scope Code in LabVIEW.
This kit will contain a number of MakerBeam and MakerBeam compatible parts, allowing users to quickly prototype robots. A custom circuit board with predefined ports for motors and grove sensors will further allow users to build robots with ease. In LabView, we created the myRIO Scope, which is a diagnostic tool allowing users to quickly and easily diagnose issues they may run into with their robot.
Circuit Board Design
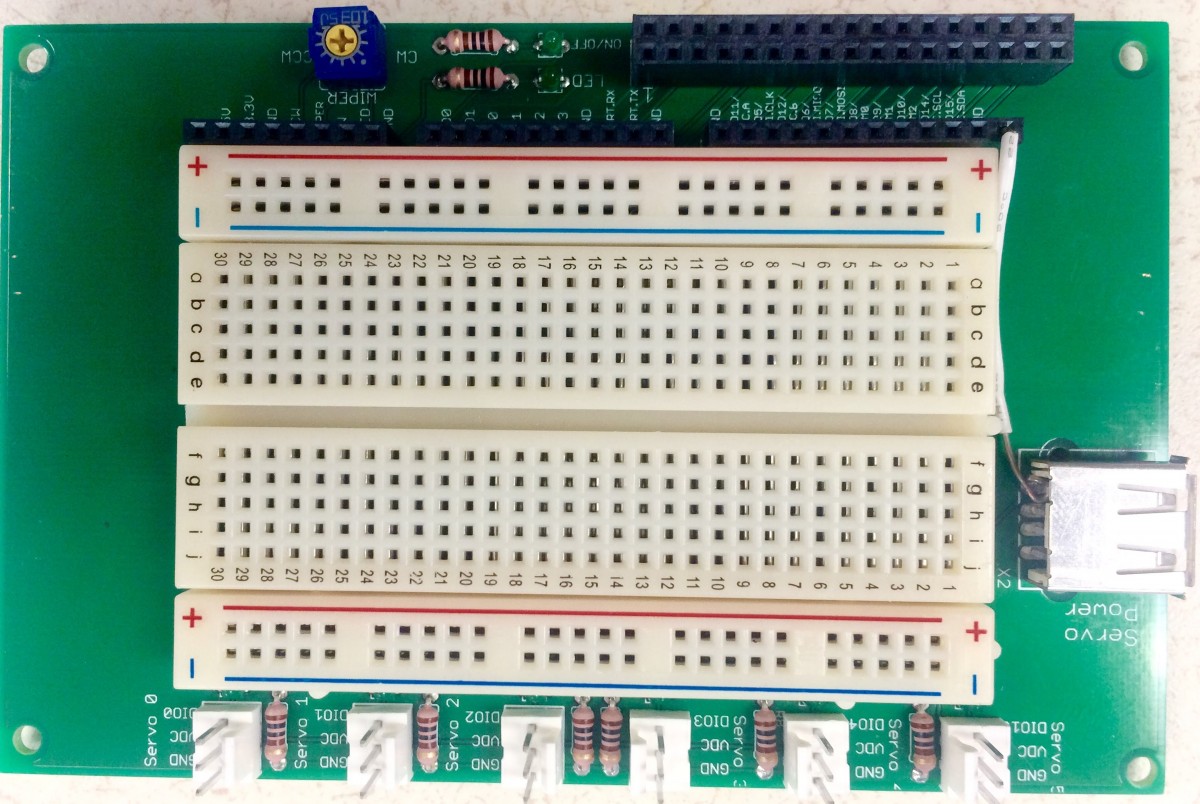
The myRIO Robotics Kit contains a custom made circuitboard, the MakerBoard. This board is a cross between plug and play ports for servo motors and sensors, and open breadboard for students to create their own projects. The board has indicator LEDs and a Potentiometer to help with debugging, and a USB port for extra current delivery if needed.
Download our Gerber Files
Download the Eagle Files
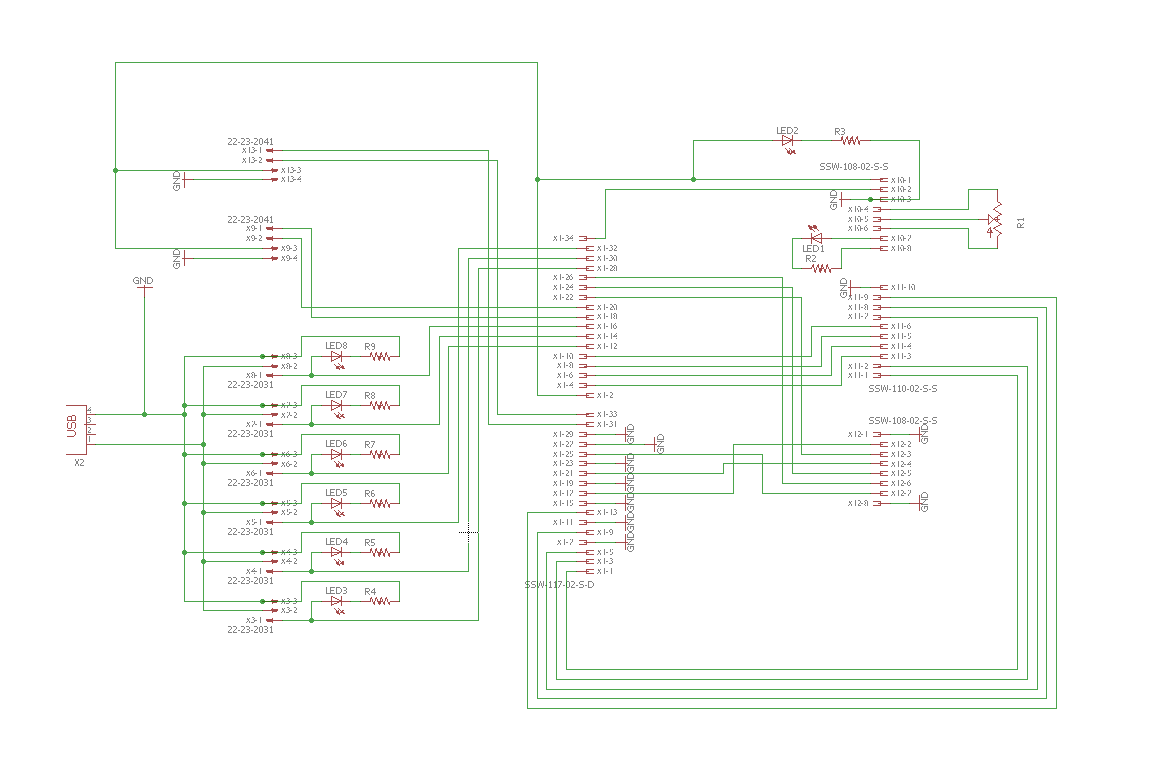
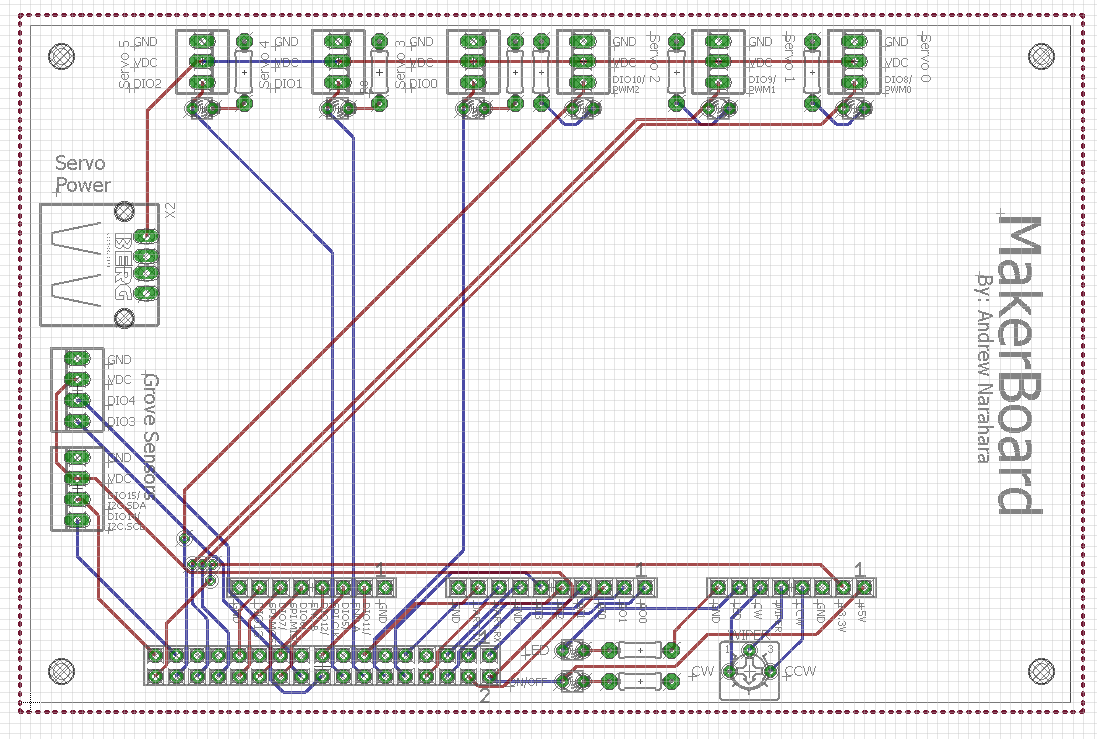
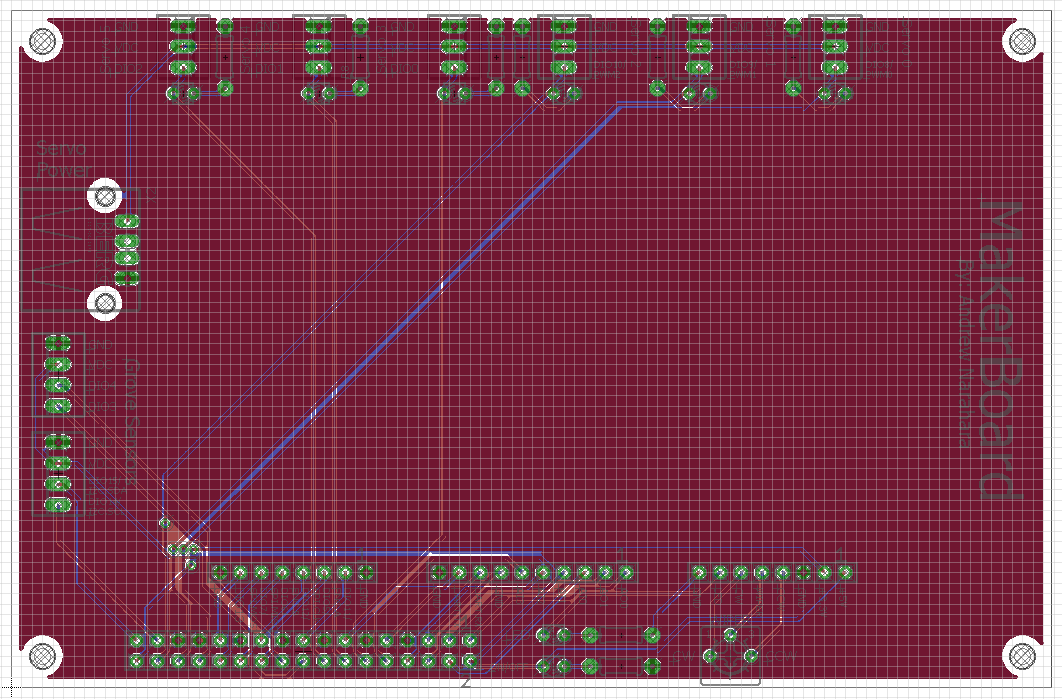
Circuit boards can be designed using Eagle or Fritzing. Our PCB, makerBoard, was created in Eagle.
Links to helpful Eagle tutorials:
Part 1
Part 2
Part 3
Eagle downloads
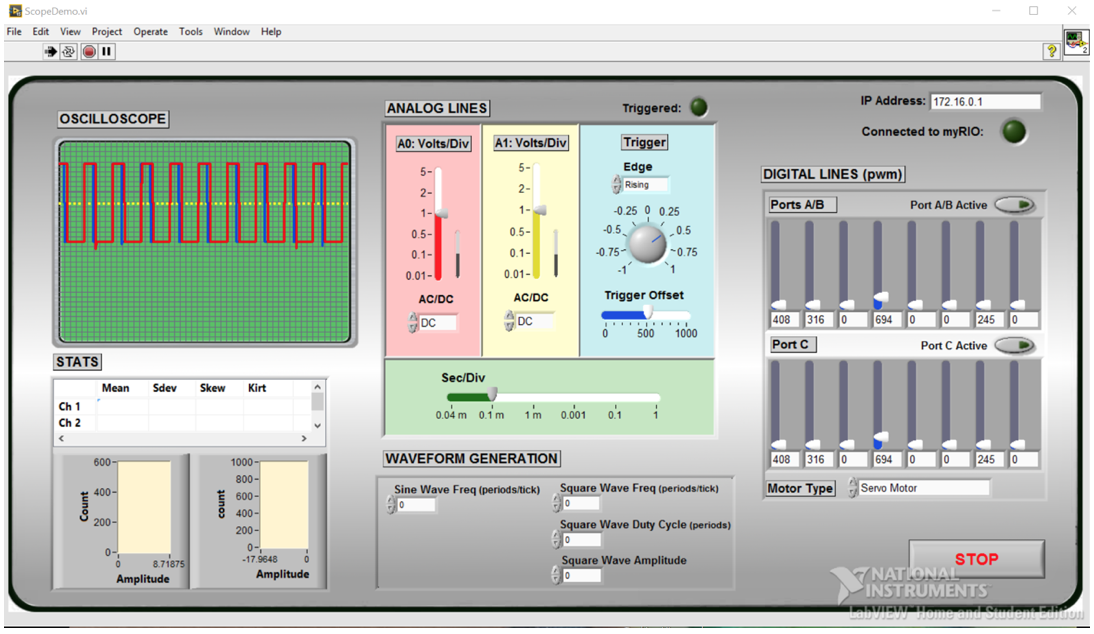
myRio Scope
The myRIO Scope is a LabVIEW interface designed to make troubleshooting robotics projects easier. The scope code contains an oscilloscope with statistical analysis, analog lines to send signals to analog pins, function generator, and digital lines that can send PWM signals to servo motors. This allows students to troubleshoot issues without needing any additional technology.
For example, if a motor isn't working with the student's code, they can open up the myRIO scope code and send a PWM signal to it. If the motor starts moving, they know that the motor is functional and the issue is with their code. If the motor doesn't move, they know that their motor isn't functional and they need to get a new one.
Download the Scope Code here.
Download the Scope Code Documentation here.
Open the Web app by downloading this Zip File and opening "Scope Web Browser.html". This has only been tested in Firefox, Chrome, and Safari, and will not work in IE.
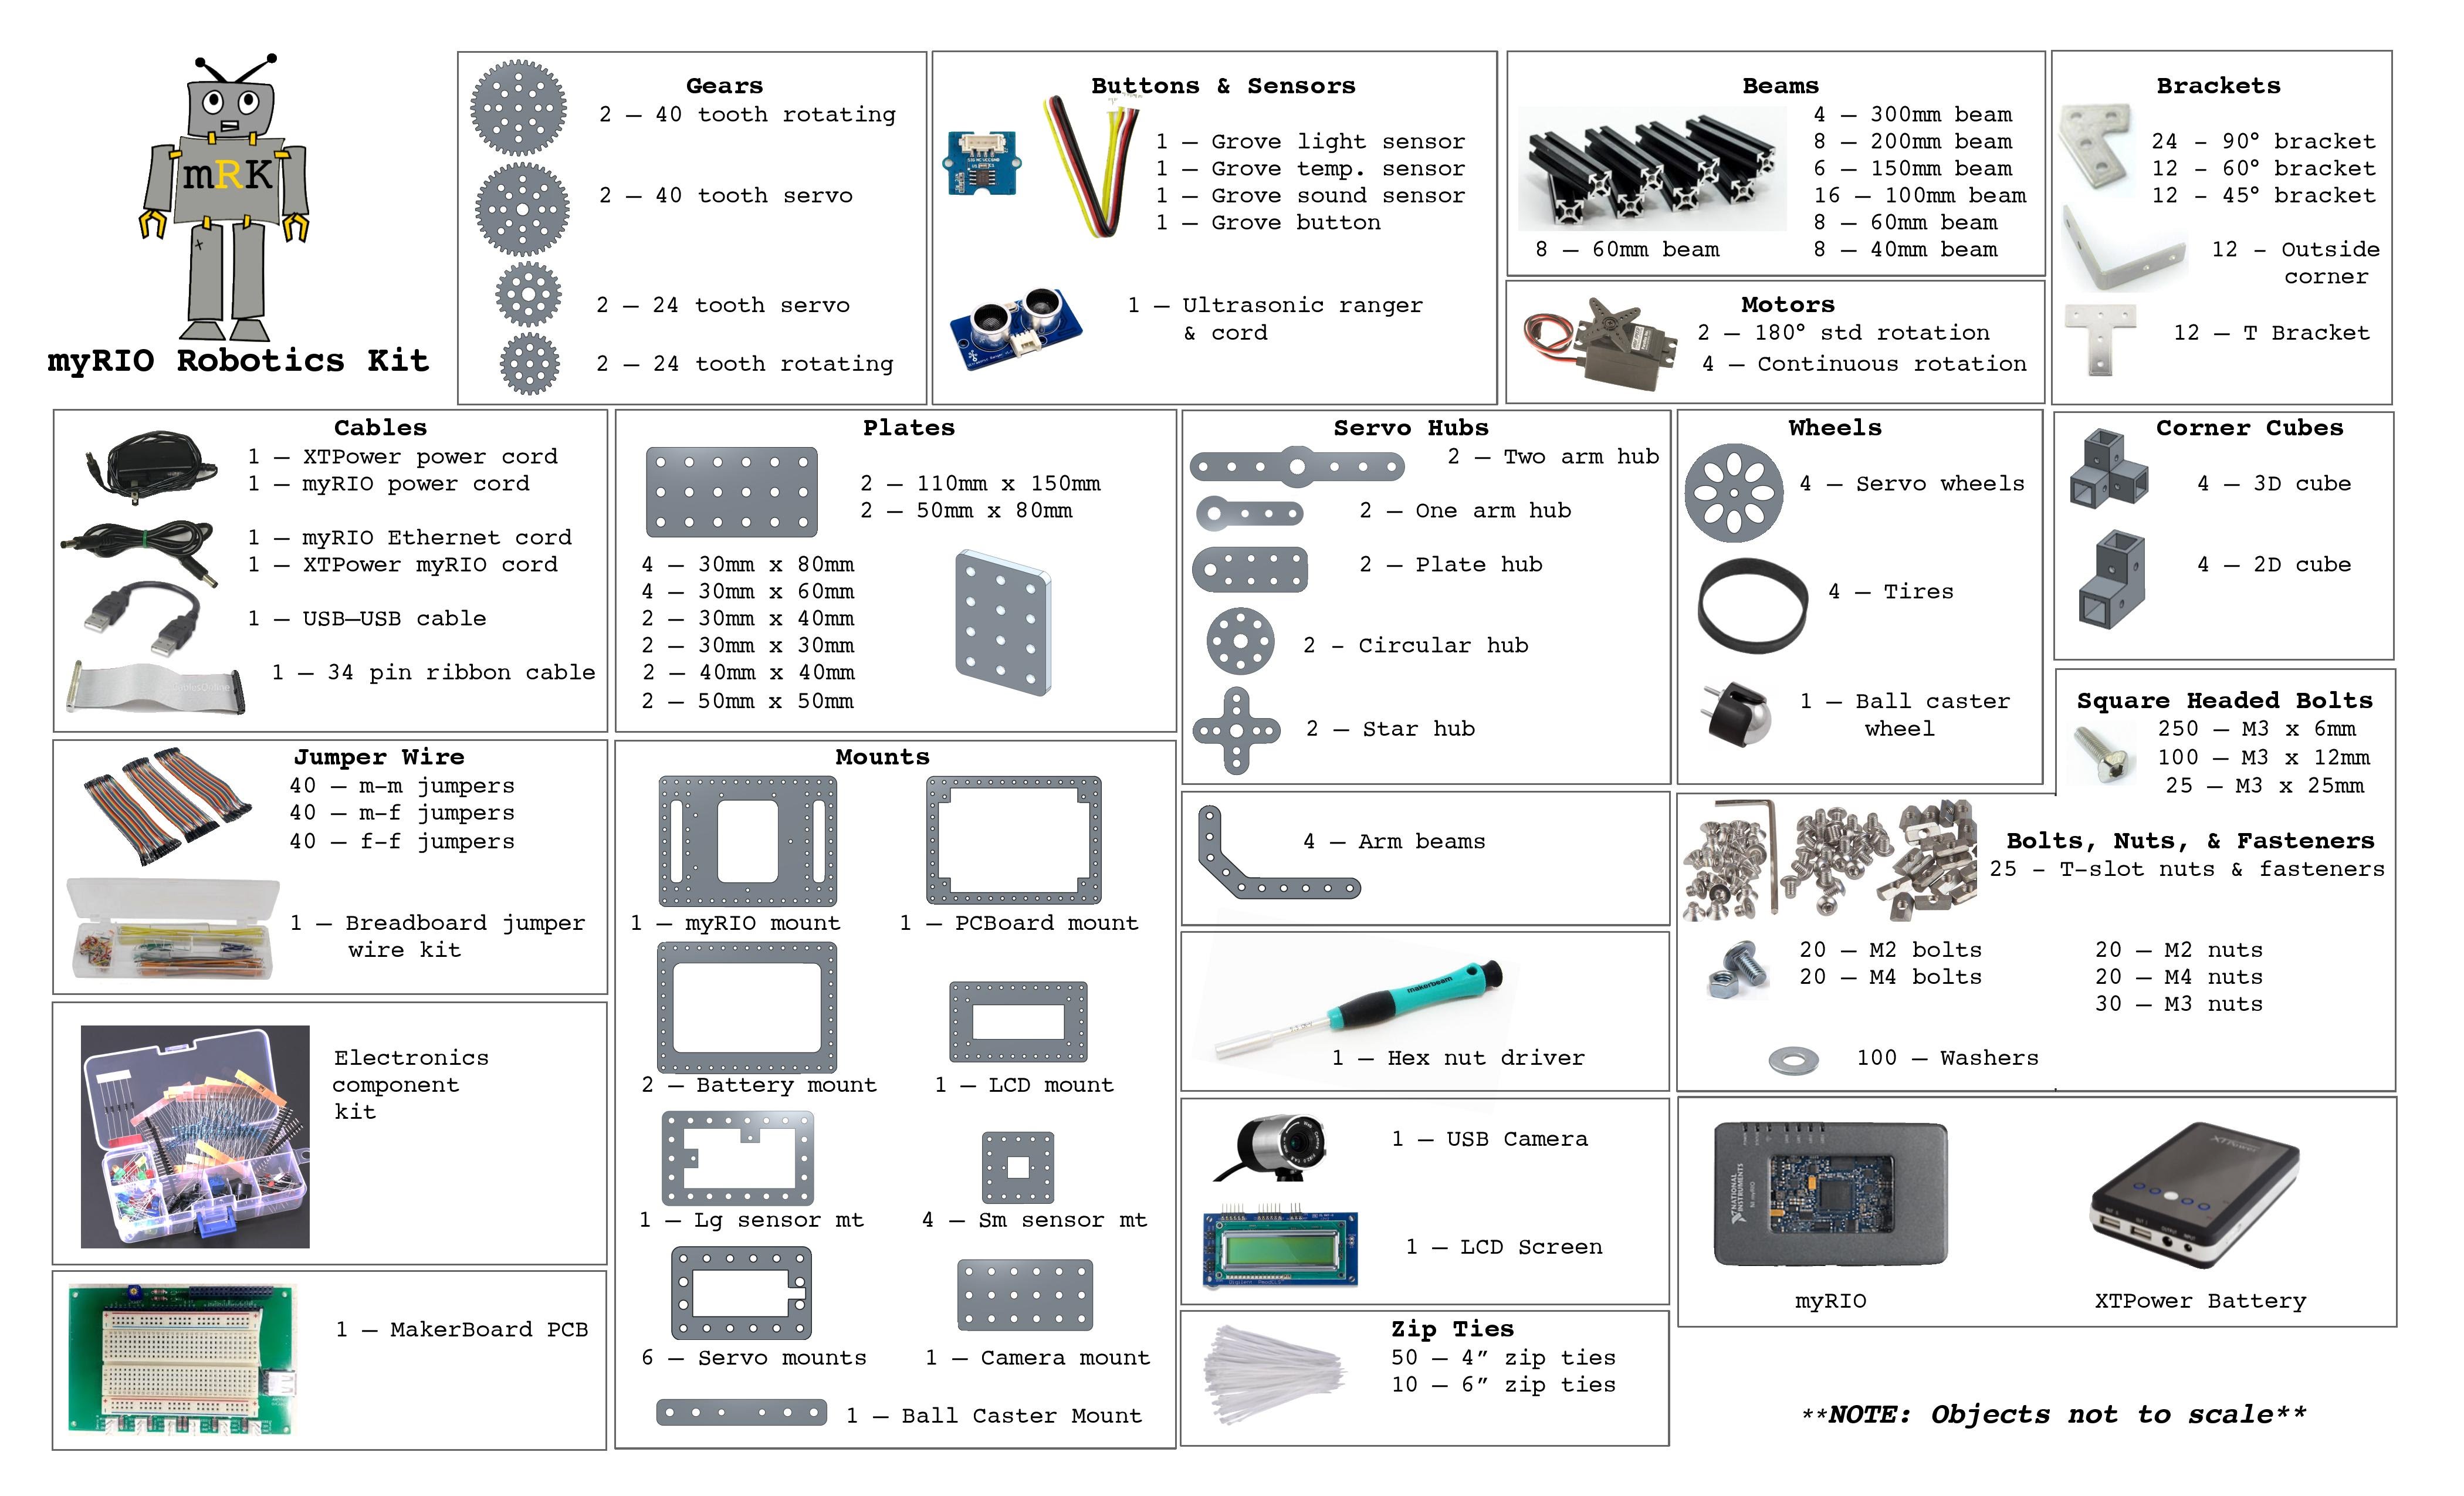
Kit Contents
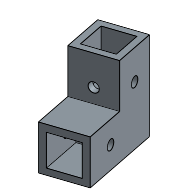
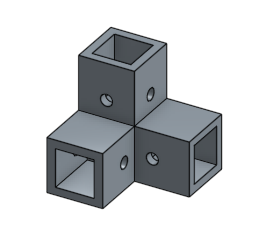
The myRIO robotics kit is an all inclusive kit that allows users to design and build complex robotics systems. The kit contains MakerBeam extruded aluminum beams and assorted MakerBeam brackets to provide a strong build platform. The kit also includes a myRIO compatible battery, the MakerBoard Circuit board specifically designed for the myRIO robotics kit, continuous rotation and standard servos, and grove sensors. Custom Laser-cut mounts for all non-makerbeam compatible parts are also included for ease of build.
It is assumed that students using this kit have access to maker-spaces where they can fabricate their own parts based on what they need. All of the parts we created can be accessed and edited in OnShape and reproduced as needed.
To access the OnShape files for parts we created, click on the links in the below.
To download the files necessary to fabricate these parts (DXF or STL), click here.
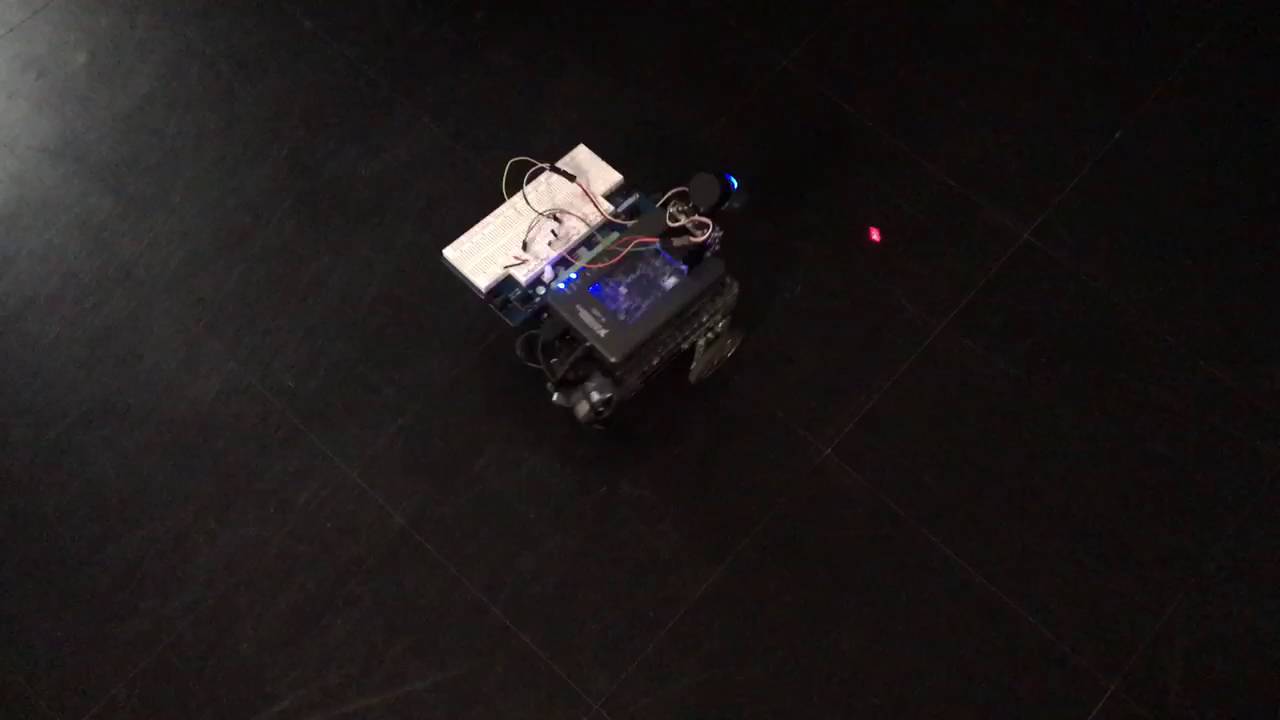
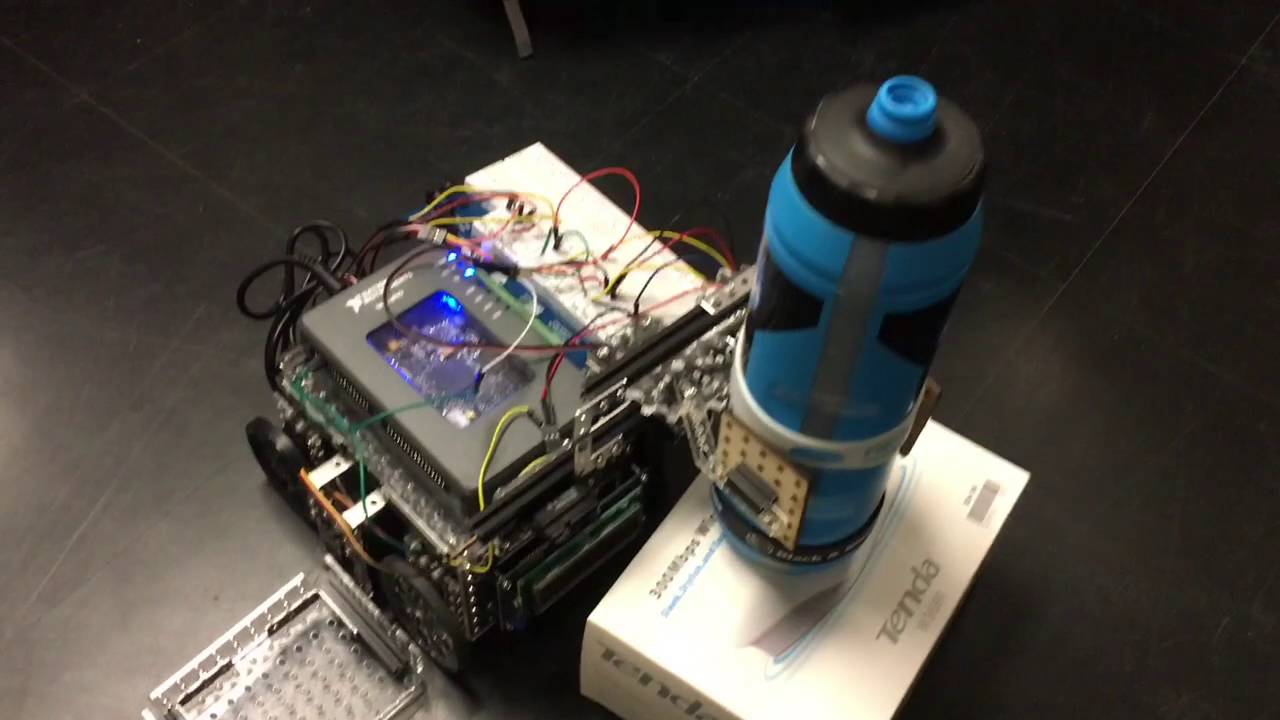
Example Robots
Download code here:
LabVIEW Code - Example Robots
Example Robots Pt 2
Laser-Pointer Follower Robot
Gripper Robot
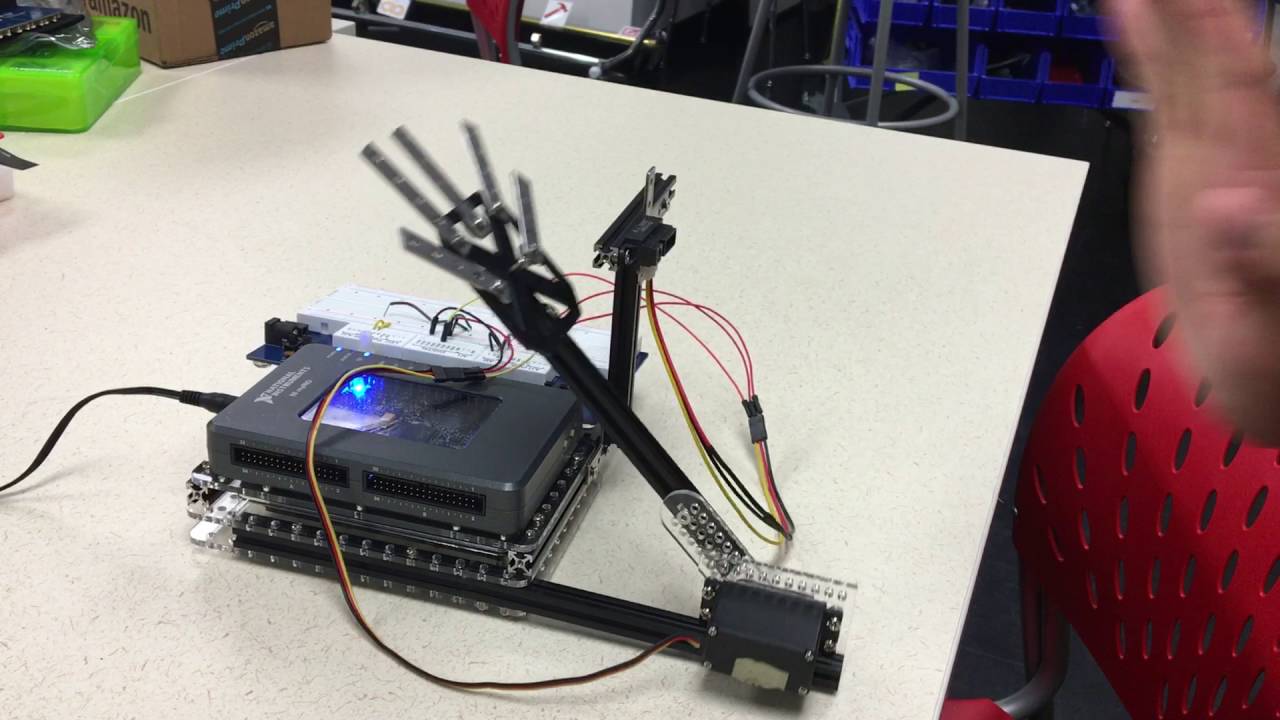
Hi-Five Robot
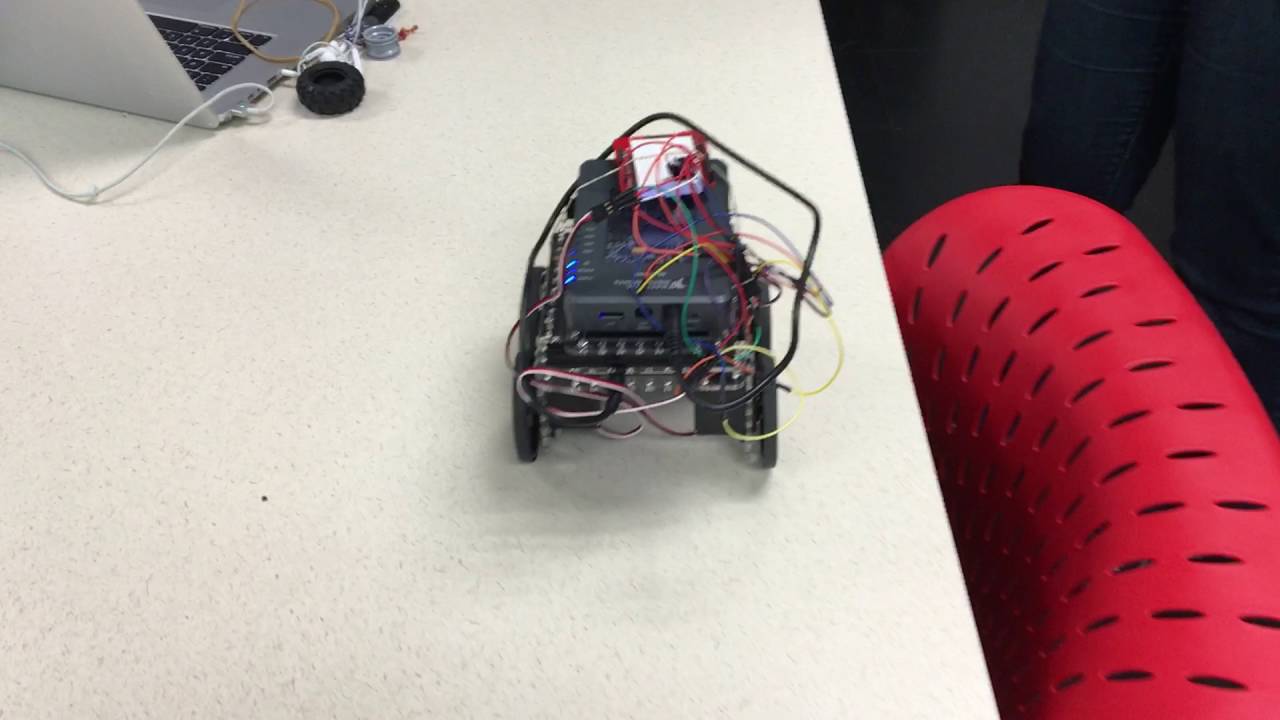
Simple 4-wheeled car

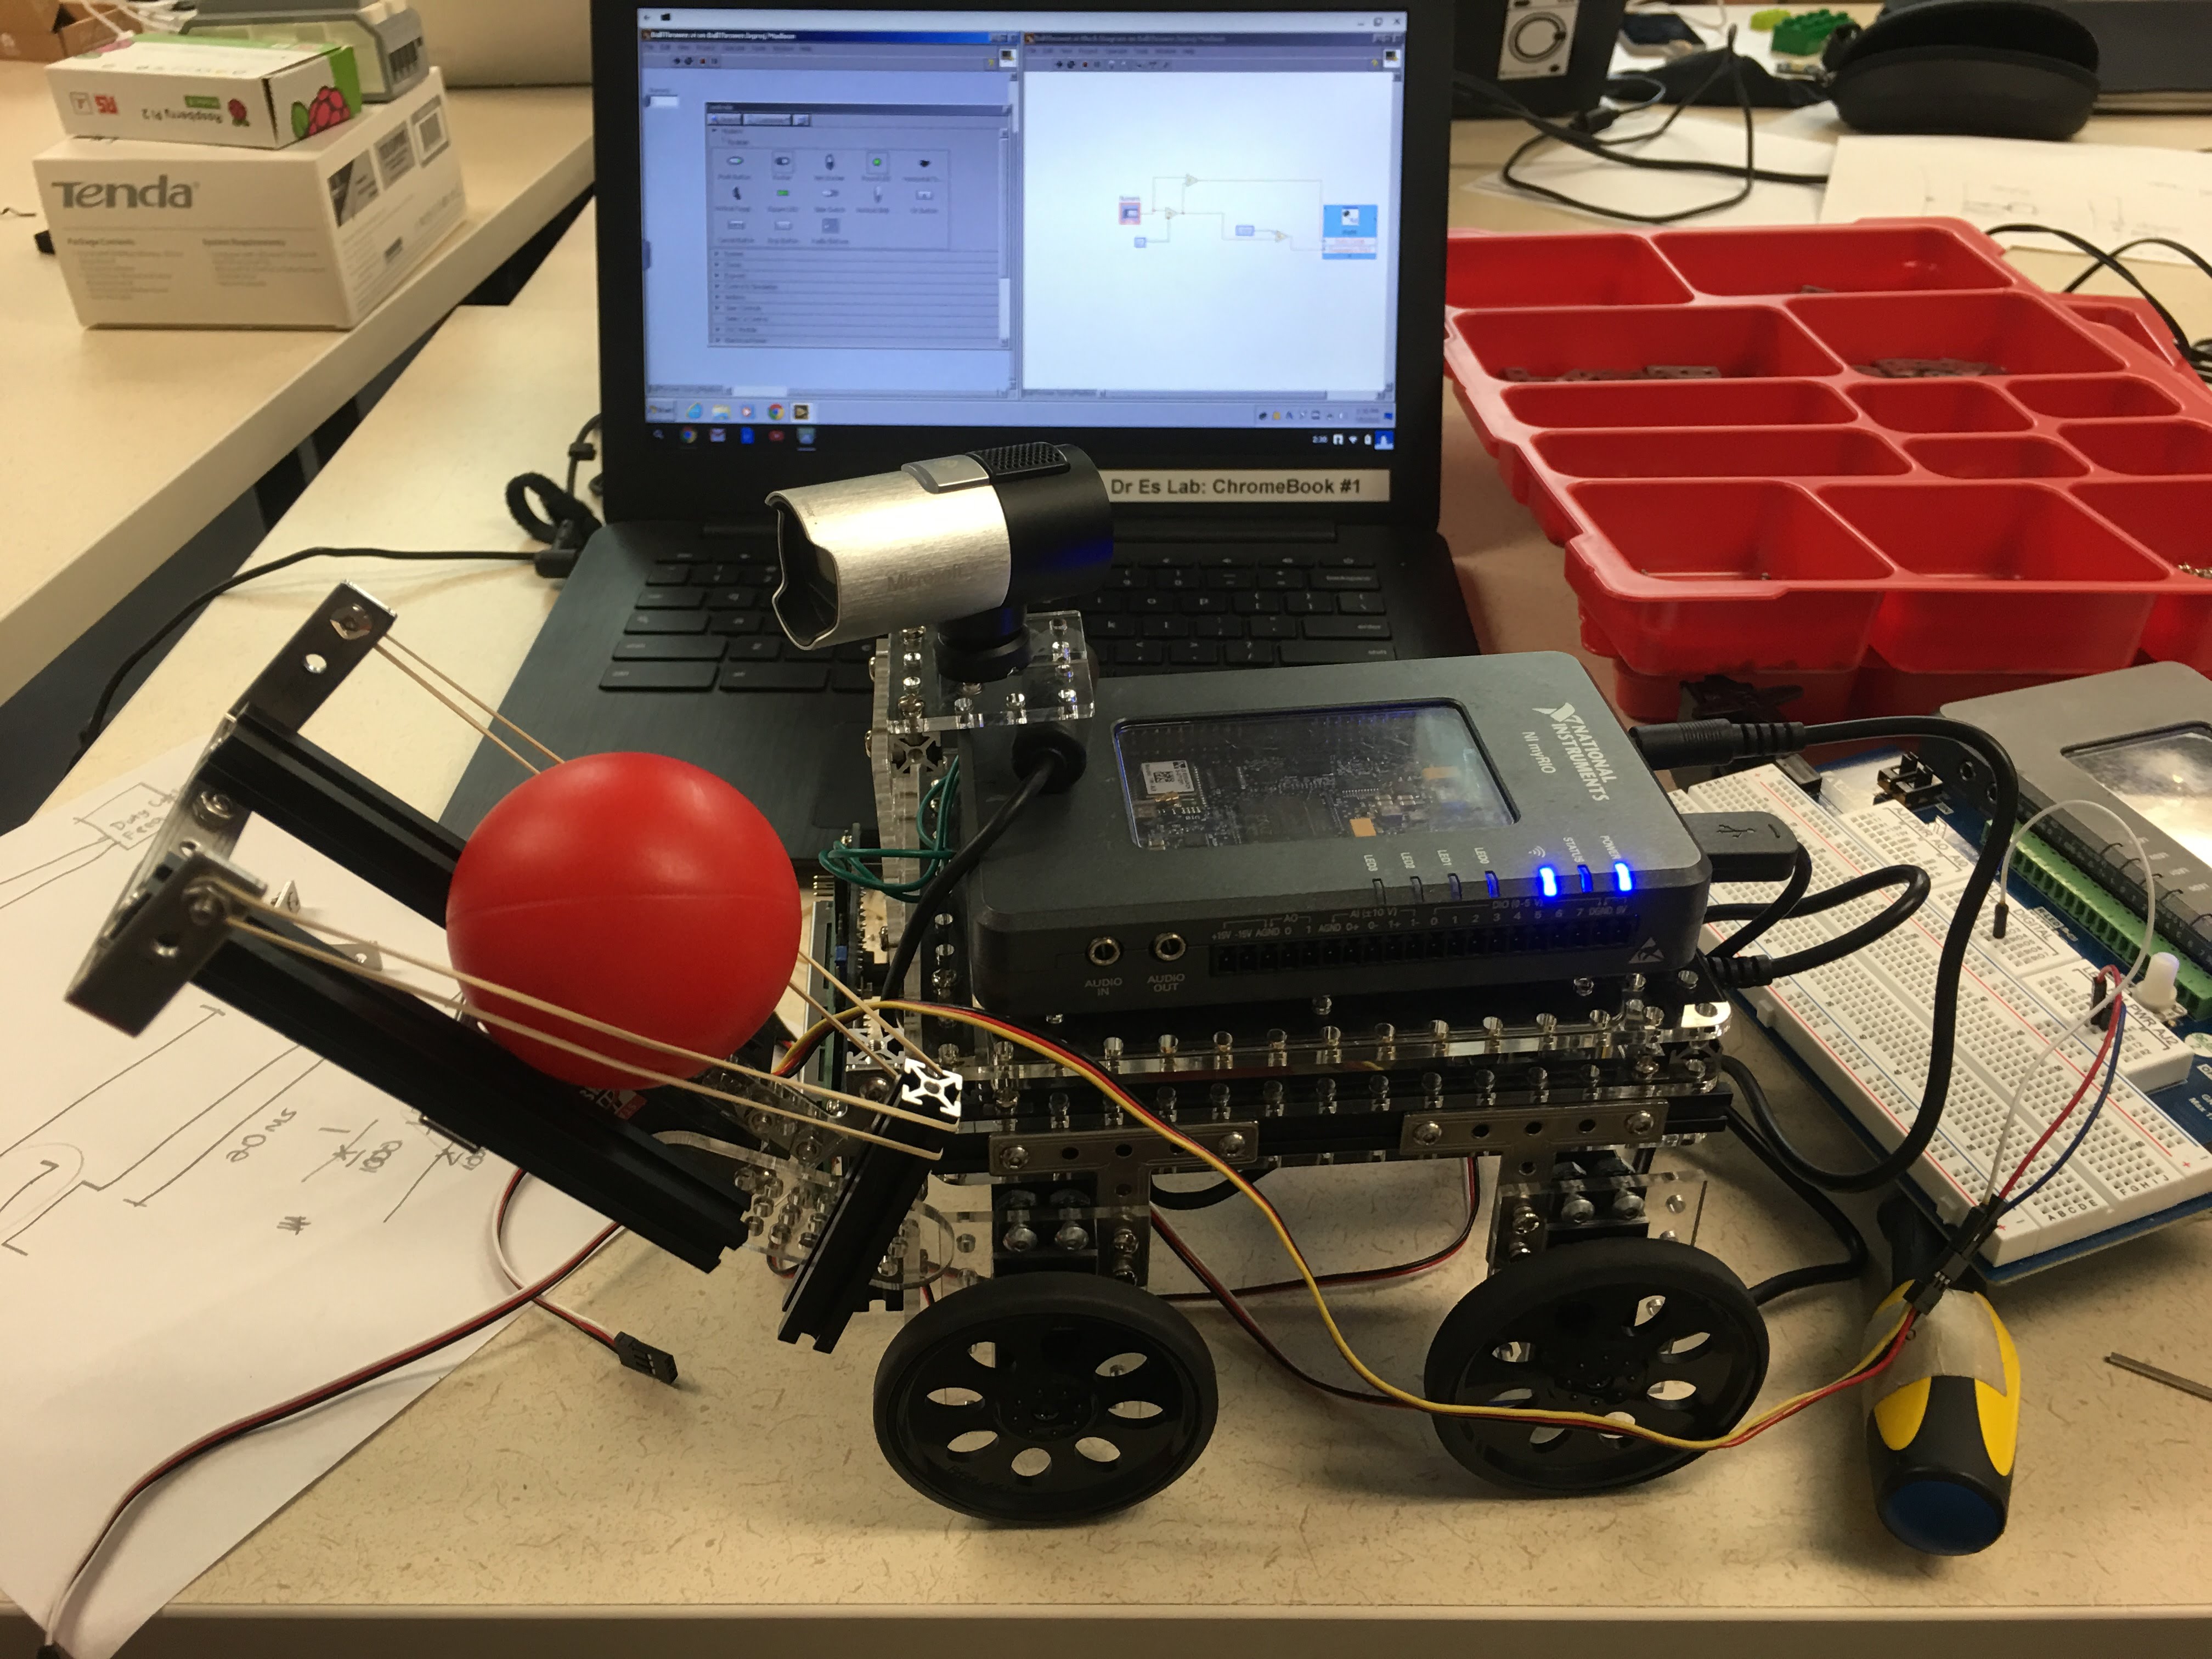
Ball-Thrower Robot
ME-184
MISSING PIECES:
Your myRIO Robotics Kit is incomplete! You are missing the following pieces:
- myRIO Mount x1
- XTPower Battery Mount x2
- makerBoard Mount x1
- LCD Screen Mount x1
- Ball Caster Mount
- Servo Motor Mounts x6
- Circular Servo Hub x2
- Two-Arm Servo Hub x2
- One-Arm Servo Hub x2
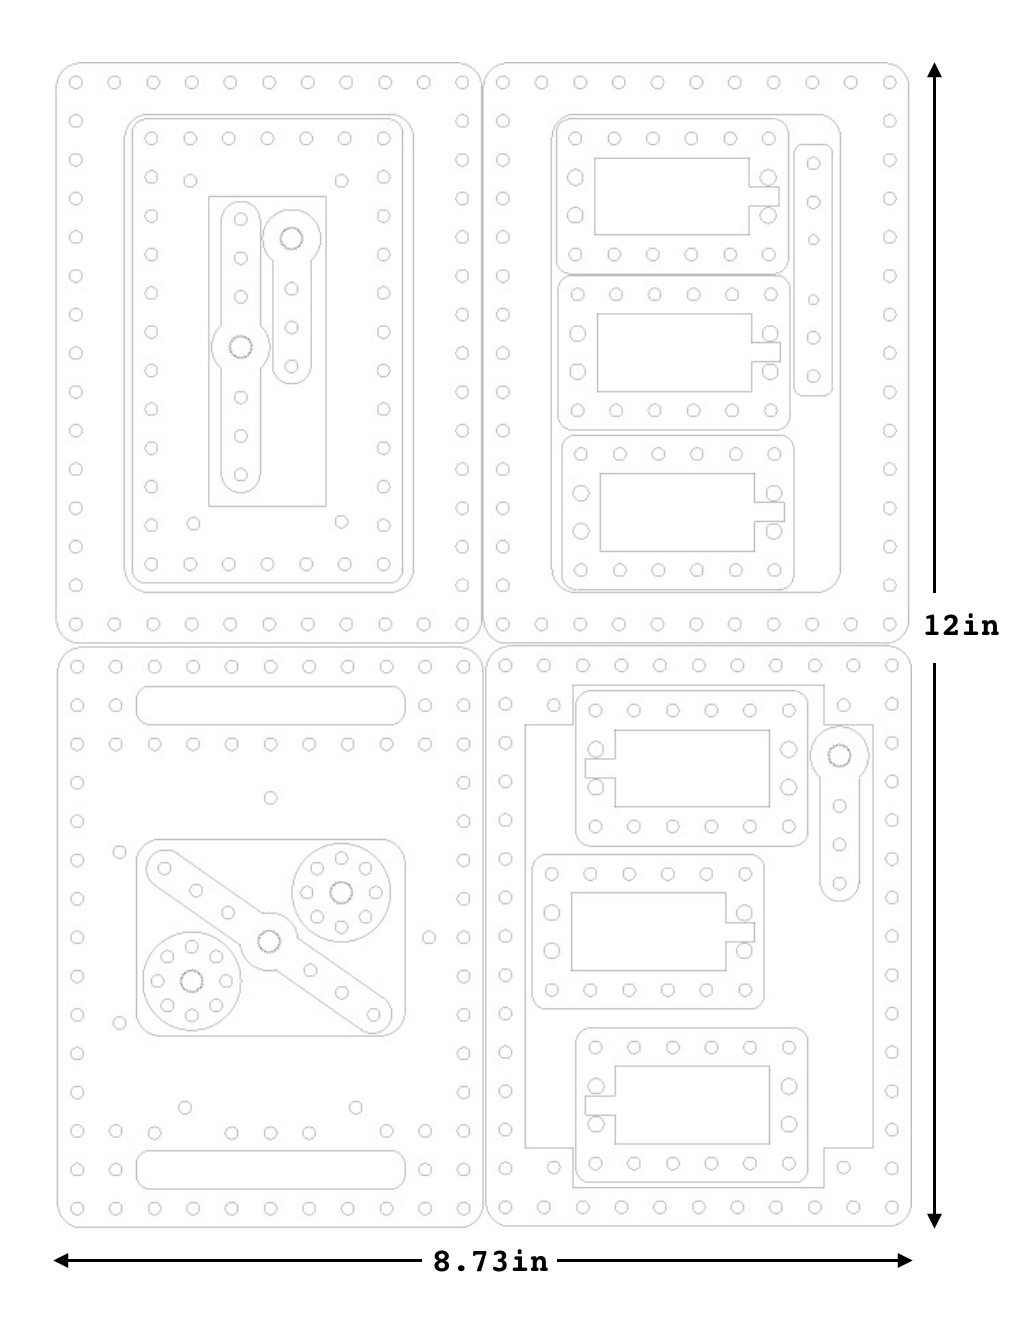
To complete your kit, download the following Adobe Illustrator File.
Everything is laid out for you, so all you need to do is laser cut the parts on 1/8in Clear Acrylic that is AT LEAST 12in x 9in.
It will take approximately 40 minutes for everything to cut out.
If you are not trained on how to use the laser cutter, sign up for a training here.
You are also missing the 3D printed corner cubes. If you would like these pieces for your kit you can download the files here and 3D print them.
If you are not trained on how to use the 3D printers, sign up for a training here.
Getting Started Resources
myRIO Set-Up and First Projects:
myRIO Robotics Kit Guides: