ShopBot Desktop CNC Router
If you haven't already, please read the CNC Routing Handbook to learn the basics of CNC routing before using this machine.
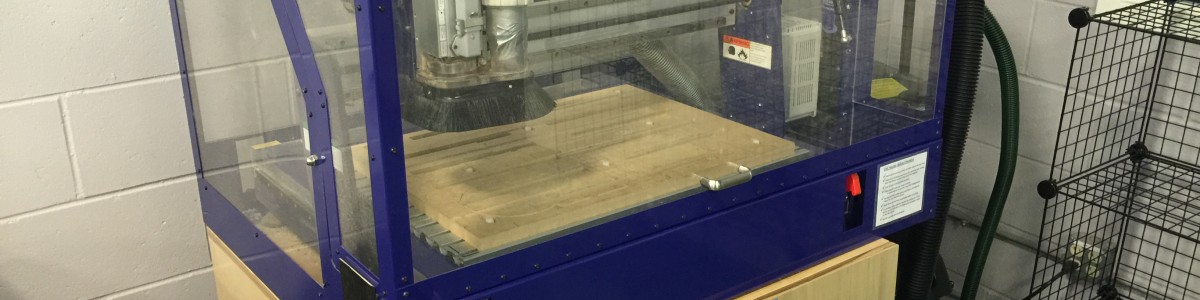
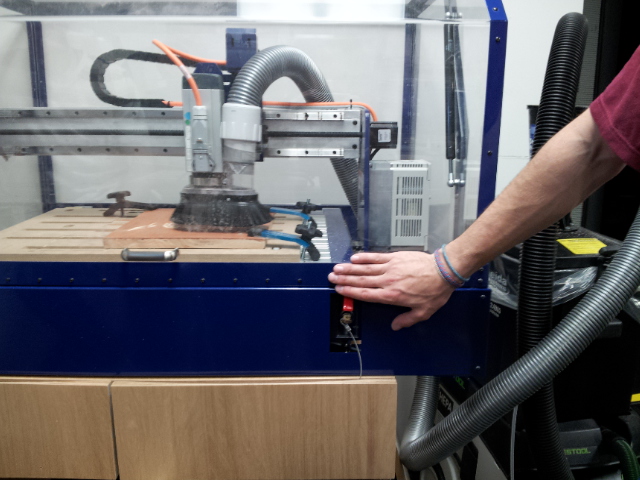
The ShopBot Desktop CNC router in Bray Lab is currently the only CNC router available for students to use. All students must complete Bray Lab safety training and CNC training before using the ShopBot.
The ShopBot Desktop router has a 24"x18"x5.5" workspace and operates on 3 axes. The ShopBot is connected to a computer with VCarve Pro installed to control the path that the machine follows while cutting.
Materials
| Allowed Materials | Restricted Materials | |
|---|---|---|
| Wood | Solid wood Plywood MDF |
Pressure-treated, stained, or painted wood |
| Plastics | Most plastic sheets with proper blades, bits, and guards | |
| Foam | XPS foam (pink/blue insulation) | |
| Metals | No metals allowed |
Machine Specs
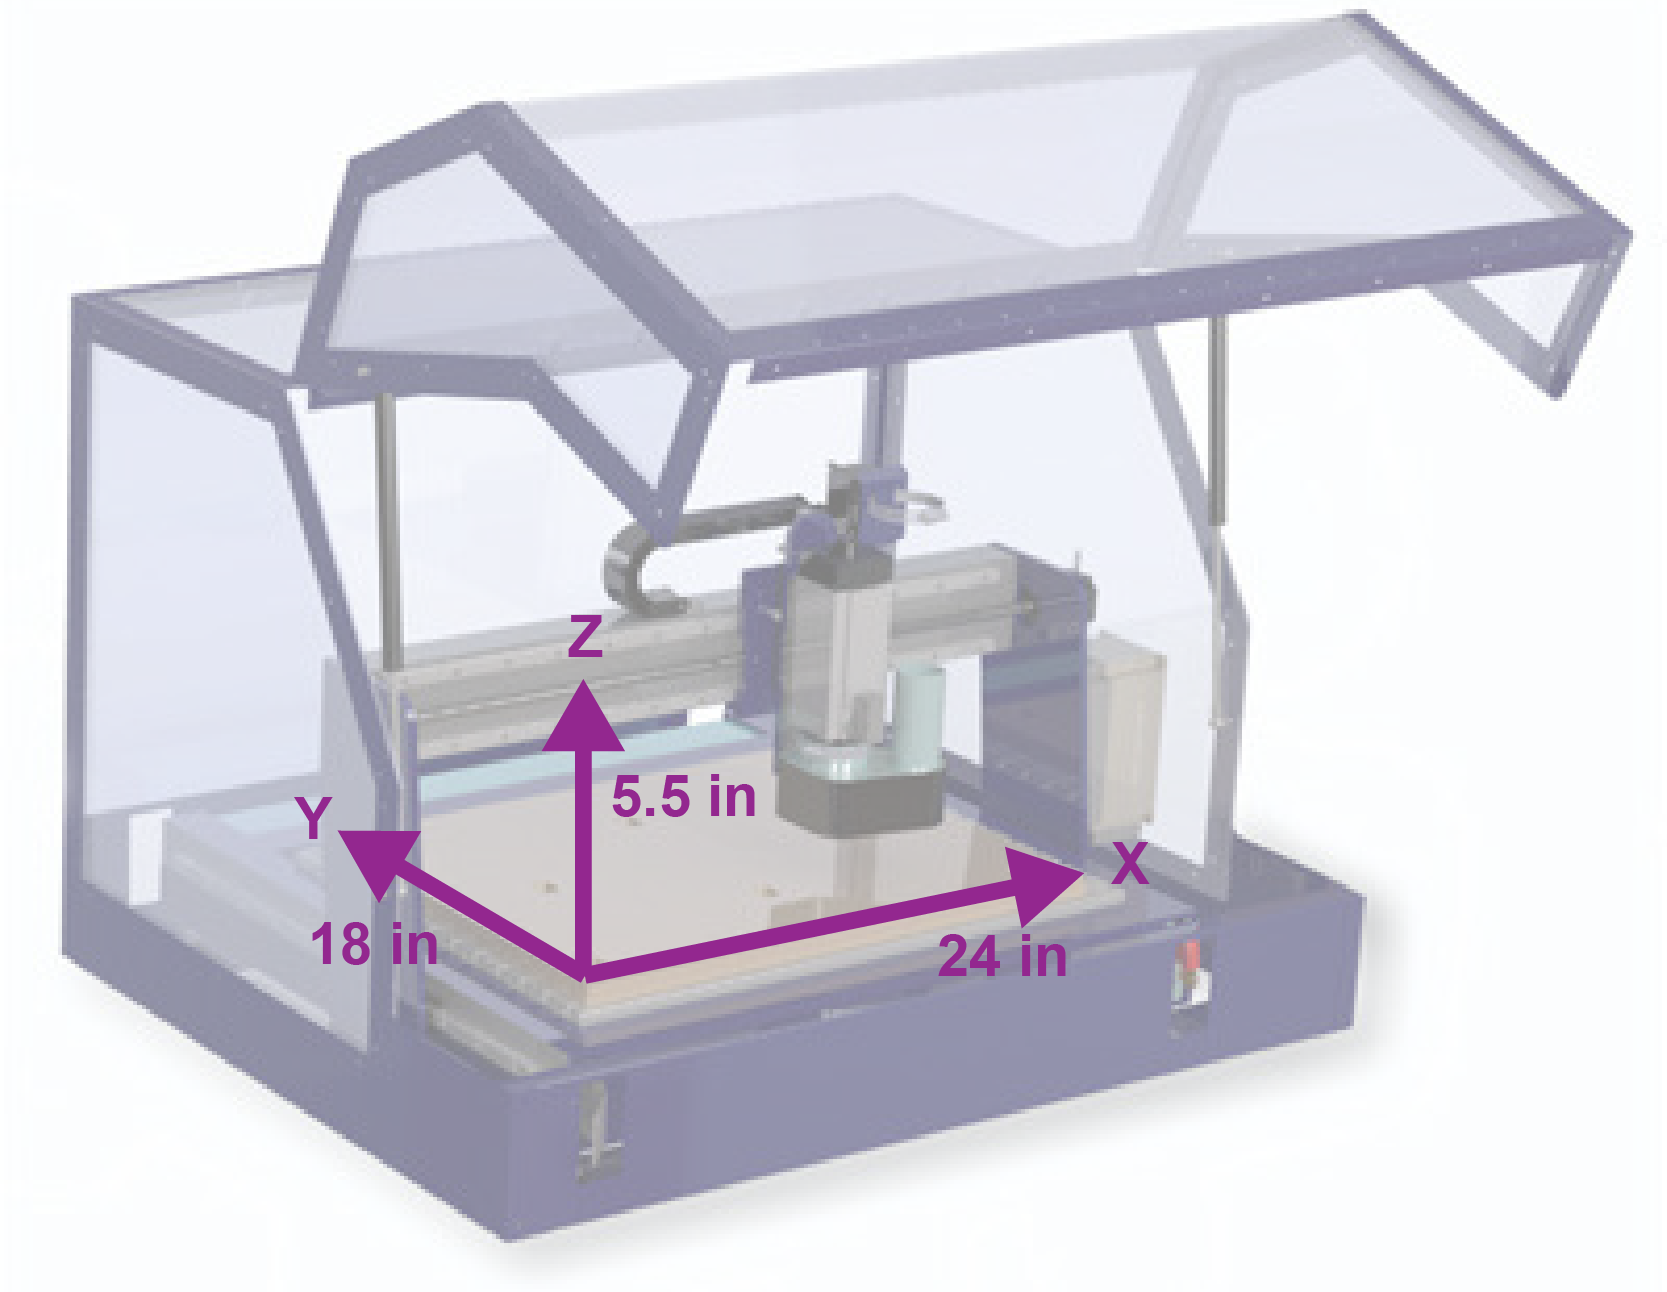
NOTE: the maximum height of the Z-axis is 5.5 inches; however, depending on the bit and material you use, it maybe less than that.
File Setup
Design or download a file
Design: Choose your favorite design program to create an object in any of the 2D or 3D file formats
2D file formats: .dxf, .dwg, .eps, .ai (adobe illustrator), .pdf
3D file formats: .stl, .dxf, .3ds, .obj, .skp, .v3m, .lwo, .3dm (Rhino 3D model)
Check out these websites for some free design software!
- Inkscape : Similar to Adobe Illustrator, but not as powerful
- TinkerCAD : An easy to use, browser-based 3D design and modeling tool. Offers limited ability for designing complex shapes
- OnShape : The first cloud-based system for creating 3D objects and assemblies. Offers easy ways to collaborate with other people on CAD projects; however, it does not support .stl and .obj files that were not created in OnShape
NOTE: You can also trace a file in VCarve (.bmp, .jpg or .jpeg, .gif, .tif or .tiff, .png)
Download: Download a pre-existing 2D or 3D design from websites such as Thingiverse
Setting up a file in VCarve
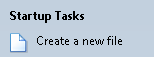
1) Open VCarve
2) Select 'Create New File'
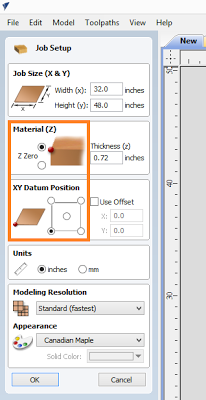
3) Measure length, width, and height of your raw material. Enter these dimensions under 'Job Size'
Recommended: Zero Z to top of the material, set XY datum to bottom-left corner, and check your units!
4) Import file into VCarve
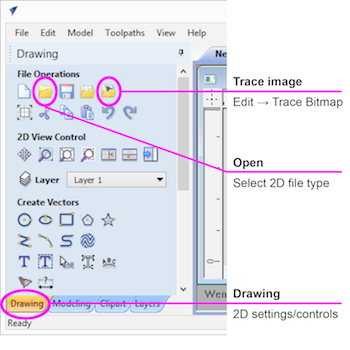
2D file
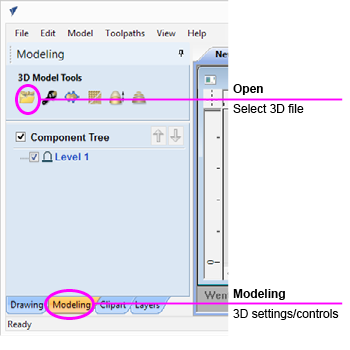
3D file
NOTE: After importing an .STL file, check the object’s dimensions in VCarve because objects tend to be scaled larger than the actual size.
Toolpathing
In order to cut a part, a toolpathing file must be created. The toolpathing file is the path that the bit follows to produce the desired work piece.
1) In the top menu bar, select “Toolpaths” –> “Show Toolpaths Tab”
2) Select the kind of toolpath you would like to make first:
Most common types of toolpaths:
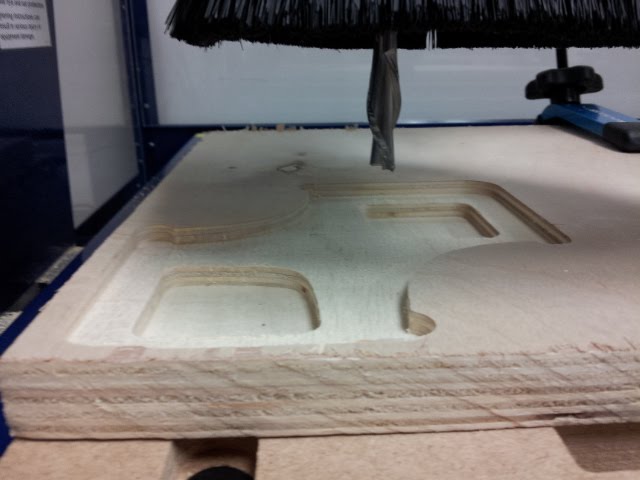
Profile cut: Cuts along a specified boundary, great for cutting a smaller piece out of a larger piece
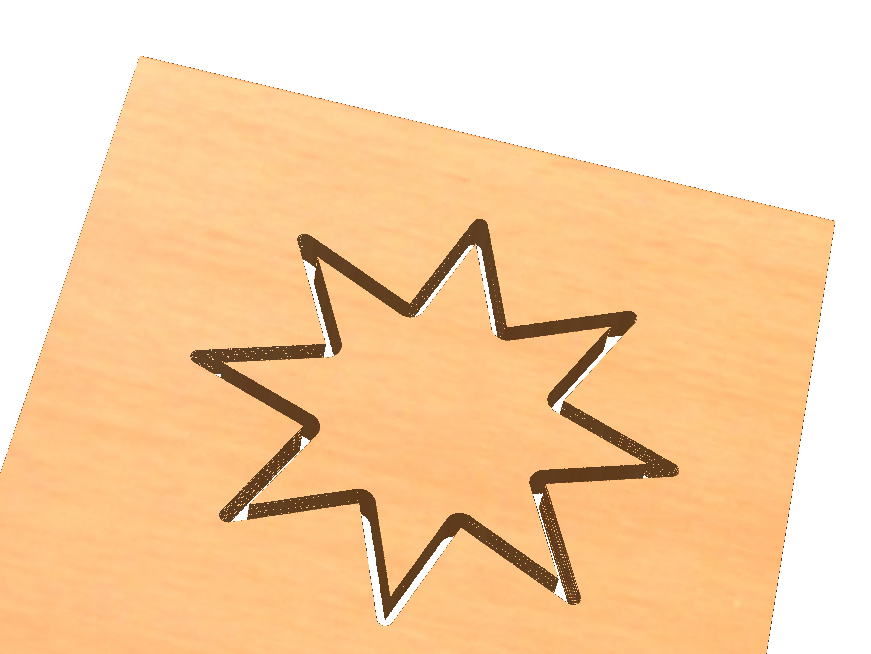
Profile cut
Pocket cut: Cuts out all material within a specified boundary, good for shelling out material
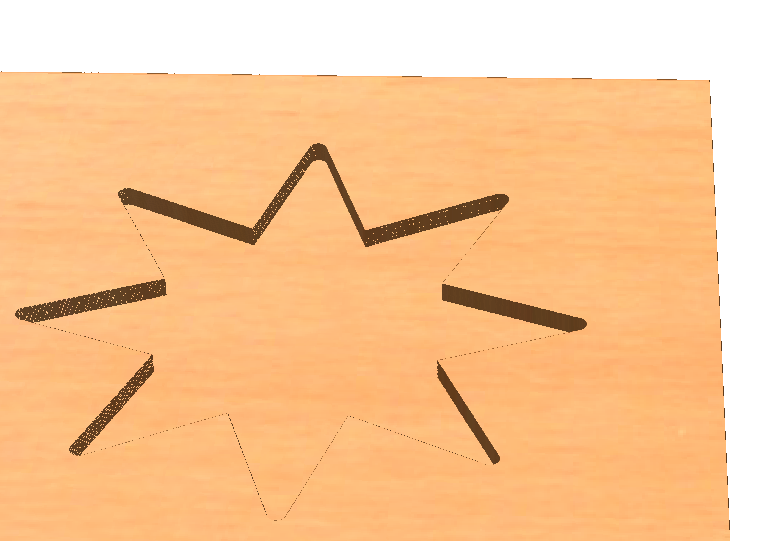
Pocket cut
3D Roughing cut: Often the first toolpath, can be used to take out the majority of material and leave a rough shape of the final product. This decreases cutting time and prevents wear on bits.
3D Roughing cut
3D Finishing cut: After a roughing cut has been made, a finishing cut can be used to go back over the material, clean up the surfaces, and add fine details.
3D Finishing cut
3) Select the proper bit
Recommended bit settings
The Bray Lab team has pre-loaded settings for common materials.
If you would like to cut a material which which we do not have settings for, please contact a Maker Studio Manager.
4) Export toolpathing
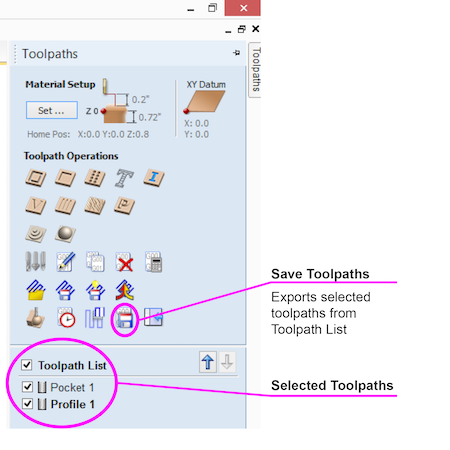
NOTE: You can change the order of your toolpaths by simply dragging them in the “Toolpath List”
Machine setup
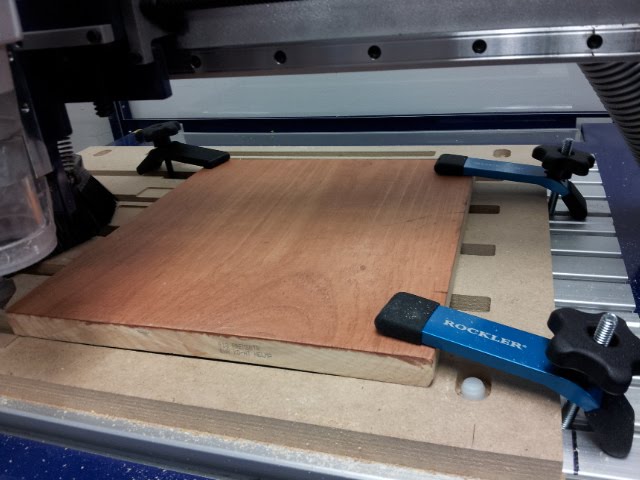
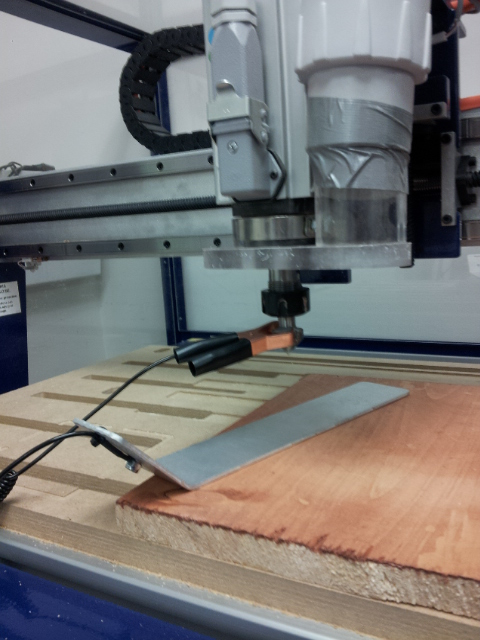
1. Secure your work piece
Use the clamps to secure the work piece. It is recommended to use at least 3 clamps either clamping from the top (shown below) or the side.
- Make sure your clamps will not be in the way of the bit. If it is hard to tell, move your clamp or use a plastic one (the metal clamps will damage the bit).
– Make sure your clamps are not hanging over the edge of the workspace as they will get in the way of the machine.
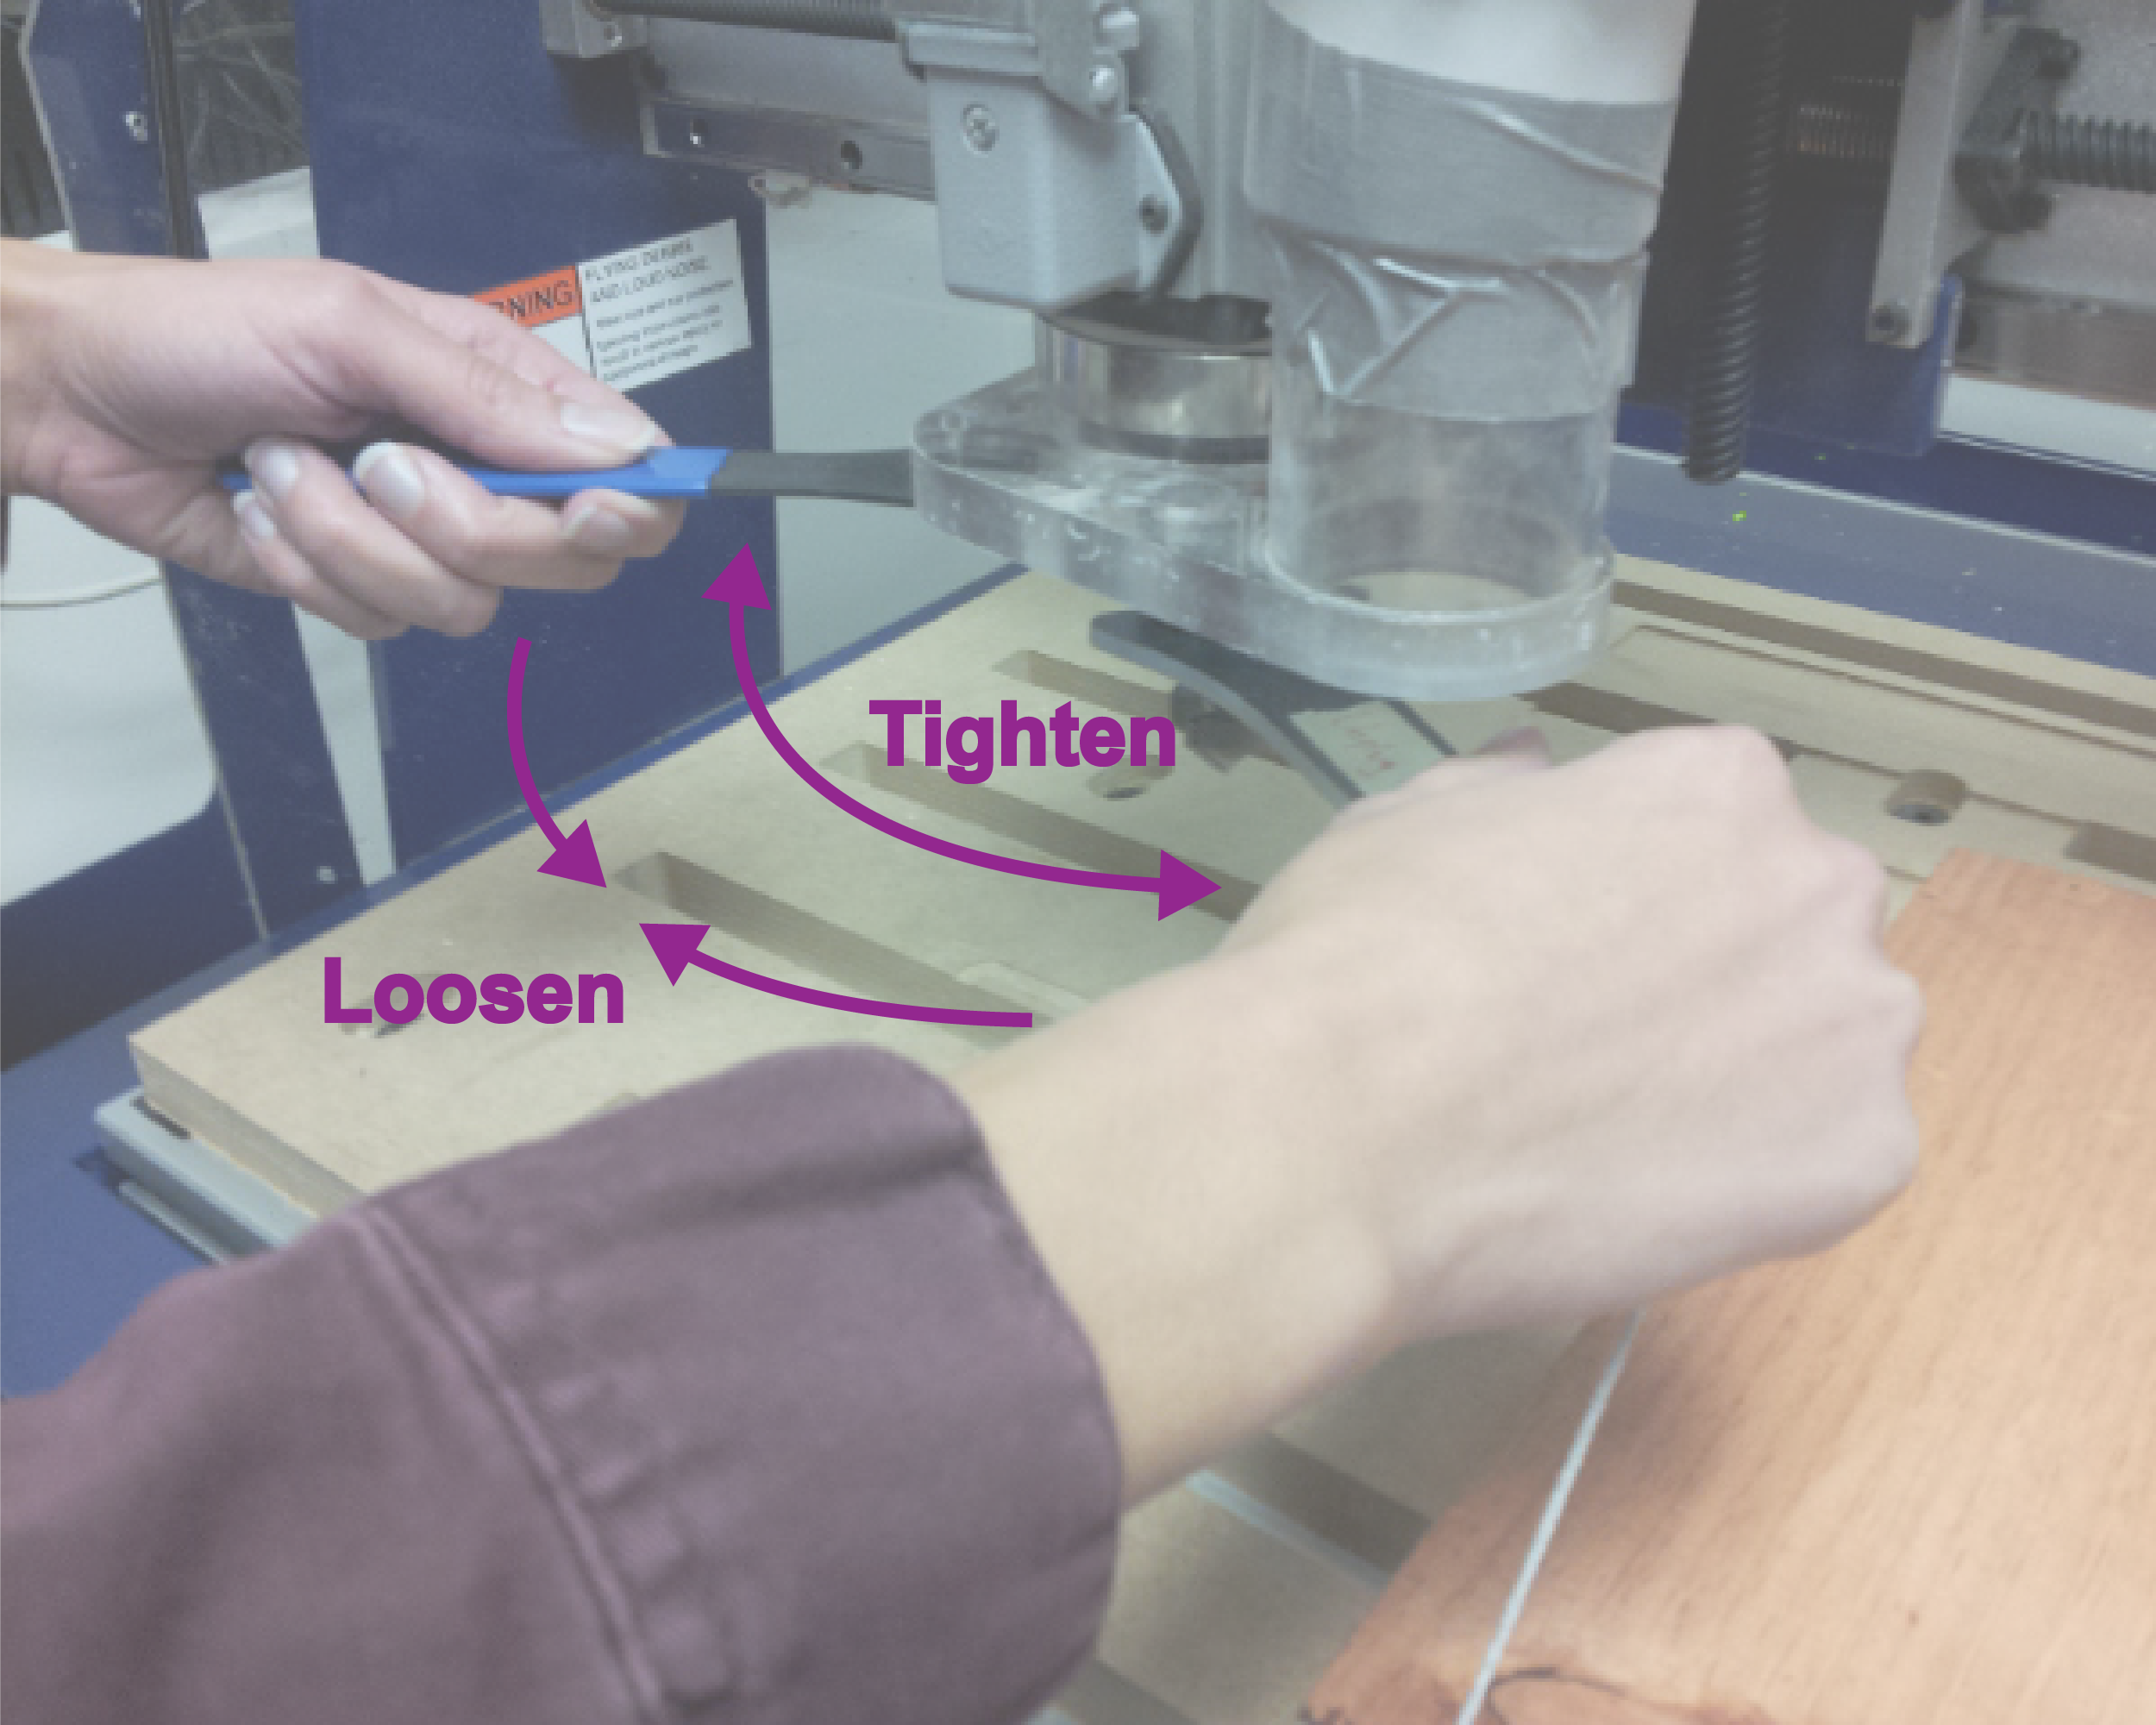
2. Insert the bit
Use the wrenches to remove the bit from the collet. With the blue wrench in your left hand and the silver wrench in your right, move the wrenches toward each other.
NOTE: the bit tends to fall out of the collet, make sure that it does not drop into the spoil board slots and hit the metal t-slotted table below. Also, when changing out bits, do not place them on the board as they may roll off and into the ShopBot!
If using a different sized bit than what is already in the machine, you will need to change the collet to match the bit’s diameter.
Push the collet out of holder. This can be done with your fingers or with the assistance of the 3D printedplastic hold down clamps (never use metal).
Press the new collet back in its holder (shown below).
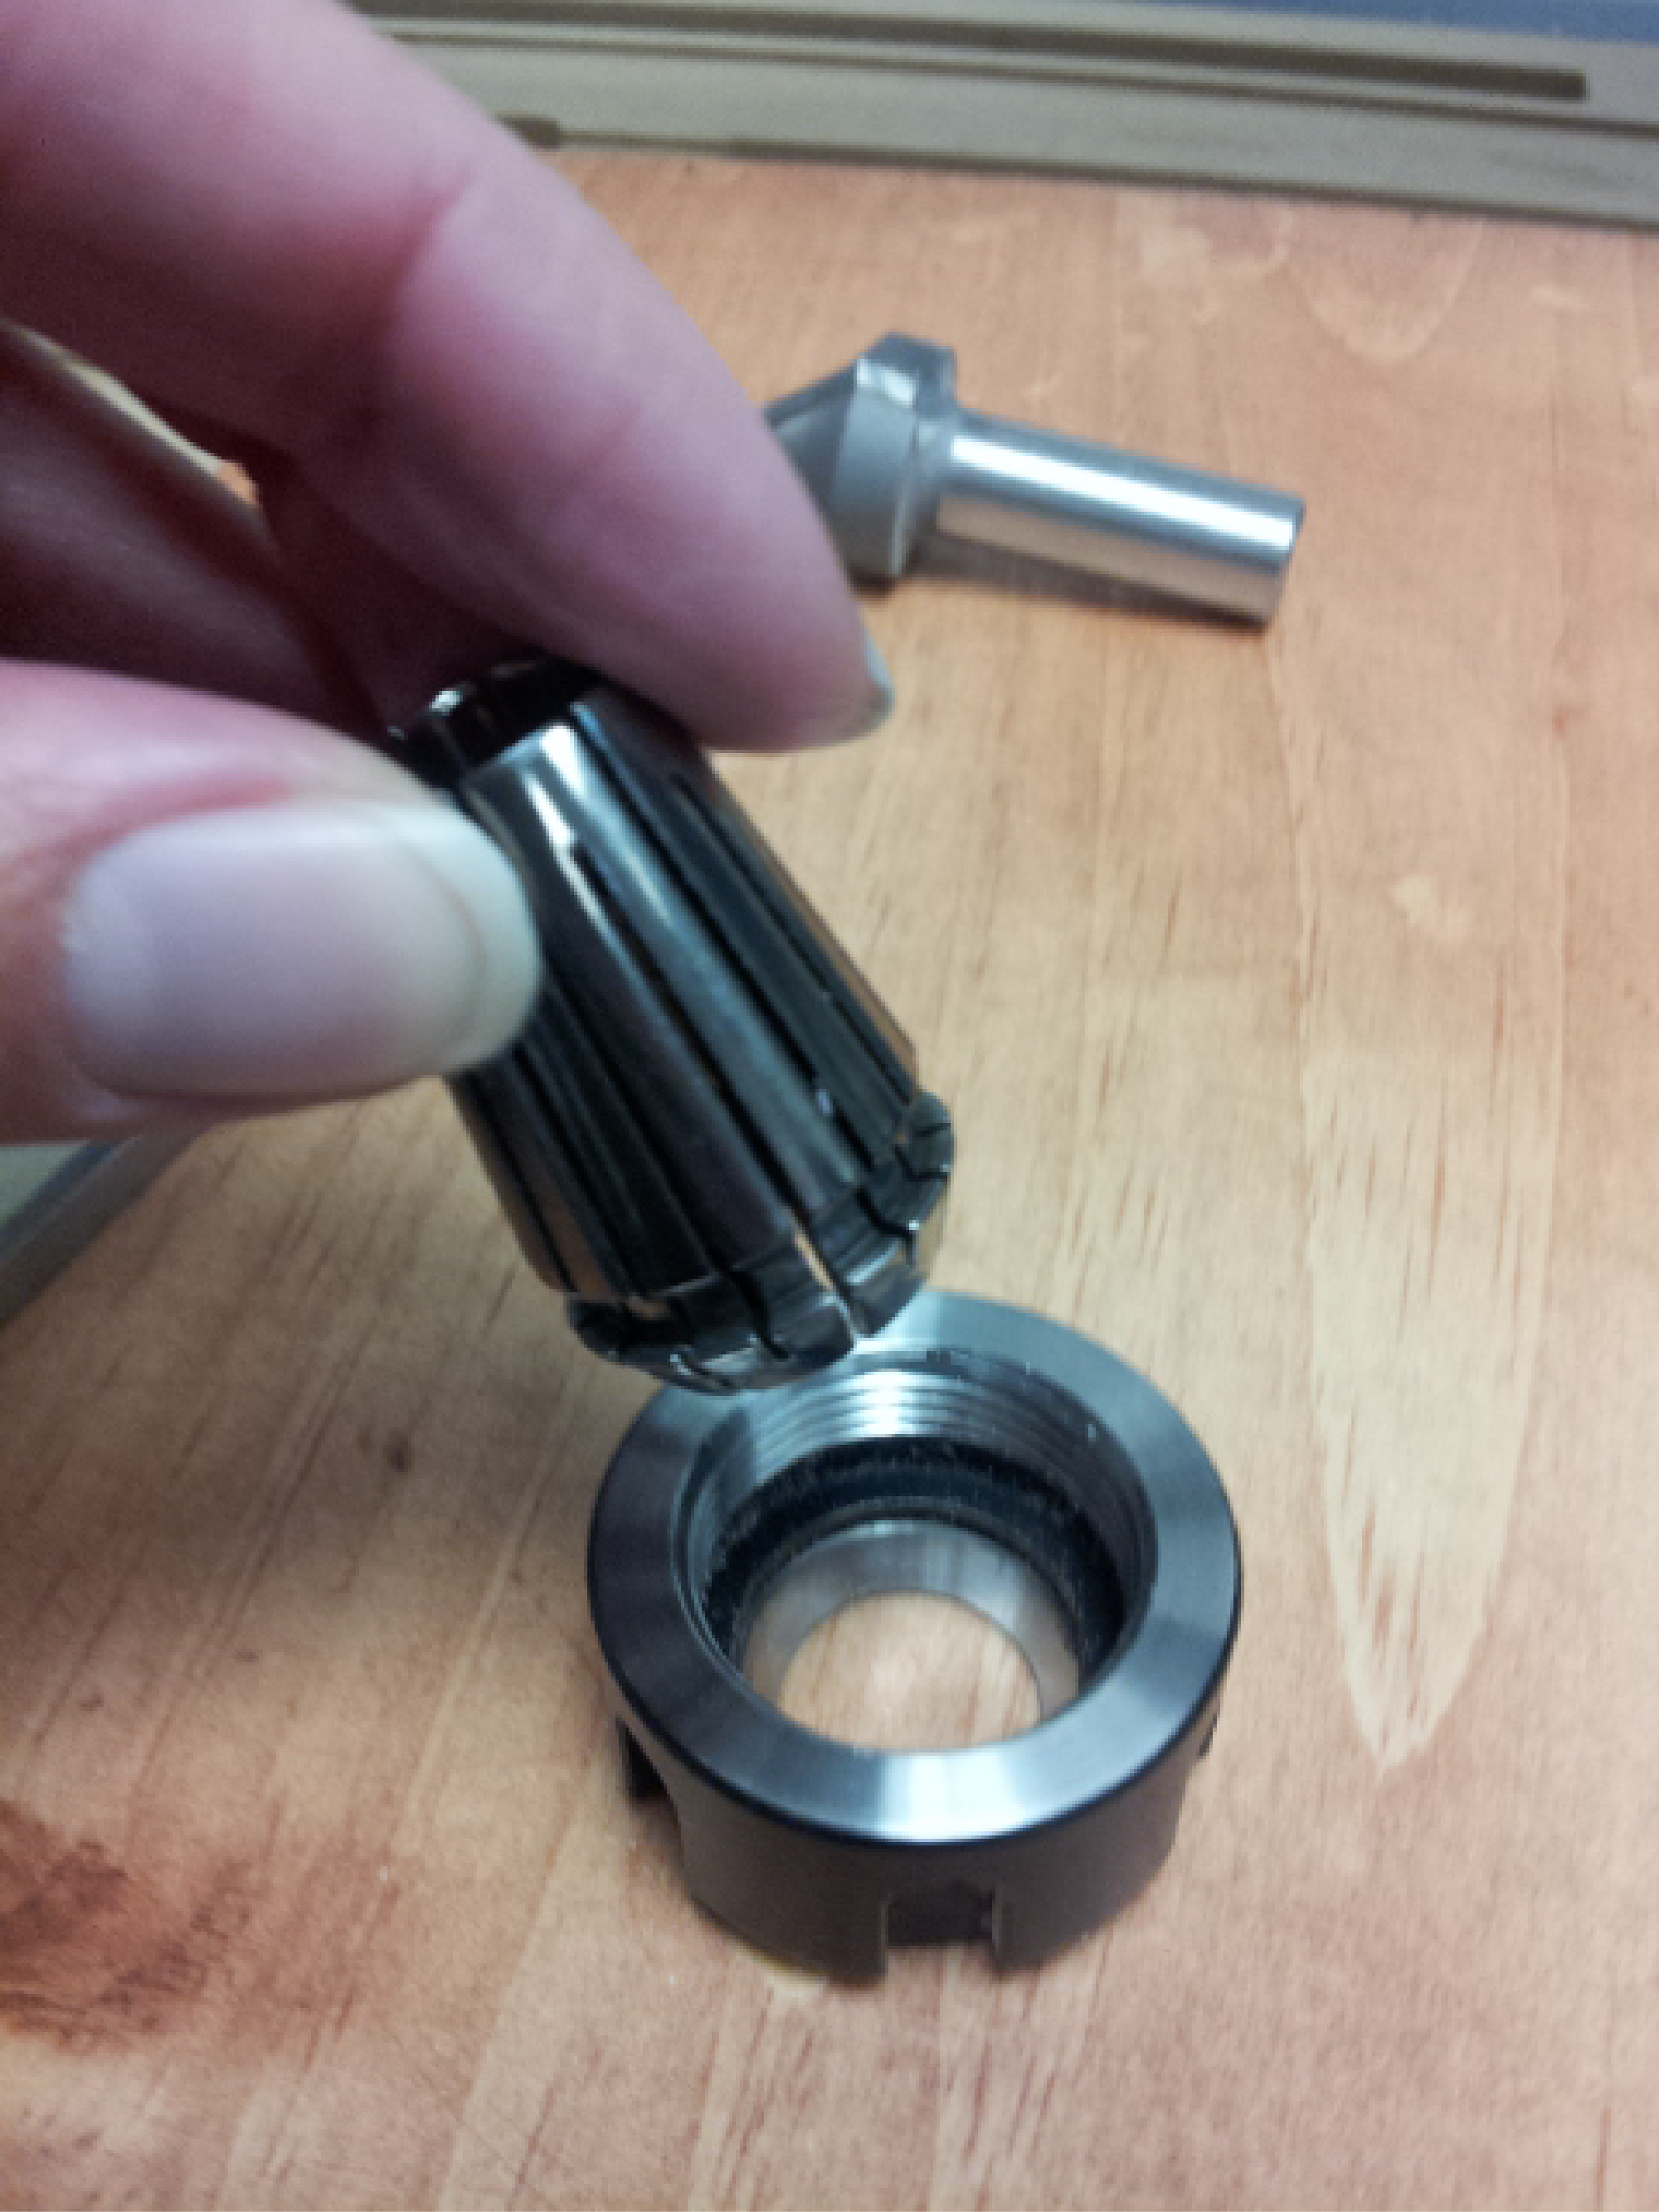
Insert the bit to the line indicated on the bit. Tighten the bit with the wrenches – remember not to over tighten.
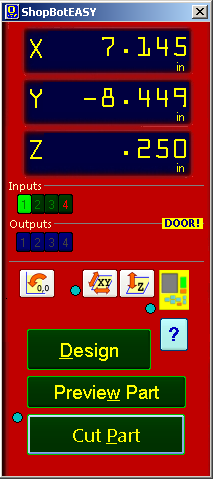
3. Zero X, Y, and Z axes
Zero X and Y:
Select the button that looks like a miniature version of the yellow keypad. Use the keypads arrow buttons to set the bit to match the XY Datum Position that was set in the file’s Job Setup options.
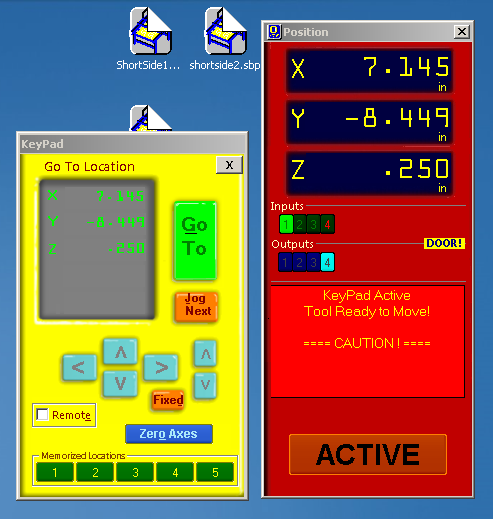
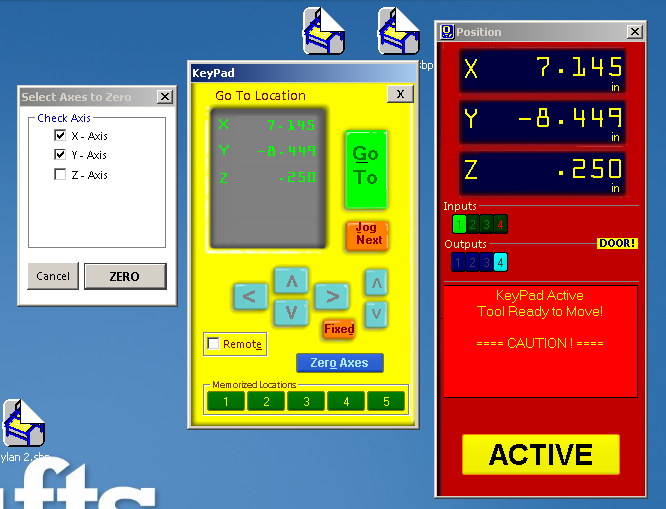
Select the blue ‘Zero Axis’ button and select the X and Y checkboxes.
Zero Z:
After setting up, test the connection, to ensure the grounding clip is making good contact with the bit.
To test the connection: touch the z zero plate to the bit. The Input 1 on the red Position panel should light up green if the connection is good.
Exit the keypad. Select the button marked Z.
4. Warm up the spindle
- Close cover
- Put key into lock and turn 90 degrees (so key is horizontal).
- Switch to Full view/command console and type C5 then enter OR from menu select [C]ut → [5] Spindle Warmup Routine
To switch to full view. Select the ‘?’ light blue Help button (the keypad must be closed)

Select the ‘Switch to FULL’ button
The ShopbotEasy panel will disappear and the below Command Console will appear.

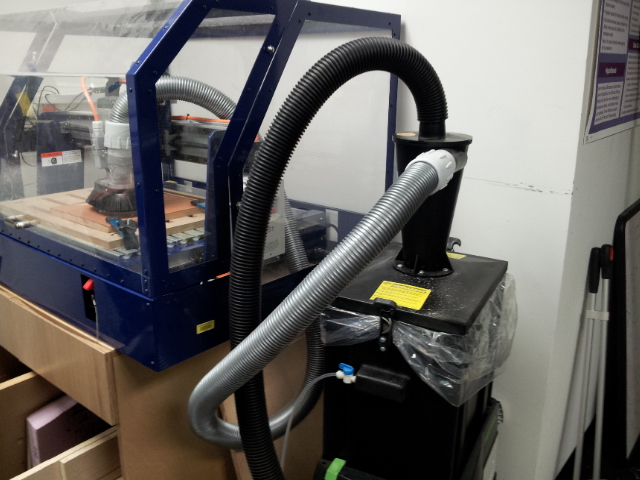
5. Dust collection and running cut
- Check that the silver vacuum hose is connected to shopbot

- Turn on Vacuum
- Select ‘Cut Part’ green button from the Shopbot EASY red panel. It will let you know that the spindle will start running.
- Stand by emergency shut off switch in case there are any issues, for example:
If the machine starts to move but the spindle is not turning, it's likely because the key is not in its proper position.
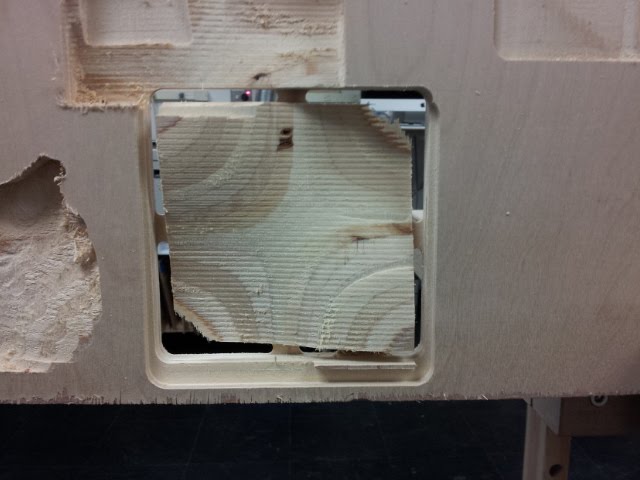
The machine will likely cut into the spoil board. Shallow cuts into the spoil board are fine, but this can be an indication that the zero on your file was not set to the top of the material.
PLEASE WATCH THE MACHINE UNTIL IT IS FINISHED CUTTING to ensure the safety of the machine and to prevent damage to your material.