3D Printing
How 3D printers work
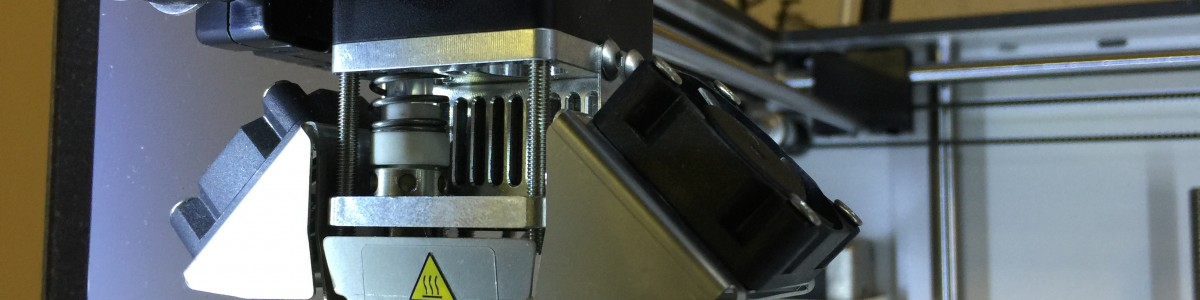
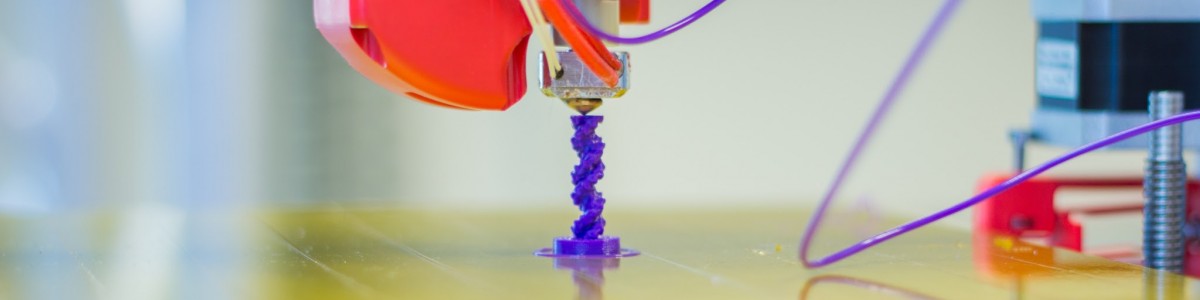
3D printers are like really fancy glue guns; they extrude molten plastic filament from their nozzle into exactly the right place, and then rapidly cool it down into a hardened shape. The printer slowly adds layer upon layer of material until the model is complete - bringing your digital representation to life. This process is called "Fused Filament Fabrication" (FFF), and that's pretty much all there is to it.
For more information on other types of 3D printing, check out 3D Printing from Scratch.
A few things to note before getting started:
- 3D printers are really cool, but not everything needs to be 3D printed. A chess set, for example, is only $11 on Amazon. Be creative, and use 3D printing to solve problems or fix things!
- 3D printers take a long time to print - easily 6+ hours for an apple-sized object at medium/high quality. Plan ahead and try to kick off large prints at the end of the day so that they print overnight.
- 3D printers are more finicky than their 2D counterparts, and can be broken more easily. It's important that you learn the basics and common pitfalls of 3D printing via this handbook before you start printing.
How to 3D print
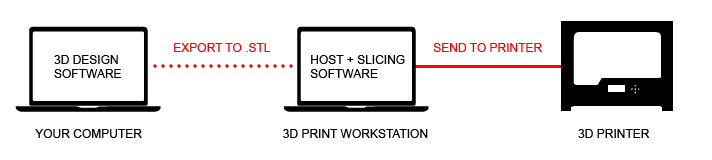
There are 3 steps involved in 3D printing something:
Step 1: Export or find a .STL file
.stl is like the .pdf or .doc of the 3D printing world - it's ubiquitous. Most 3D modeling or CAD programs (SolidWorks, AutoCAD, Inventor, Onshape, Tinkercad) are able to export objects as STL or OBJ files that are ready for printing.
Tinkercad makes 3D modeling pretty darn easy, but a site called Thingiverse also has thousands upon thousands of user-created models you can download as well.
STL files contain surface geometry of a model, which is used by...
Step 2: Import into Slicing/Hosting software
Slicing software is kind of like the "Print Preview" window in 2D printing - they show you what your model will look like when finished, and allow you to make changes to your model (moving, scaling, colors) before printing.
Slicing software converts an STL file into one long layer-by-layer path for the 3D printer to follow. Since every 3D printer is different, manufacturers of 3D printers often either create their own custom slicing programs (like MakerBot Desktop) or contribute machine-specific settings to open-source software like Cura or Slic3r. The combination of machine-specific settings and layer-by-layer instructions results in a G-code file that is then sent to the 3D printer either via USB or an SD card.
Every 3D printer at Tufts is attached to a computer with the recommended slicing/hosting software already installed, so it's not something you need to worry about.
Step 3: Configure print settings
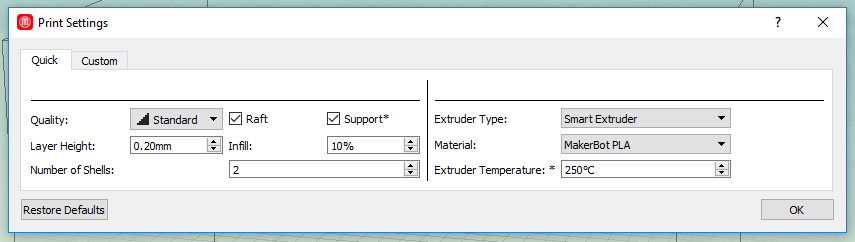
There are a few settings you should think about before kicking off a print:
Print quality

3D printing programs typically offer at least 3 levels of print quality: low, medium, or high. If you're making rough prototypes and need an object quickly, low is your best bet. If you've refined your model and want it looking the best it can be, high would be your choice.
By default, 3D printed objects are mostly hollow with hexagonal structure inside - kind of like a stiff cardboard box. The "Infill" setting allows you to change what % of the object is actually made of plastic. 100% infill would give you a dense, solid object.
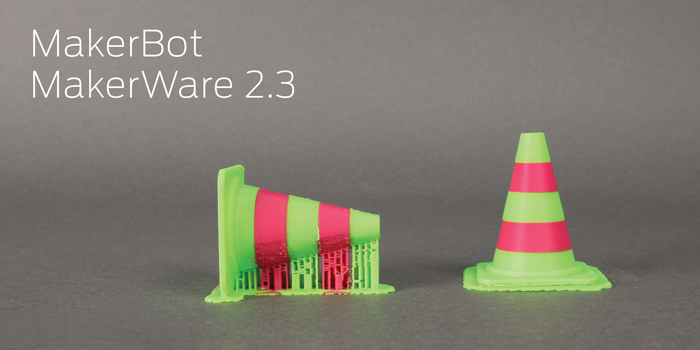
Support structure
As cool as 3D printers may be, they still have to obey the laws of physics just like everybody else: they can't print in thin air!
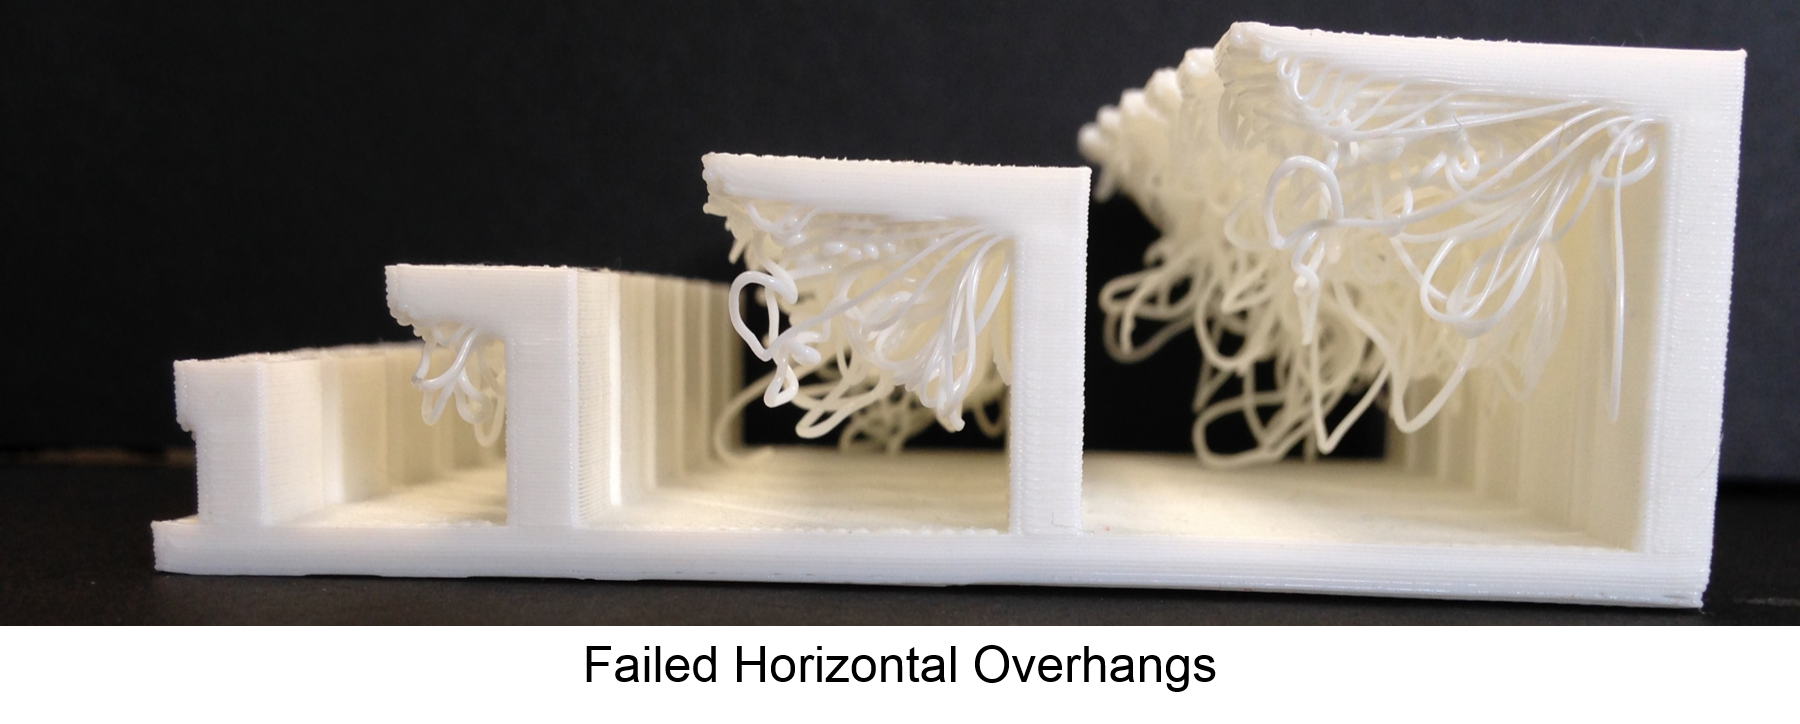
If part of your model has an angle that exceeds ~45 degrees, you'll need to turn on something called "support structure". Support structure is like scaffolding on a building - it's a stable platform from which overhanging parts can be built safely.
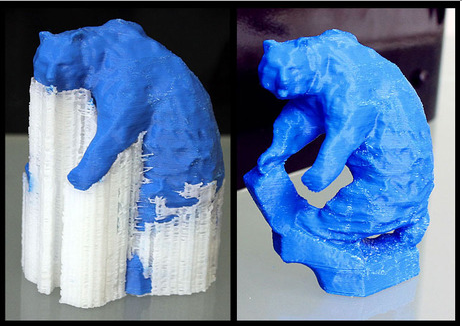
Support structure is created automatically by the software so long as its checkbox is checked. The lattice-like structure is mostly easy to snap off when the print finishes, but sometimes nail clippers or sandpaper is needed to get off remaining bits.
Dual-extruder 3D printers come in handy here, because they can print support structure using a separate, dissolvable filament like HIPS (High Impact Polystyrene) which melts away in citrus-based Limonene solution or PVA (PolyVinyl Alcohol) which dissolves in water. This makes removing support structure a whole lot easier, particularly in hard-to-reach places.

Object orientation
Support structure works pretty decently, but it's easier to avoid using it when possible. Sometimes re-orienting an object on the print bed can avoid the need for support structure entirely, reducing the print time and improving the print's quality.
Rafts
Rafts are a lattice of material that is printed underneath an object. They are usually easy to remove by simply pulling away from an object. However, similar to support material, they can degrade the quality of the print sometimes due to issues removing and require additional time to print. The purpose of the raft is to help the object adhere to the print bed.
Recommended if:
Your object is wide and/or long or your object has difficulty sticking to the platform
For some more information on rafts go here or find a full guide on rafts at Simplify 3D.
Choosing a filament type (ABS vs PLA)
Printing with ABS
Printing with ABS
- Requires
- Heated print bed
- Fully-enclosed printer to keep object warm
- Advantages
- Can be recycled with plastic bottles
- More flexible than PLA
- Easily sanded and machined
- Soluble in acetone / nail polish for a shiny finish
Printing with ABS requires:
- Heated print bed
- Print fully enclosed to keep the print warm
Advantages
- ABS can be recycled with plastic bottles.
- More flexible than PLA
- Easily sanded and machined
- Soluble in Acetone - painting with nail polish can create a a shiny finish
Printing with PLA
PLA requires ventilation for allowing each layer to cool for better adhesion.
Properties
PLA is plant based.
More rigid and better adhesion between layers than ABS
Advanced 3D Printing Techniques
Dual Extrusion printing with MakerBot Desktop
This website provides information on printing with two different filaments.
Properties Different 3D Printing Filaments
Currently the Maker Studio Flashforge 3D printer is set up to print ABS only.
If you would like to 3D print with other materials, please contact one of the co-managers because this requires particular modifications to the 3D Printer and print settings.
Printing molecules from PyMOL
Unfortunately PyMOL isn't able to directly export molecules as 3D-printable STL files, but we can use another program called MeshLab to convert our PDB model instead.
First, download the latest version of MeshLab for your operating system. Mac users should download the .dmg file, and Windows users should download the 64bit.exe. Install MeshLab as you would any other program.
Next, open MeshLab and either click and drag your PDB file into the window or select it using "File" > "Import Mesh...". When MeshLab presents you with some options, change the checkboxes and values to match the below (MeshLab may crash otherwise).
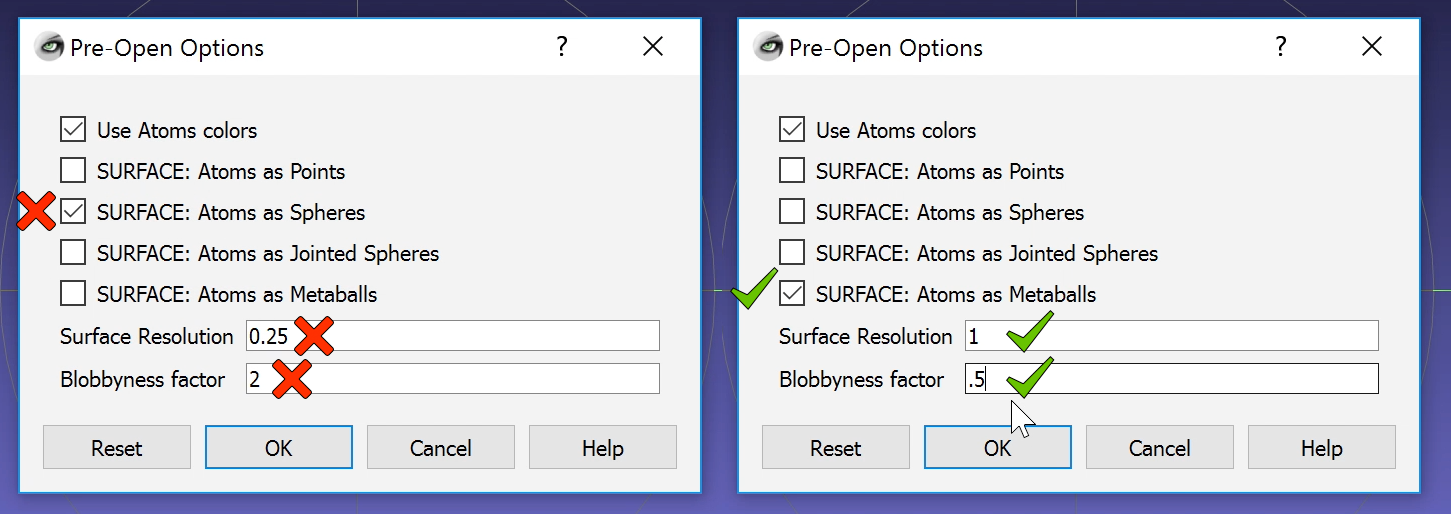
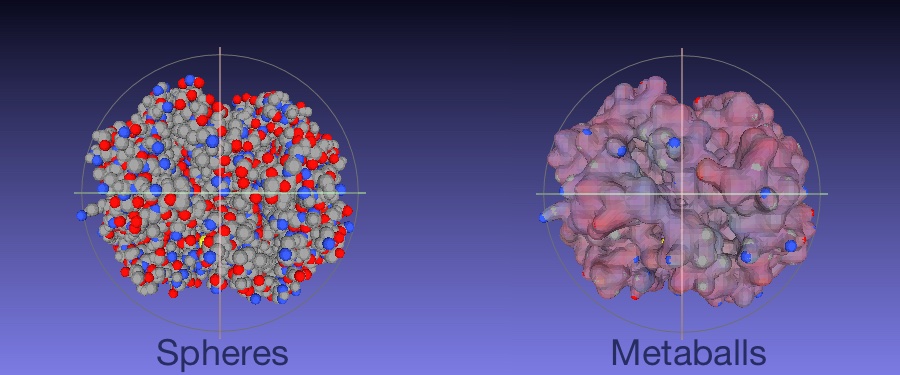
Why are we changing these settings? Because our (current) 3D printers would more than likely botch a model as detailed and precise as what the default options give us (seen below). The metaballs option smooths out the surface of the model, and tweaking the blobbyness value gives us a shape that's possible to print with less likelihood for failure.
If your model is more ribbon-like or has a lot of overhanging parts, keep in mind that 3D printers have to obey the laws of physics (as described above), which means it'll have to print support structure underneath any overhanging parts that you'll need to remove with tweezers or nail clippers after the print finishes.
Once the model is in MeshLab, go to "File" > "Export Mesh As..." and select "STL" from the filetype selection box. Then click "Save".

The STL file you have is now ready to print! Bring it to one of our 3D printing stations and import it into our 3D printing software (MakerBot Desktop if you're going to the Maker Studio), and be sure to select the option for "Support Structure" before printing.
A 2 inch hemoglobin model (2x1.5x1.5 inches) will take about 4 hours to print using the FlashForge Creator Pro. A 3 inch model will take about 8 hours.