FlashForge Creator Pro
If you haven't already, please read the 3D Printing Handbook to learn the basics of 3D printing before using this machine. Also check out the CAD Handbook if you'd like to create your own 3D models from scratch.
The FlashForge Creator Pro is a dual extrusion printer, meaning it can print using two different filaments at the same time. It can print objects up to 225mm (8.8in) x 150 mm (5.9in) x 145mm (5.7in) using either PLA or ABS.
Materials
| Bray Lab | Left Extruder | Right Extruder |
|---|---|---|
| FlashForge 1 | Clear PET-G (high strength plastic) | Blue PLA |
| FlashForge 2 | Black TPU (rubber-like plastic) | White PLA |

Setup
The FlashForce Creator Pro uses the MakerBot Desktop program to prepare files for printing. The computers in Tufts' makerspaces already have it installed, so just bring your .stl or .obj file with you on a USB key. If you're using your own computer, be sure to select the Replicator (Dual) under Devices > Select Type of Device > Replicator (Dual).
1) Import and adjust your model
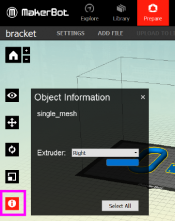
Choose an extruder
Add a file by dragging and dropping it onto the virtual print bed, or by using the "Add File" button.
Click on your object and use the move, rotate, and scale tools (near the bottom-left) to manipulate your model's position within the printable region. Use the info tool (the little "i") to change which extruder the model will print from.
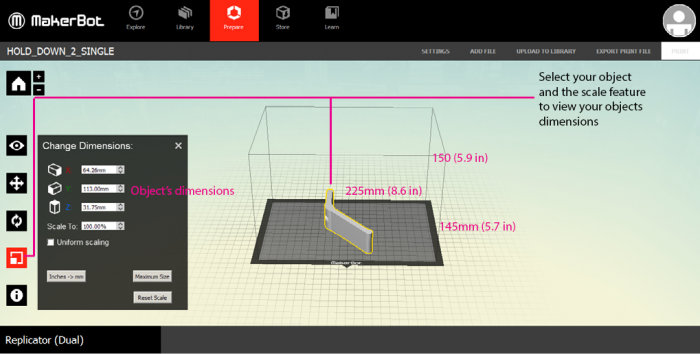
Move, scale, and rotate your model
2) Adjust print settings
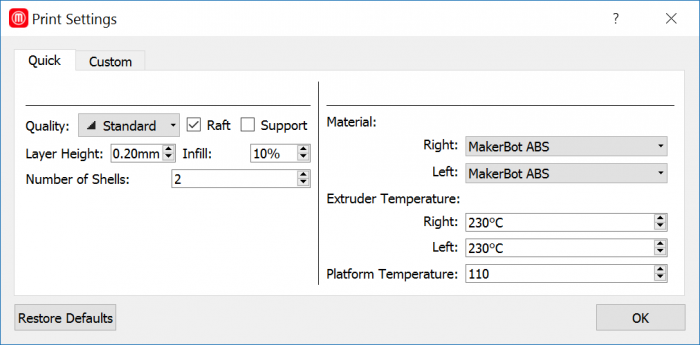
Click "SETTINGS" in the top bar to bring up the settings window. There's a lot to explore in here - most of which is covered in the 3D printing handbook - but here are a few key ones.
Material
If you're printing with ABS (which is oil-based), make sure you close the lid on the MakerBot to keep the air inside warmer. PLA is generally the less-smelly and easier option. Read the 3D printing handbook to learn more about the differences.
Quality
Low quality will print much faster, but be more frail and less dense. High quality will be very carefully-printed, but will use more material and take a lot of time. Standard is a good compromise.
Raft
Creates a base for your object to be printed on. If your print has a lot of contact area with the surface, a raft is a good idea to make sure your object doesn't curl up or get warped by the plate.
Supports
If your object has any part that overhangs significantly you'll need this checked, otherwise some areas will collapse because they're not built on top of anything.
3) Preview and Print
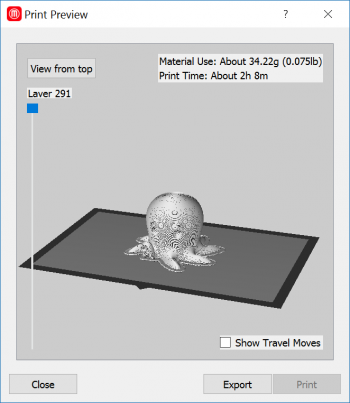
Once your model's position and print settings are all set, click "PREVIEW" near the top-right to receive a time and material estimate for your print.
You should also visually confirm that the software's slicing algorithm processed your object correctly by rotating the preview and dragging the layer slider. If your model looks broken anywhere, try the preview again and/or double-check your 3D model for weird geometry.
If the preview looks correct and you're sure that your print settings are the way you want them, click Print to kick off the print.
If you're printing with PETG filament, spread a thin film of glue on the print bed using an Elmer's Glue Stick
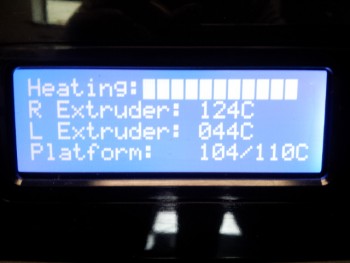
The FlashForge will (slowly) start to warm up and begin printing when ready. You should watch the machine for at least the first 5-10 layers before leaving to ensure that the filament is adhering to the bed and is printing correctly. If it messes up, try again or adjust your print settings.
Safe Operation
- Don't touch or lick the extruder. It gets hot.
- Don't stick your fingers in the printer while it's printing. That's bad form.
Cleanup
After removing your 3D print with metal scraper, throw away all debris and excess material, leaving the print bed and inside of the printer clean for the next person.
